Typeform Ibexa Connect Data Stores
**Scenario: **Store your Typeform responses to Data Stores to keep a record or to transfer data between scenarios
**Level of difficulty: **Easy
Implementation Time: Approximately 15 Minutes
Typeform calls itself the versatile data collection tool for professionals and I can’t agree more. I love Typeform! But you know what makes Typeform better? The fact that you can not only send the data to a third-party service such as a Google Sheet but also store the same on Ibexa Connect Data Stores.
So what exactly is a data store? It is the equivalent of a table in a database and is as easy to set up as a Google Sheet (with more versatility). Read on to see how!
Step 1: Create a new scenario and add the first module
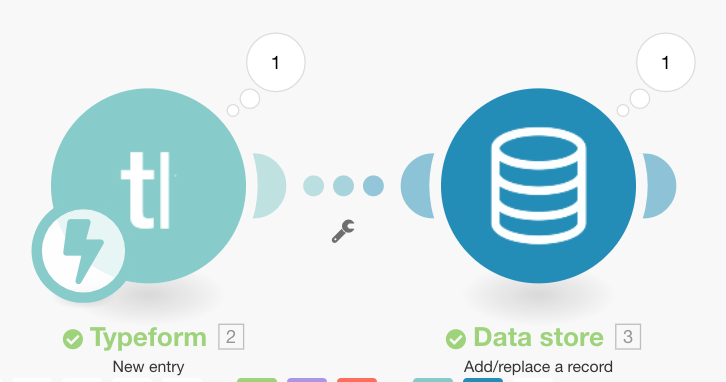
The scenario we will create today contains two modules and it looks like this:
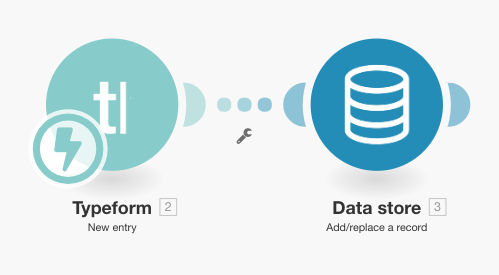
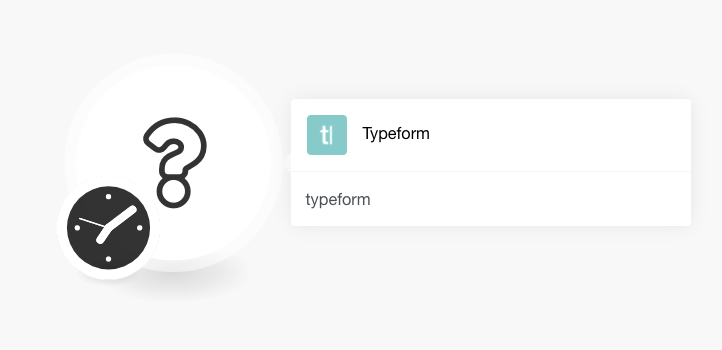
The first is the Typeform module. Click the big question mark and search for the Typeform to see the module.
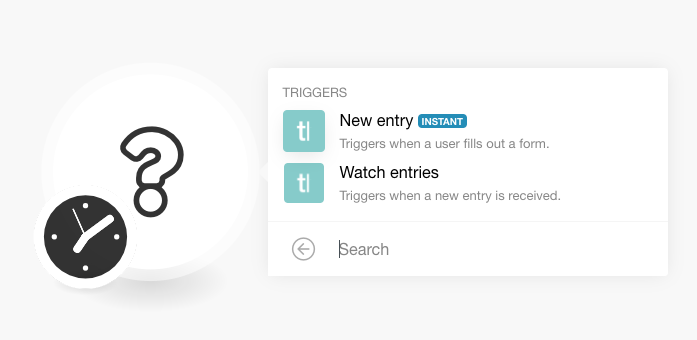
Once selected, you need to select the Trigger, which in this case is New Entry.
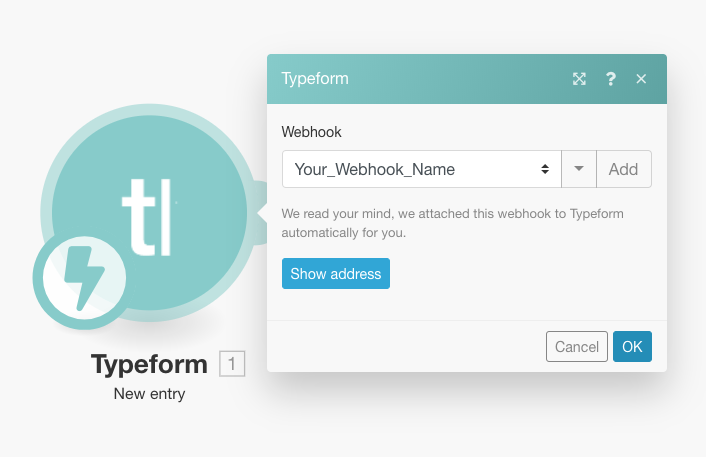
Next, you need to add a new webhook or select an existing one followed by connecting your Typeform account if it isn’t already connected.
Here, we will add a new webhook by clicking the Add button and giving it a name and then connect the Typeform account.
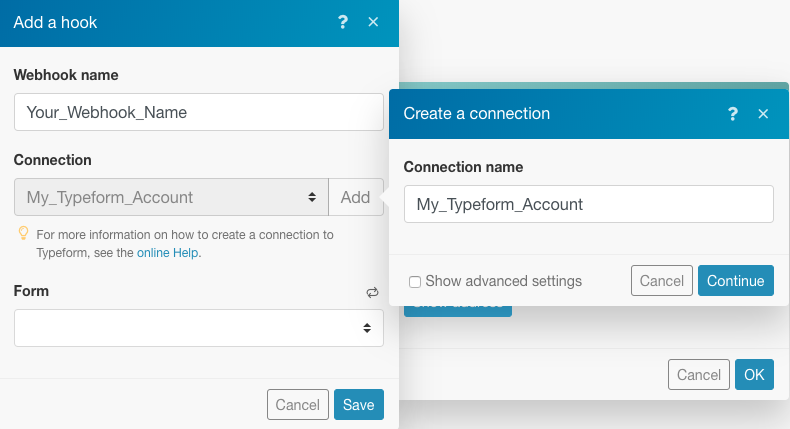
Name your webhook and connection and click Continue. You will need to authenticate Ibexa Connect to access your Typeform account (which is 100% safe).
Once this is done, you will see all the forms associated with your account. Select the form whose responses you would like to store and you will see that the webhook is automatically attached to that form as below:
Step 2: Add the Data Store module
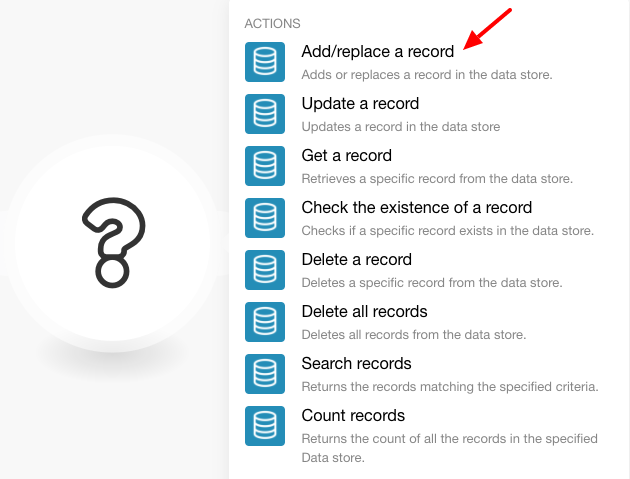
The next step is to add the Data Store module as shown below:
Select the first action that says Add/replace a record:
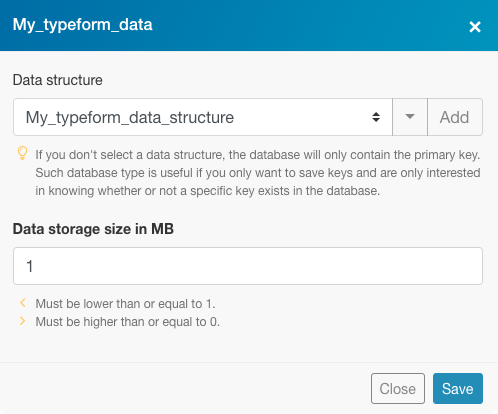
Step 3: Add a new data store
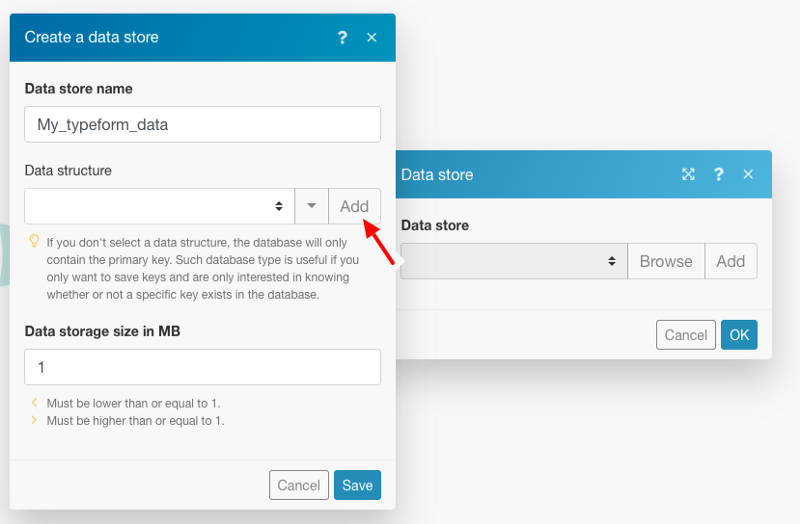
Once added, you need to add a data store or select an existing one. Here, we will create a new data store, give it a name and then go on to create the data structure by clicking Add as shown below:
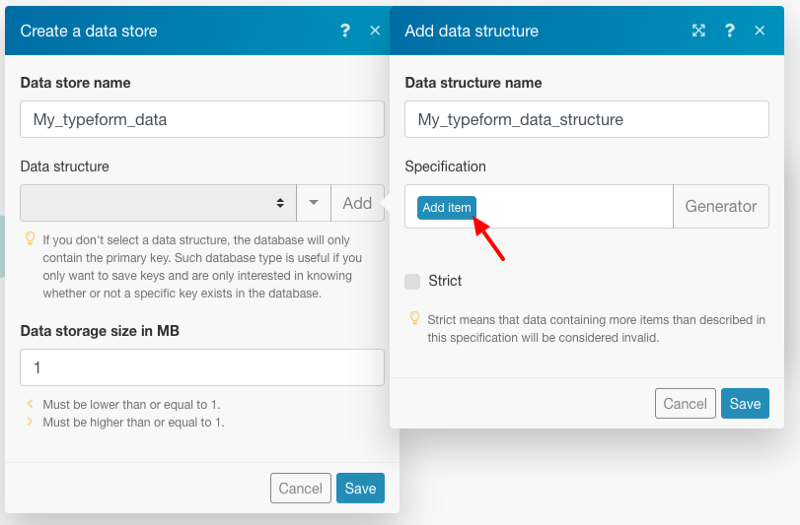
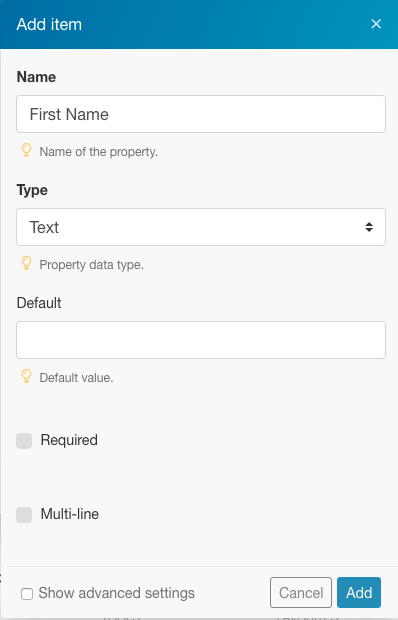
The next step is to add an item to your data structure. An item is the equivalent of a column in a spreadsheet (or a field/attribute in a database) and contains the response to a question (or block) in your Typeform.
Click on add item to proceed:
For each item, you need to specify a name and select a type from the drop-down. We have named this item First_Name and selected text as the type. You will see more options below which are self-explanatory. Click on Add to continue.
Follow the previous step to add all the items corresponding to the questions/blocks in your Typeform. We have added the following items:
-
First Name
-
Last Name
-
Phone
-
Email
-
Opt-In
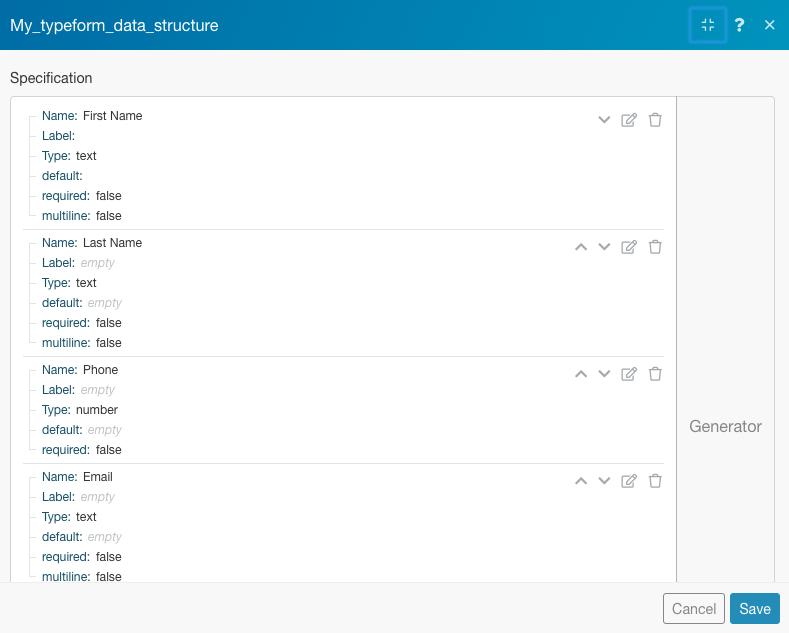
Save the items list followed by Saving the data store.
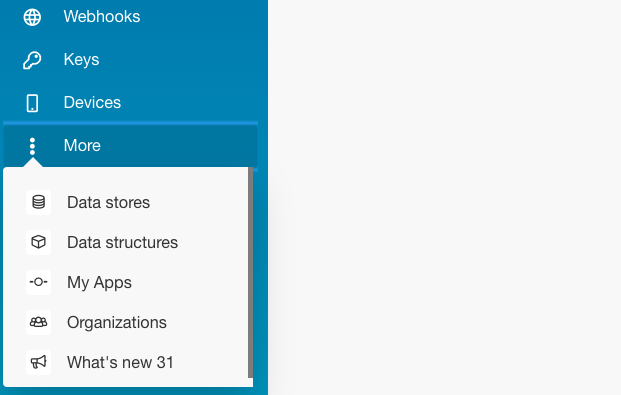
Please note that to edit the data store and modify the items, you will need to navigate to the Data stores under More in the collapsible menu bar on the left.
Step 4: Configure your newly added data store
Once your data store is created, you will see a field named Key which can either be assigned the Typeform Entry ID (as shown below) or left blank. This is useful to retrieve a particular record containing the responses to an entry. If you leave it blank, a key is anyway generated.
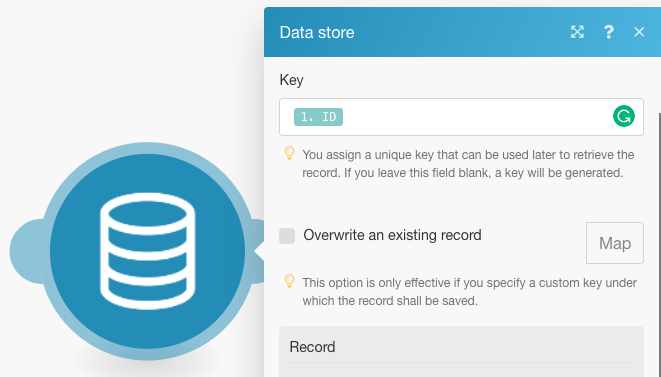
You can also overwrite an existing record by specifying the custom key for that particular record. We don’t need to do this since this is a new record and contains no existing data.
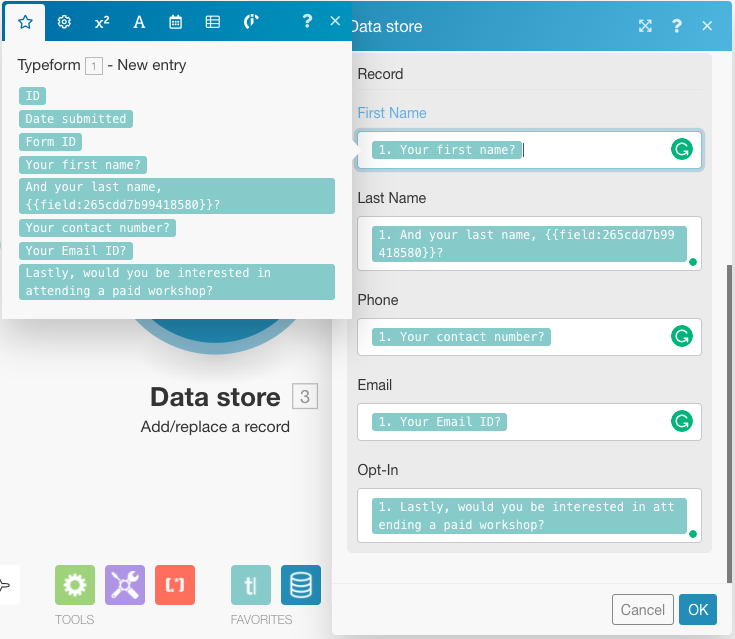
Now scroll down to Record to see the fields corresponding to all the items in your data store. (A row in a data store is known as a record).
Here, click on each field and choose the attribute (from the ones fetched from your Typeform) that you would like to map with the item in your data store.
Now hit OK, run your scenario once, submit your Typeform and see the scenario execute beautifully, and create a new record in your data store!
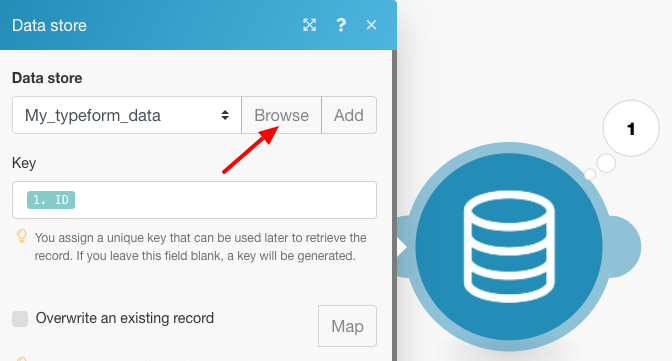
To view the record, you can either navigate to the Data store section in the menu and click on Browse or do so by simply clicking the Data store module right in your scenario as follows:
You record will look like the one below:

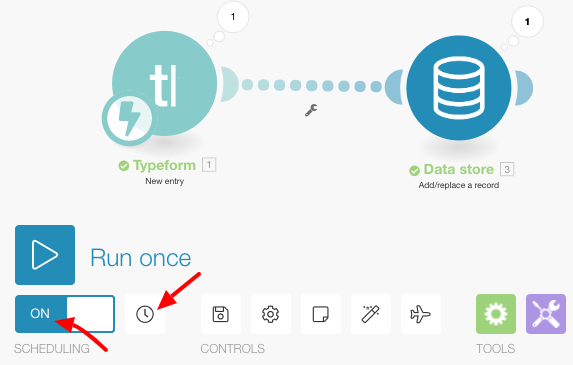
Lastly, just click on the little clock icon to choose the Schedule setting for your scenario, save it, and turn it on by toggling the Scheduling switch as shown below:
That’s it! You can now send the data from your Data store to Google Sheets, a CRM like InfusionSoft, or any other application by adding another module.
Let us know which application you wish to see added as the next module and we will write the next tutorial for just that!
Happy Automating!