How to connect Ibexa Connect to any web service that uses OAuth2 authorization
In this tutorial, you will learn how to integrate the DeviantArt service, one of the largest networks for creative people. Our goal is to get a list of the latest deviations. Before configuring this scenario, you have to find out some basic information about the service.
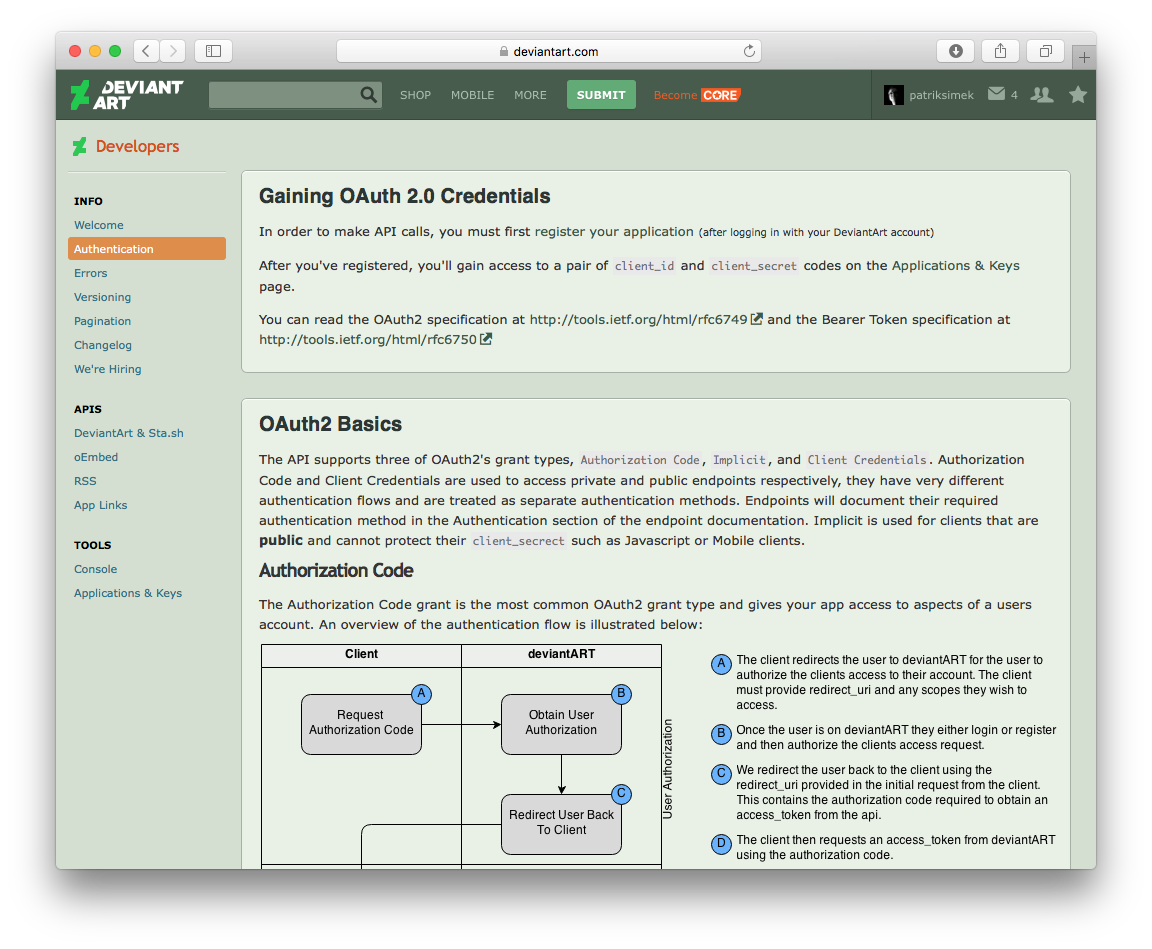
Firstly, go through the Development section and find out what method DeviantArt uses for user authentication, and which API is appropriate to perform the desired function.
Ibexa Connect supports the following authorization types:
-
OAuth2
-
Basic Authorization
-
API key
Getting ready
DeviantArt uses a standardized OAuth2 protocol for authorization. You can see that in the Authentication section.
-
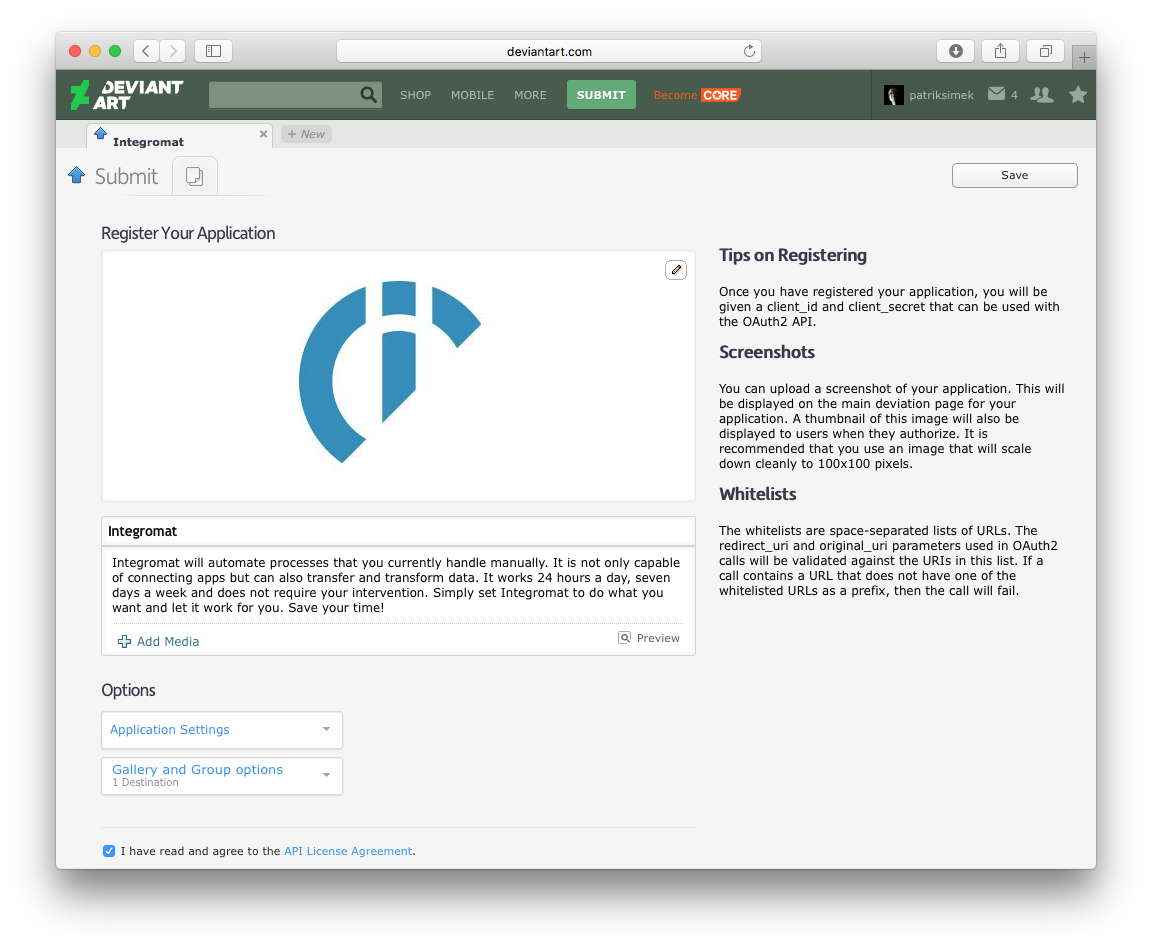
Create a so-called client to be able to communicate with the API. Click Register your application link to create a client.
-
A form opens up that allows you to create a new application. Fill in the name and description of the application and upload the icon.
-
In Application settings section, fill out the OAuth2 Redirect URI Whitelist field. All services that use standard OAuth2 protocol for authorization require this parameter.
The value of this parameter is always the same -
https://www.integromat.com/oauth/cb/oauth2. This is the URL, that a user is redirected to after they authorize Ibexa Connect to access the given service. This way, Ibexa Connect learns that the authorization has been successful, and creates a new connection with the service.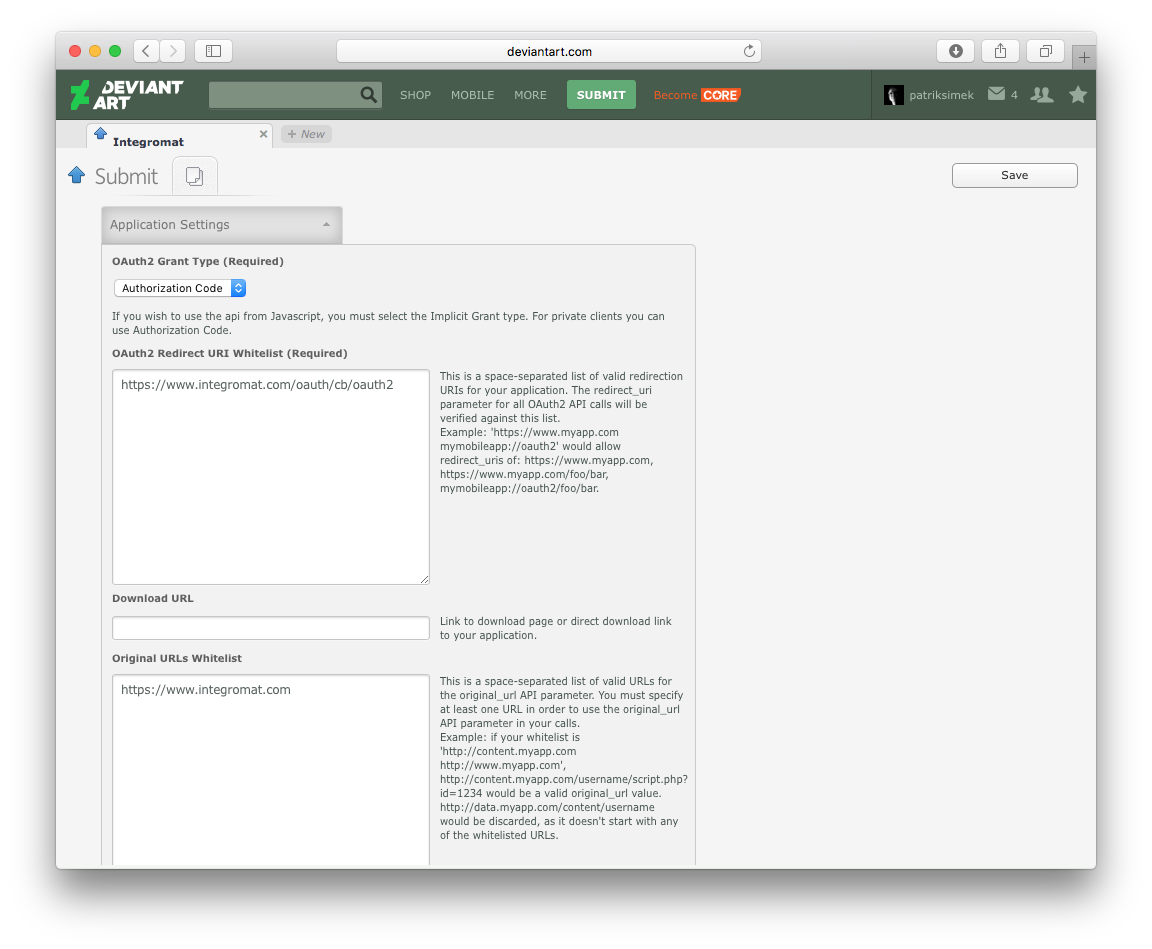
- Once you have completed the registration, a screen opens where you can view two important values - client_id and client_secret. Write down these two values, you need them later on.
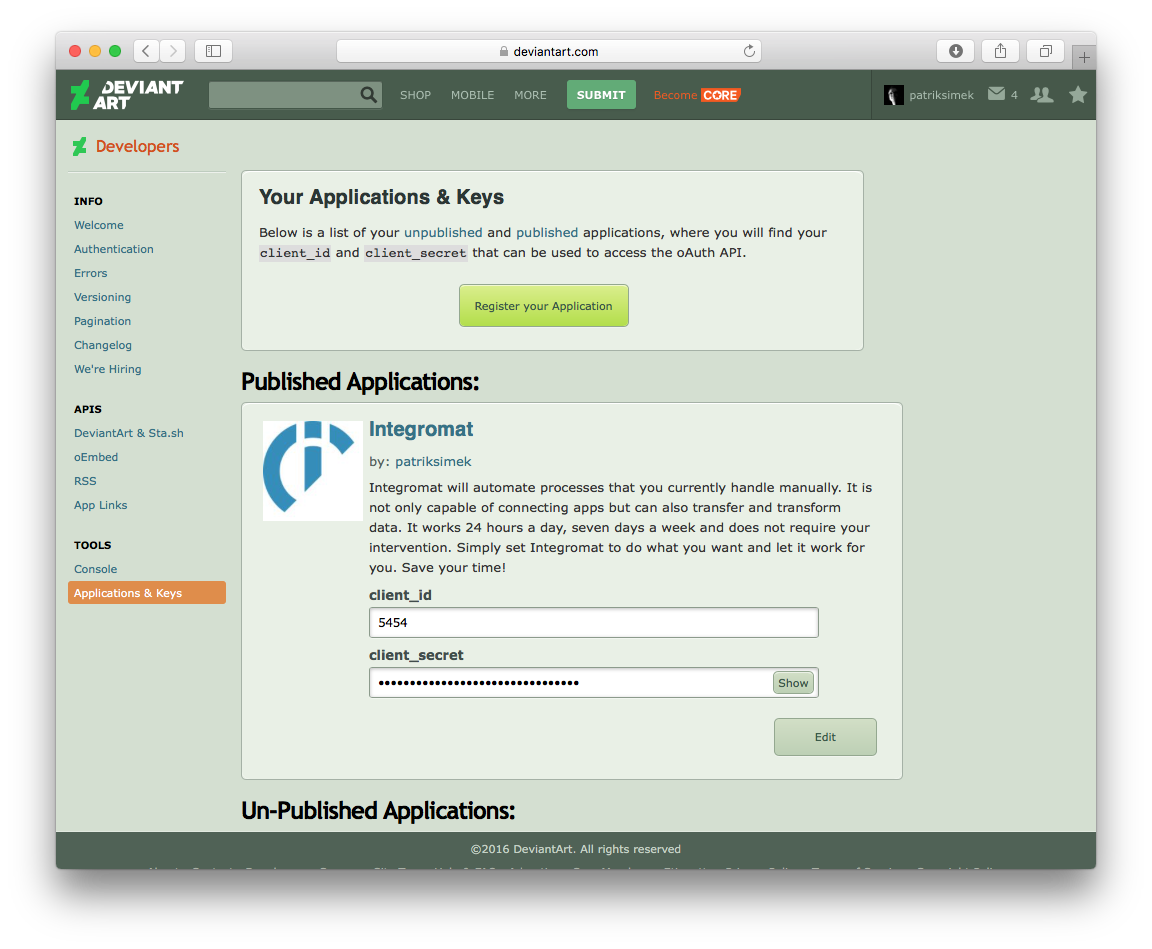
-
Go back to the Authentication section and get authorization URL and access token URL. All services that use standard authorization OAuth2 protocol always include both URL addresses in their documentation.
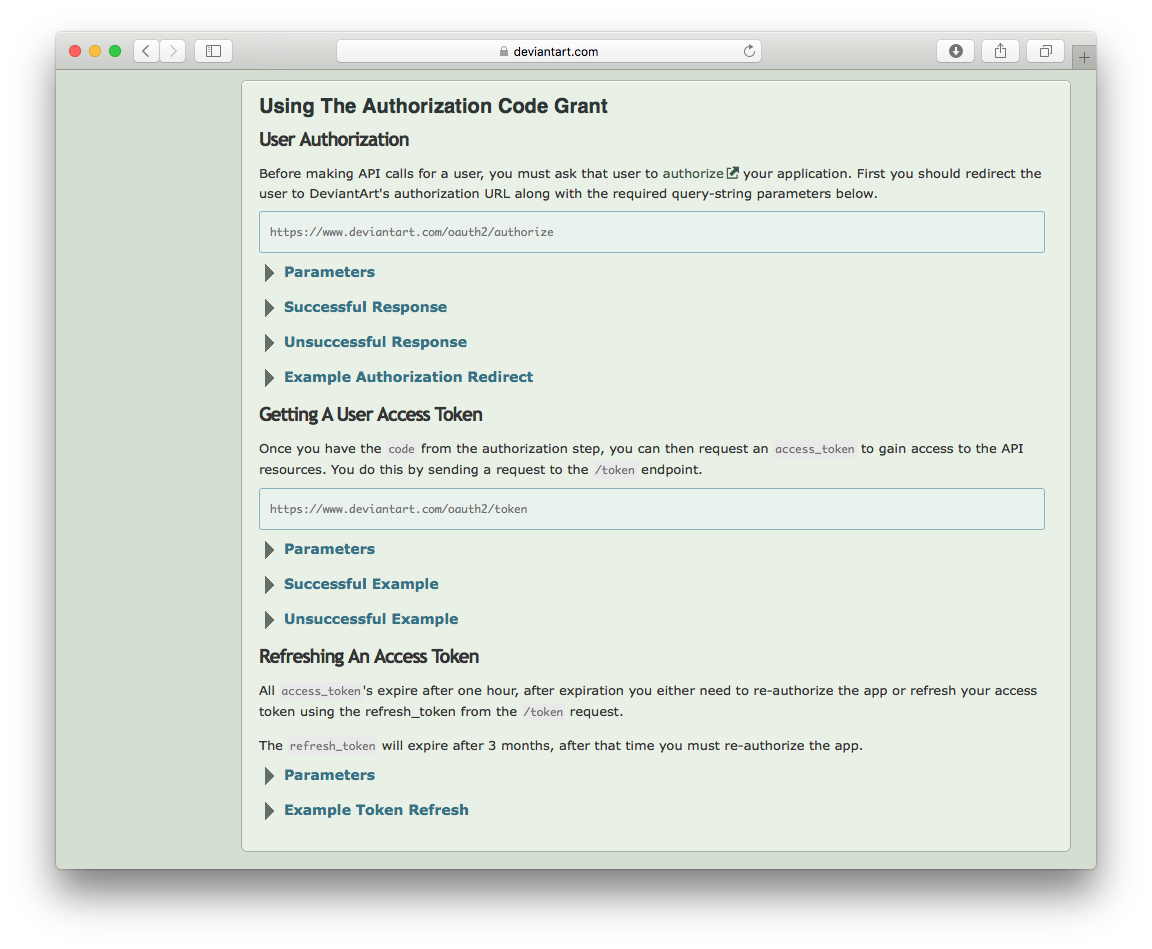
-
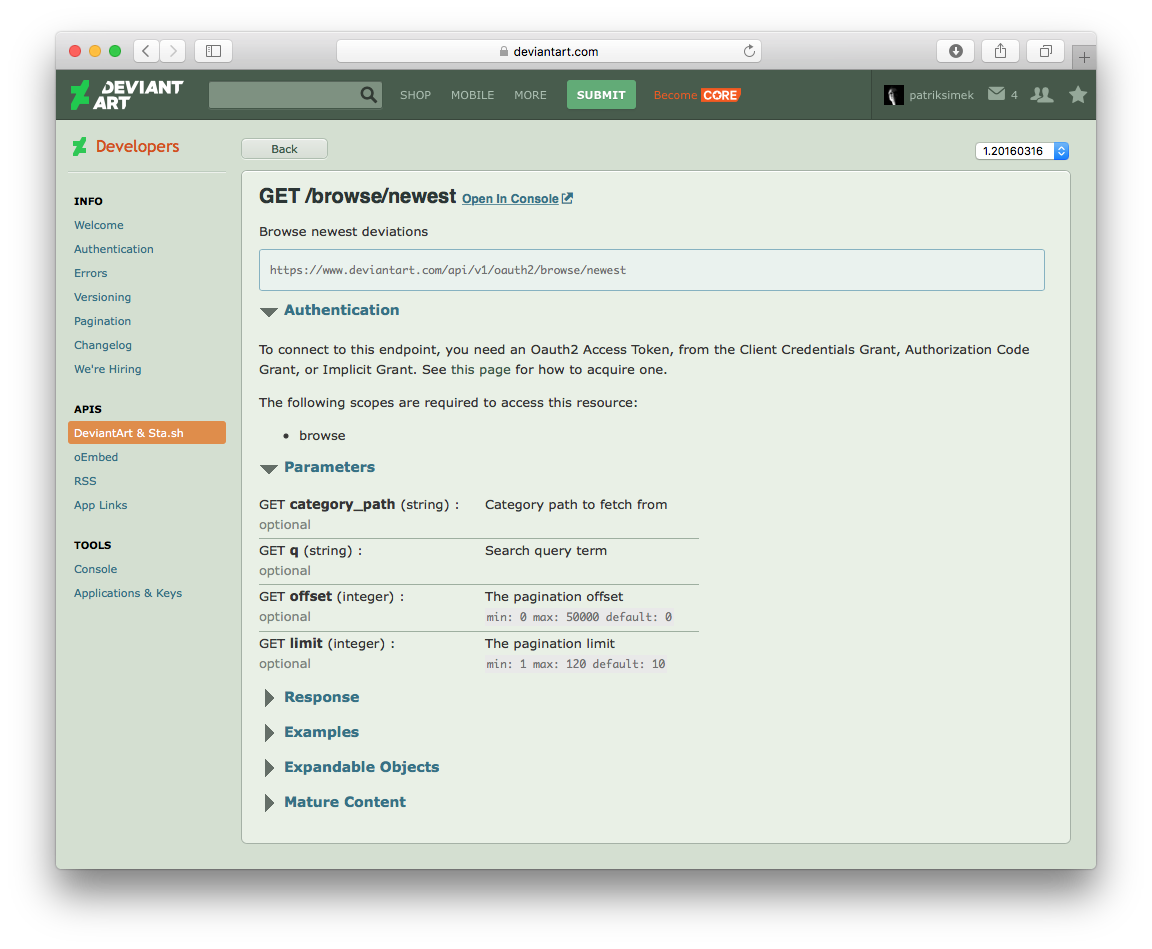
Go to the API section which describes all API calls in detail. The API you need is in GET /browse/newest.
-
Expand the Authentication and Parameters sections to learn which scope is required to call this API and which parameters you can send along with the request.
Creating a scenario
Note
Before you start setting up your scenario in Ibexa Connect, we recommend that you go through all APIs that you plan to call and get a list of all scopes that are needed. This way you can acquire all the necessary scopes at once and avoid the hassle of expanding the scopes in the future.
-
Go to Ibexa Connect and create a new scenario.
-
Choose the OAuth 2.0 HTTP(S) request and response processing module from the HTTP app and add it to your scenario.
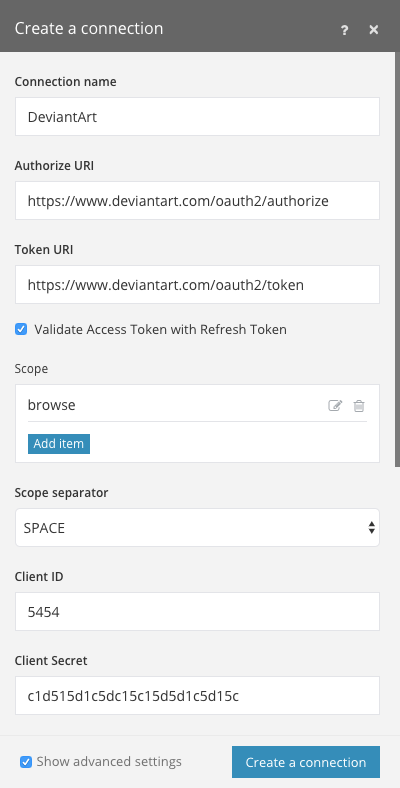
In the open configuration window, click Add. A new window opens that allows you to add a new OAuth2 connection. In this step, enter the information that you have found in the documentation:
-
Connection name - Enter any name you would like to identify as the connection.
-
Authorize URI - The Authorize URL specified in the Authentication section of the DeviantArt documentation.
-
Token URI - The Access Token URL indicated in the Authentication section of the DeviantArt documentation.
-
Scope - Specify the list of access scope that you want to grant to Ibexa Connect and associate with this connection. In our case, it is enough to select the browse value.
-
Client ID - The client ID you got when creating the application.
-
Client secret - The secret key you were given once you had created the application.
-
-
Click Create a connection.
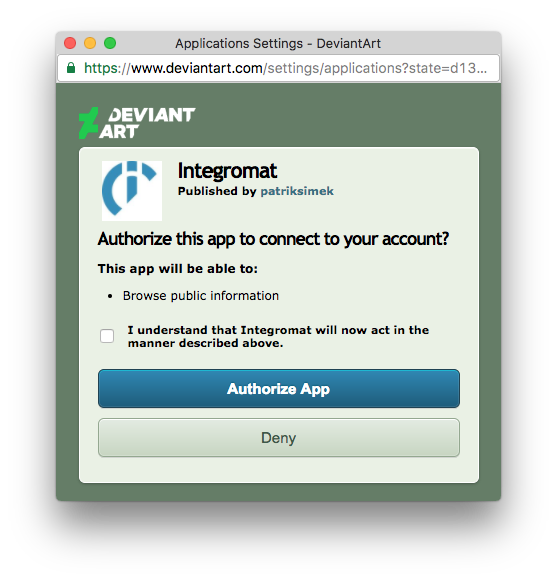
A new window pops up. Click Authorize App to authorize Ibexa Connect to access the given service via the application you have created.
The access tokens exchange in the background automatically. The configuration window automatically populates with the newly created connection.
-
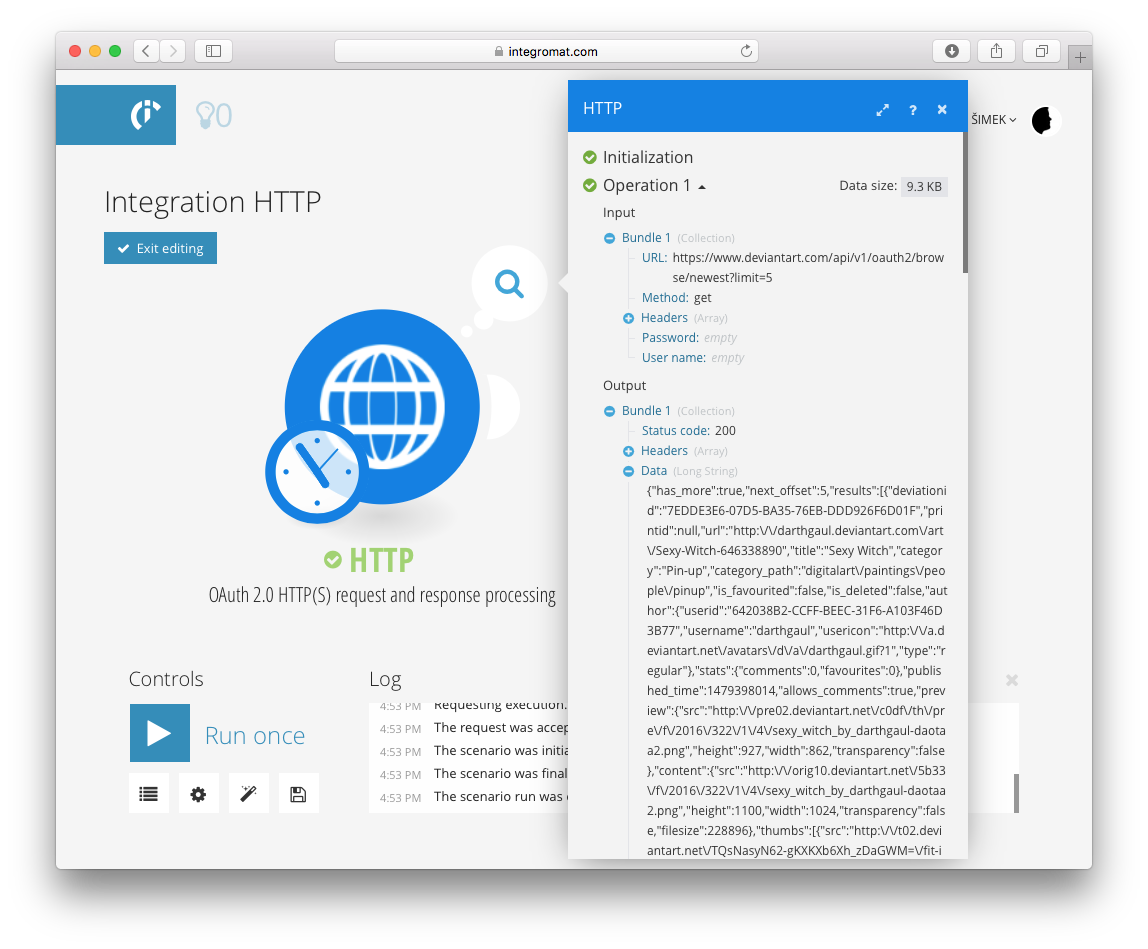
Set up the URL address of the API endpoint according to the specifications given in the API documentation and specify optional parameters (in our case, we will enter
https://www.deviantart.com/api/v1/oauth2/browse/newest).When creating a scenario, we recommend working with a smaller number of bundles.
Testing
-
Run your scenario.
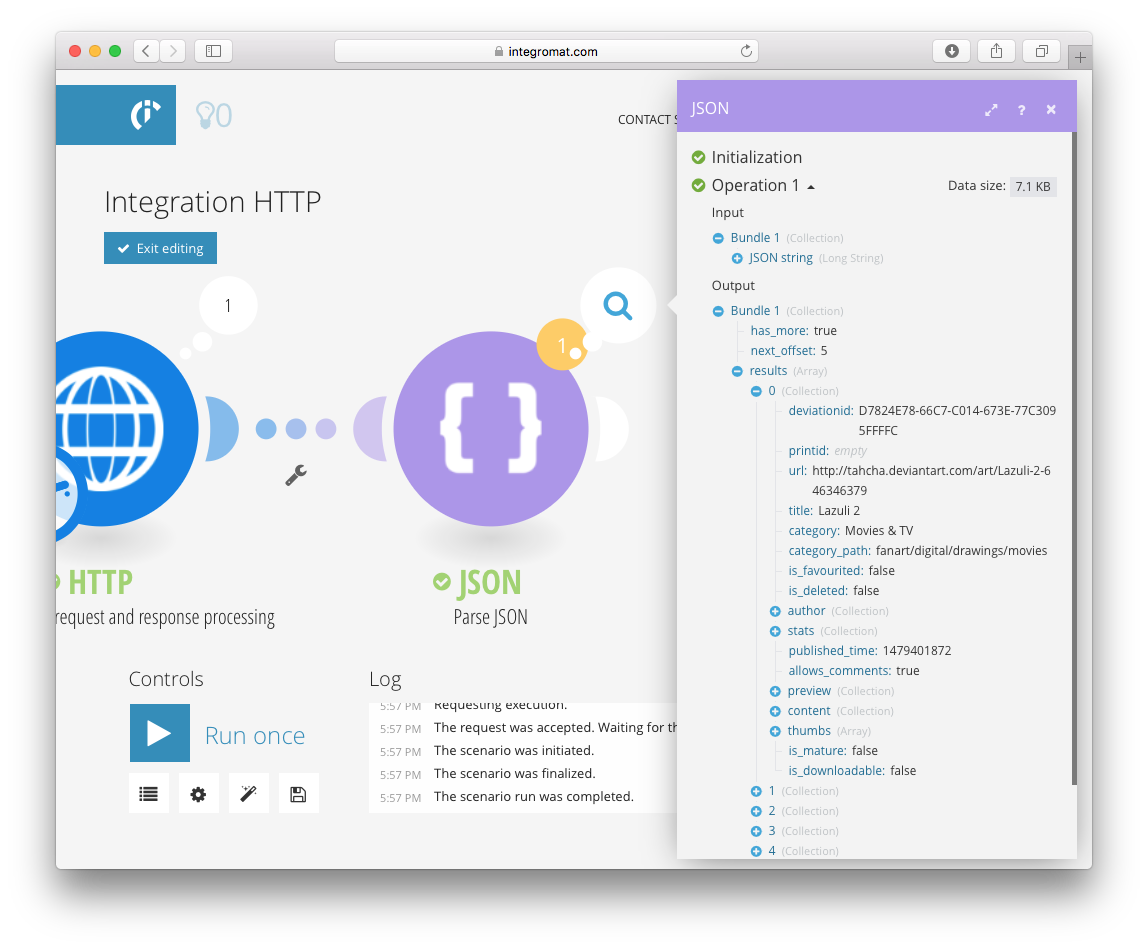
If the execution results show that the call ended with a 200 status, the run completed successfully. The response details contain complete JSON data that is available for further use.
-
Copy the whole JSON response to the system clipboard - you’ll need it in order to generate a data structure.
Thanks to the data structures, Ibexa Connect knows exactly what structure the received data has.
-
Use JSON app > Parse JSON module to parse your data in order to use the data in your scenario.
-
In the settings of Parse JSON module, map the Data variable from the HTTP app to the JSON string field.
-
Next to the Data structure field, click Add. A panel opens. Select Generator.
-
In the data structure generator, choose the JSON value as Content type. In the Sample data field paste the JSON response from the server that you have copied to the system clipboard.
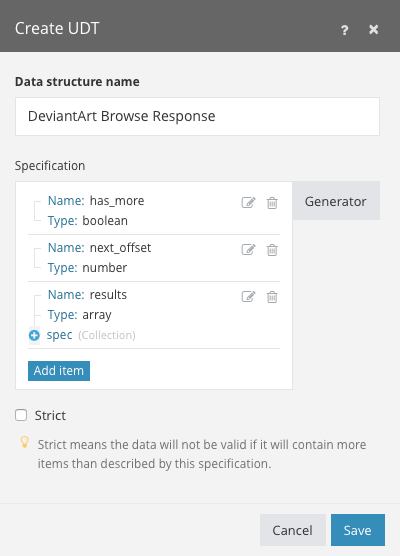
Once you confirm your entries, the data structure generates automatically.
-
Give a name to the Data structure and click Save.
Click Save to confirm the settings.
Run the scenario.
Once the scenario run completes, view details of the JSON module run. If everything has been processed without errors, you will see a list of 5 new DeviantArt deviations. You can then easily browse through the data structure and map obtained values to other modules.