GitHub
The GitHub modules allow you to watch, create, update, list, retrieve, and delete the assignees, labels, comments, issues, milestones, releases, and gist files in your GitHub account.
Getting Started with GitHub
Prerequisites
- A GitHub account
In order to use GitHub with Ibexa Connect, it is necessary to have a GitHub account. If you do not have one, you can create a GitHub account at github.com.
Caution
The module dialog fields that are displayed in bold (in the Ibexa Connect scenario, not in this documentation article) are mandatory!
Connecting GitHub to Ibexa Connect
1. Go to Ibexa Connect and open the GitHub module's Create a connection dialog.
2. Enter a name for the connection and click Continue.
3. Enter your account login credentials and confirm the access by clicking Authorize Ibexa Connect.
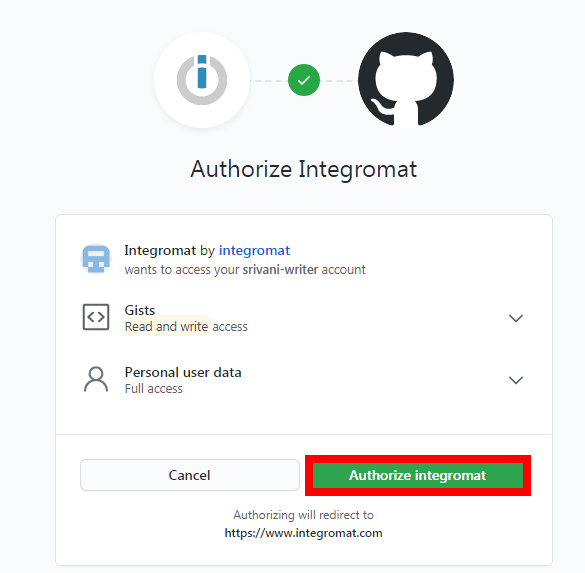
The connection has been established.
Triggers
See Connecting to GitHub Webhook using Ibexa Connect for adding the webhooks in your GitHub account.
Watch Comments
Triggers when a new comment is added or an existing comment is modified.
Maximum number of returned Repositories |
Set the maximum number of comments Ibexa Connect should return during one scenario execution cycle. |
Watch |
Select the comments you want to watch:
|
Watch Comments
Triggers when a new comment is created.
| Webhook Name | Enter a name for the webhook. |
| Maximum number of returned Comments | Set the maximum number of comments Ibexa Connect should return during one scenario execution cycle. |
Watch Forks
Triggers when a new fork is created.
| Maximum number of returned Forks | Set the maximum number of forks Ibexa Connect will work with during one cycle. |
Watch Gists
Triggers when a new gist is added or an existing gist is modified.
Maximum number of returned Gists |
Set the maximum number of gists Ibexa Connect should return during one scenario execution cycle. |
Watch |
Select the gists you want to watch:
|
Watch Issues
Triggers when a new issue is added or an existing issue is modified.
Maximum number of returned Issues |
Set the maximum number of issues Ibexa Connect should return during one scenario execution cycle. |
Watch |
Select the issues you want to watch:
|
Filter |
Select the option to filter the results:
|
State |
Select the issue status you want to watch:
|
Labels |
Add the tags of the issues you want to watch. |
Watch Issues for Events
Triggers when an issue is assigned, unassigned, labeled, unlabeled, opened, closed, or reopened.
| Webhook Name | Enter a name for the webhook. |
| Maximum number of returned Issues for Events | Set the maximum number of issues for events Ibexa Connect should return during one scenario execution cycle. |
Watch Milestones
Triggers when a new milestone is added or an existing milestone is modified.
Maximum number of returned Milestones |
Set the maximum number of milestones Ibexa Connect will work with during one cycle. |
Watch |
Select the milestones you want to watch:
|
State |
Select the status of the milestone you want to watch:
|
Watch Pull Requests
Triggers when a new pull request is added or an existing pull request is modified.
| Webhook Name | Enter a name for the webhook. |
| Maximum number of returned Pull Requests | Set the maximum number of pull requests Ibexa Connect should return during one scenario execution cycle. |
Watch Push Actions
Triggers when a new push occurs.
| Webhook Name | Enter a name for the webhook. |
| Maximum number of returned Push Actions | Set the maximum number of push actions Ibexa Connect should return during one scenario execution cycle. |
Watch Releases
Triggers when a new release is created.
| Webhook Name | Enter a name for the webhook. |
| Maximum number of returned Releases | Set the maximum number of releases Ibexa Connect should return during one scenario execution cycle. |
Watch Repositories
Triggers when a new repository is added or an existing repository is modified.
Maximum number of returned Repositories |
Set the maximum number of repositories Ibexa Connect will work with during one cycle. |
Watch |
Select the repositories you want to watch:
|
Actions
Create an Issue
Creates a new issue.
| Repository | Select the repository in which you want to create the issue. |
| Assignee | Select the assignee for the issue. |
| Milestone | Select the milestone applicable for the issue. |
| Labels | Add the tags for the issue. For example, bug, enhancement. |
| Title | Enter a name for the issue. |
| Body | Enter the issue details. |
Update an Issue
Updates an existing issue.
Repository |
Select the repository in which you want to create the issue. |
Assignee |
Select the assignee for the issue. |
Milestone |
Select the milestone applicable for the issue. |
Labels |
Add the tags for the issue. For example, bug, enhancement |
Number |
Enter the issue number. |
Status |
Select the issue status:
|
Title |
Enter a name for the issue. |
Body |
Enter the issue details. |
Search for an Issue
Returns the information of an issue.
Maximum number of returned issues |
Set the maximum number of issues Ibexa Connect should return during one scenario execution cycle. |
Sort By |
Select the option to sort the issues:
|
Sort Direction |
Select the order in which you want to list the issues:
|
Query |
Enter a keyword or phrase to search the issues based on the specified query. |
Get an Issue
Retrieves information about an issue.
| Repository | Select the repository whose issue details you want to retrieve. |
| Number | Enter the issue number whose details you want to retrieve. |
Add Assignees
Adds the assignees to an issue.
| Repository | Select the repository to whose issue you want to add the assignee. |
| Assignee | Select the assignees you want to add to the issue. |
| Number | Enter the issue number to which you want to add the assignee. |
Remove Assignees
Removes assignees from an issue.
| Repository | Select the repository whose issue's assignee you want to remove. |
| Assignee | Select the assignees you want to remove from the issue. |
| Number | Enter the issue number from which you want to remove the assignee. |
Add Labels to an Issue
Adds a label to an Issue
| Repository | Select the repository to whose issue you want to add a label. |
| Labels | Add the labels you want to add an issue. For example, bug, enhancement. |
| Number | Enter the issue number to which you want to add the labels. |
Remove a Label from an Issue
Removes a label from an issue.
| Repository | Select the repository whose issue's labels you want to remove. |
| Labels | Add the labels you want to remove from an issue. For example, bug, enhancement. |
| Number | Enter the issue number from which you want to remove the labels. |
Create a Release
Creates a new release.
| Repository | Select the repository in which you want to add the release. |
| Tag Name | Add the tags for the release. |
| Target Commitish | Specifies the location to commit the release and determines where the Git tag is created from. It can be any branch or commit SHA. Unused if the Git tag already exists. By default, the repository's default branch is the master. |
| Name | Enter a name for the release. |
| Description | Enter the details of the release. |
| Draft | Select whether the release is in a draft stage. |
| Prerelease | Select whether this release eligible for a prerelease. |
Update a Release
Updates an existing release.
| Repository | Select the repository whose release details you want to update. |
| Release ID | Select the Release ID whose details you want to update. |
| Tag Name | Add the tags for the release. |
| Target Commitish | Specifies the location to commit the release and determines where the Git tag is created from. It can be any branch or commit SHA. Unused if the Git tag already exists. By default, the repository's default branch is the master. |
| Name | Enter a name for the release. |
| Description | Enter the details of the release. |
| Draft | Select whether the release is in a draft stage. |
| Prerelease | Select whether this release eligible for a prerelease. |
Delete a Release
Deletes an existing release.
| Repository | Select the repository whose release details you want to delete. |
| Release ID | Select the Release ID you want to delete. |
Create a Milestone
Creates a new milestone.
| Repository | Select the repository in which you want to create the milestone. |
| Title | Enter a name for the milestone. |
| Description | Enter the details of the milestone. |
| Due On | Enter a date on which the milestone is due. See the list of supported data formats. |
Update a Milestone
Updates an existing milestone.
Repository |
Select the repository whose milestone's details you want to update. |
Number |
Enter the milestone number whose details you want to update. |
Title |
Enter a name for the milestone. |
State |
Select the milestone status:
|
Description |
Enter the details of the milestone. |
Due On |
Enter a date on which the milestone is due. See the list of supported data formats. |
Delete a Milestone
Deletes an existing milestone.
| Repository | Select the repository whose milestone's details you want to delete. |
| Number | Enter the milestone number you want to delete. |
Create or Edit a File
Creates a new or updates an existing file.
| Repository | Select the repository whose file you want to create or update. |
| Filepath | Enter the path address of the file. |
| Message | Enter details of the file. |
| Data | Enter the file data. |
| SHA | Enter the SHA details of the file. This field is mandatory to update an existing file. |
| Branch | Enter the branch details where you are creating or updating the file. |
Delete a File
Deletes an existing file.
| Repository | Select the repository whose file you want to delete. |
| Filepath | Enter the path address of the file you want to delete. |
| Message | Enter details of the file. |
| Data | Enter the file data. |
| SHA | Enter the SHA details of the file. This field is mandatory to update an existing file. |
| Branch | Enter the branch details of the file you want to delete. |
Get a File
Retrieves the information about the specified file.
| Repository | Select the repository whose file you want to delete. |
| Filepath | Enter the path address of the file whose details you want to retrieve. |
| Commit, branch, or tag | Enter the tag, branch, or commit details of the file you want to retrieve. |
Create a Gist
Creates a new gist.
| Files | Add the file name and content to make a gist. |
| This Gist is public | Select the checkbox if this gist is public. |
| Description | Enter the details of the gist. |
Update a Gist
Updates an existing gist.
| Gist ID | Select the Gist ID whose details you want to update. |
| Files | Add the file name and content to make a gist. |
| This Gist is public | Select whether this gist is public. |
| Description | Enter the details of the gist. |
Delete a Gist
Deletes an existing gist.
| Gist ID | Select the Gist ID you want to delete. |
Create a Comment
Creates a new comment for an issue.
| Repository | Select the repository in which you want to create the comment. |
| Number | Enter the issue, milestone, or gist number for which you want to add the comment. |
| Body | Enter the comment text. |
List Comments
Lists comments for an issue.
| Repository | Select the repository whose comments you want to list. |
| Number | Enter the issue, milestone, or gist number whose comments you want to list. |
| Since | Enter the date to list the comments added on or after the specified date. |
| Maximum number of returned comments | Set the maximum number of comments Ibexa Connect should return during one scenario execution cycle. |
Iterators
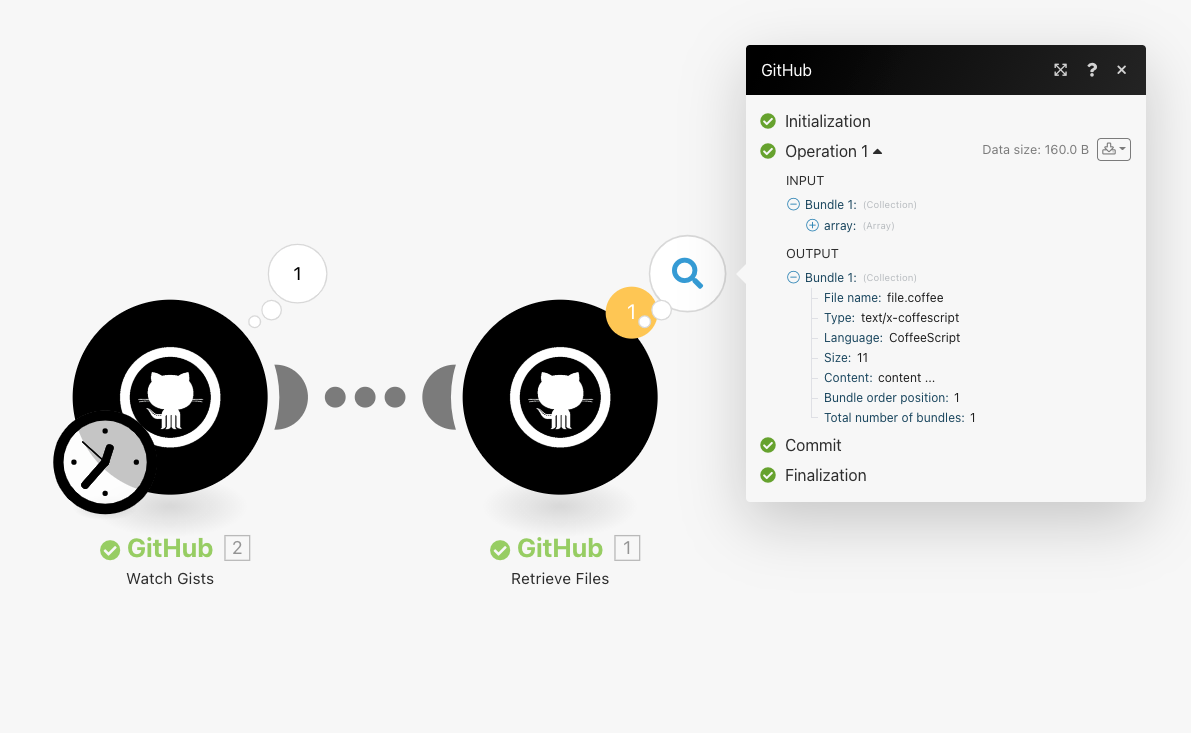
Retrieve Files
Retrieves files from a gist one at a time.
The GitHub retrieves files from only the Watch Gists module. The module iterates the received Gists details one by one.
The iterator module lets you manage the email attachments separately. For example, you can set up to Watch Gists module to iterate the Gists with its details.
For more information about iterators, see Iterator.
Connecting to GitHub Webhook using Ibexa Connect
1. Open any Watch Module, establish a connection as mentioned in the respective module description, click Save, and copy the URL address to your clipboard.
2. Log in to your GitHub account and open the repository in which you want to add the webhook.
3. Click Settings > Webhooks > Add webhook and enter the details to add the webhook.
Payload URL |
Enter the URL address copied in step 1. |
Content Type |
Select the content type as |
Secret |
Enter the repository secret details. To create a secret, open the Repository > Settings > Secret. Enter the name and value of the secret. Click Add Secret. |
Which event Would you like to trigger this Webhook? |
Select the events for which you want to receive the trigger:
|
Active |
Select the checkbox to activate the webhook. |
4. Click Add Webhook.
The webhook is added successfully. png](162e7a7f118d34.png)
For more information about iterators, see Iterator.
Connecting to GitHub Webhook using Ibexa Connect
1. Open any Watch Module, establish a connection as mentioned in the respective module description, click Save, and copy the URL address to your clipboard.
2. Log in to your GitHub account and open the repository in which you want to add the webhook.
3. Click Settings > Webhooks > Add webhook and enter the details to add the webhook.
Payload URL |
Enter the URL address copied in step 1. |
Content Type |
Select the content type as |
Secret |
Enter the repository secret details. To create a secret, open the Repository > Settings > Secret. Enter the name and value of the secret. Click Add Secret. |
Which event Would you like to trigger this Webhook? |
Select the events for which you want to receive the trigger:
|
Active |
Select the checkbox to activate the webhook. |
4. Click Add Webhook.
The webhook is added successfully.