MySQL
The Ibexa Connect MySQL modules let you execute your custom logic directly in your database server through stored procedures. Ibexa Connect loads the interface of input/output parameters and recordsets dynamically, so each parameter/value can be mapped individually.
Preprequisites:
-
A MySQL server connection
-
A Configured MySQL server
Creating a Connection to the MySQL Server
Host |
Enter the address of the MySQL server. The MySQL server must be publicly accessible from the internet. If you want to use the database hosted on your local server, you'll need to specify your public IP address, and set the port forwarding on your router. Do not enter "localhost," or "127.0.0.1" in this field, as it will not work. |
Port |
Enter the port number of the MySQL server. |
Database |
Enter the database name if needed. This is required for the Execute a Query (advanced) module. |
User |
Enter the MySQL server user name. |
Password |
Enter the password. |
Charset (optional) |
Enter the MySQL character set for the connection, e.g., |
Self-signed certificate (optional) |
Upload your certificate (P12, PFX, or PEM file) if you want to use TLS using your self-signed certificate. If you're using the client-side certificate authorization, you can enter your CA certificate here. Ibexa Connect does not retain or store any data (files, passwords) you provide. File and password are only used to extract a private key/certificate. For more details about certificates and keys, please refer to the Certificates and Keys article. |
Client Private Key (optional) |
Upload the private key to use the client-side certificate authorization. Ibexa Connect does not retain or store any data (files, passwords) you provide. File and password are only used to extract a private key/certificate. For more details about certificates and keys, please refer to the Certificates and Keys article. |
Client Certificate (optional) |
Upload your certificate if you want to use client-side certificate authorization. Ibexa Connect does not retain or store any data (files, passwords) you provide. File and password are only used to extract a private key/certificate. For more details about certificates and keys, please refer to the Certificates and Keys article. |

Configuring Your MySQL Server
Caution
Remote access must be allowed, and CREATE ROUTINE privilege must be granted on the MySQL server!
Read Access to MySQL Tables
Before you start configuring your scenario, ensure the account you are using to connect to your database has read access to information_schema.tables, information_schema.columns, information_schema.routines, and information_schema.parameters tables.
Ibexa Connect IP Addresses
Ibexa Connect will make connections to your database from the following IP addresses: List of IP addresses
Our servers are set up with valid PTR records, so you can easily restrict access by allowing %.make.com.
Enabling Access on Your Firewall
Enable incoming TCP connections to port 3306 from source IP addresses.
Configuring MySQL for Remote Access
- Linux *
1. Open the configuration file /etc/mysql/my.cnf
2. Comment outline bind-address = 127.0.0.1 (by adding a hash at the beginning of the line):
#bind-address = 127.0.0.1
3. Restart the MySQL daemon
Creating and Granting Remote Access to Your MySQL Account
1. Start the MySQL command-line interface:
mysql -u root -p
2. Execute these commands (with <database>, <user> and <password> replaced by actual values):
CREATE USER <user>@'%' IDENTIFIED BY <password>; GRANT ALL PRIVILEGES ON <database>.* TO <user>@'%' IDENTIFIED BY <password> WITH GRANT OPTION; FLUSH PRIVILEGES;
Tolerance of Non-interactive Connection
Ibexa Connect processes scenarios transactionally. That's why all Ibexa Connect modules that support transactions (e.g., MySQL) have open transactions throughout the whole run of a scenario. Therefore, make sure that you have set a long enough time to tolerate non-interactive connections. This MySQL command will list the values:
SHOW VARIABLES LIKE 'wait_timeout';
See more information in the MySQL documentation on Server System Variables.
Connect With MySQL Hosted From DigitalOcean:
Click Here to follow the documentation.
Actions
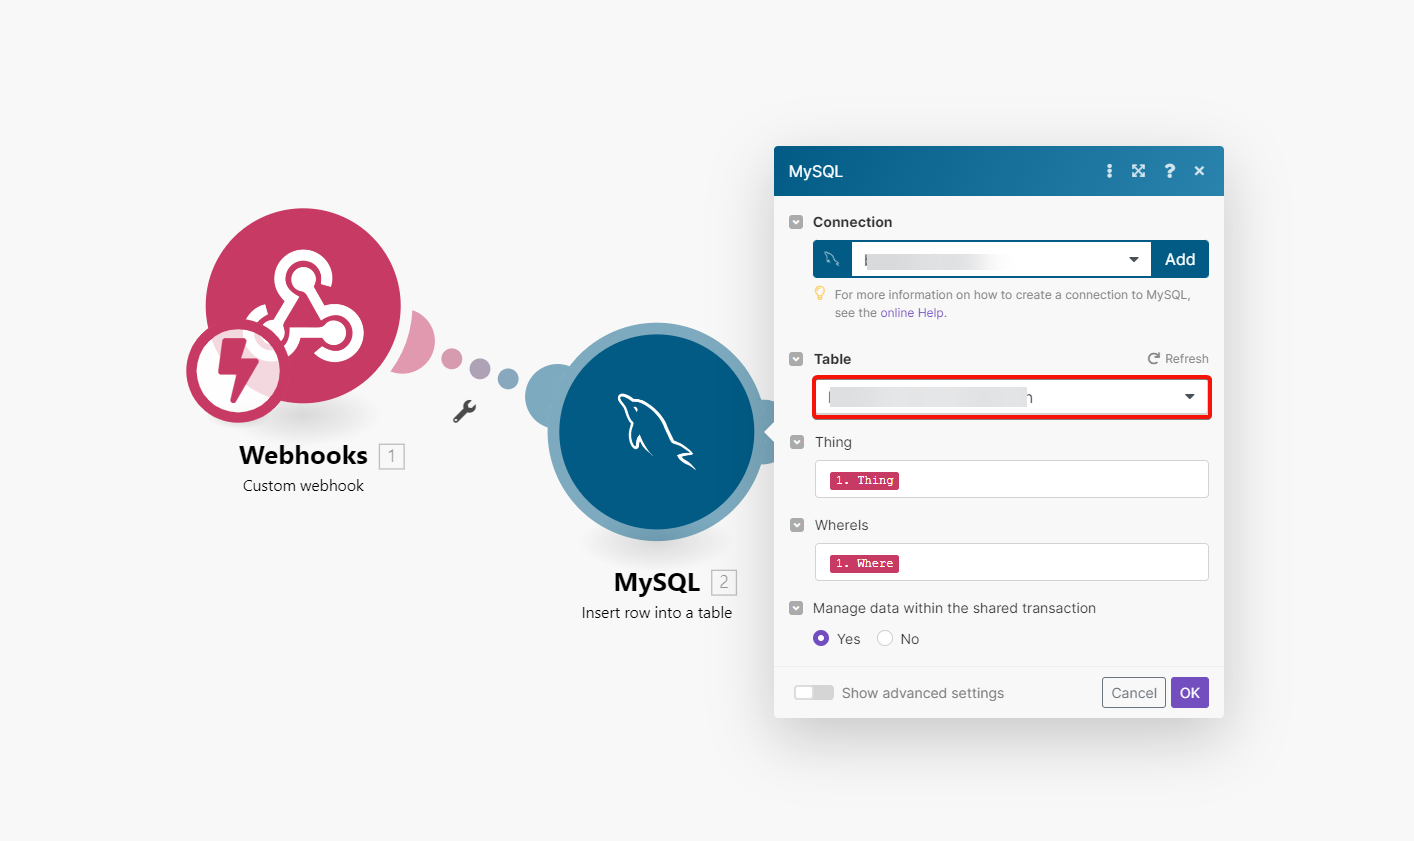
Insert Row Into a Table
Inserts a row with the desired values into a selected table.
| Table | Select the table where you want to add a row. |
| ** column name(s) ** | Enter the desired values that will be inserted into the new row. |
Note
To pass a NULL value, use an INSERT statement via Execute a query (advanced).
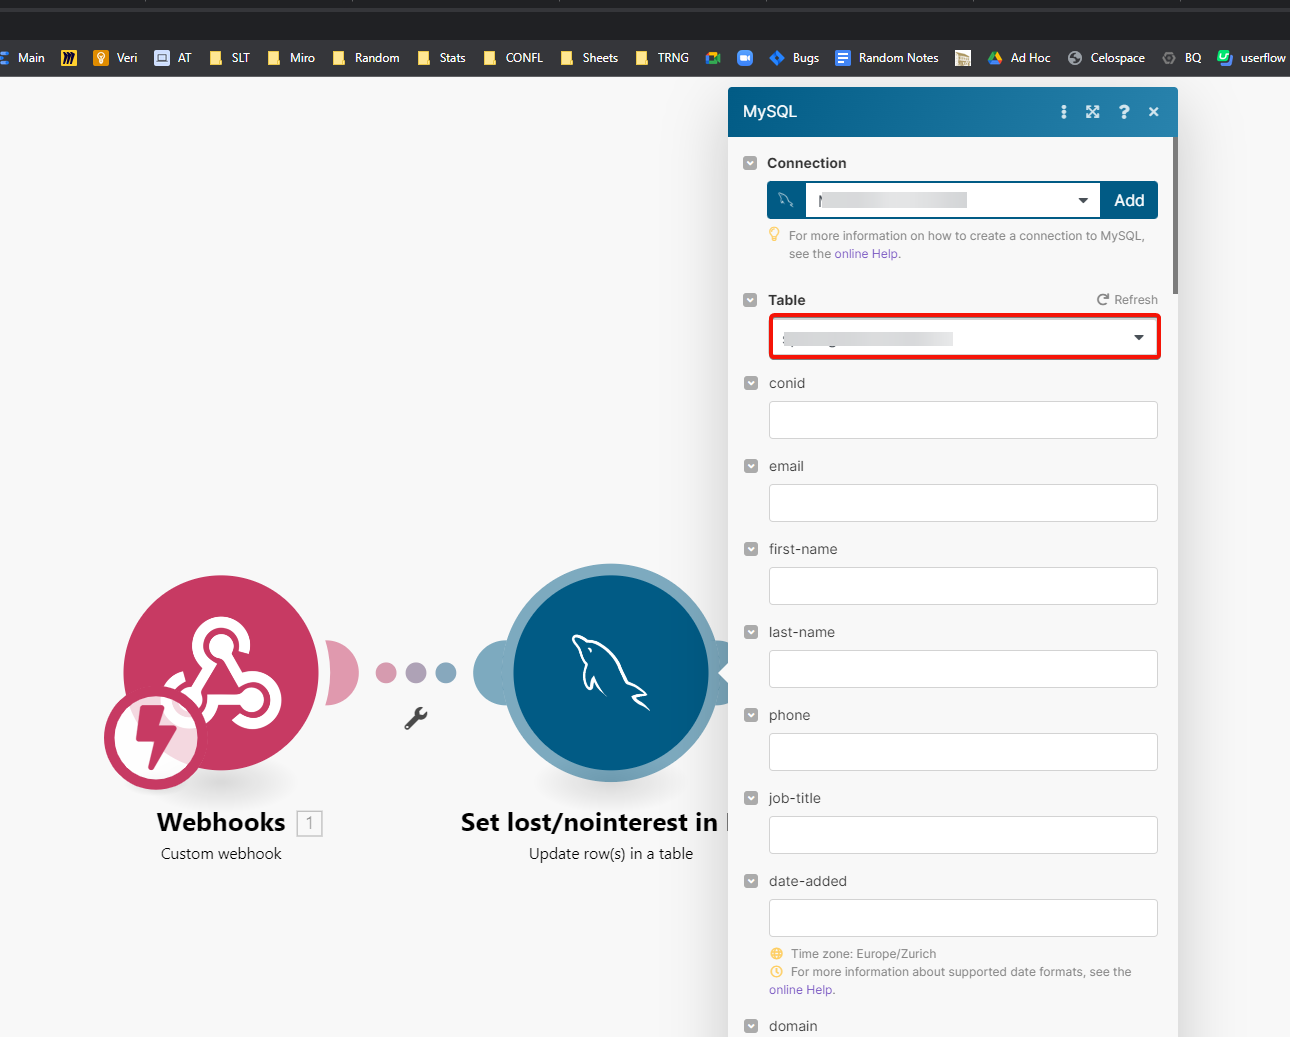
Update Row(s) in a Table
Updates rows (can be defined by the filter settings) in the selected table.
| Table | Select the table where you want to update a row. |
| ** column name(s) ** | Enter the desired values that will be inserted into the rows. |
| Filter | Set the filter to define which rows will be updated. |
Note
To pass a NULL value, use an UPDATE statement via Execute a query (advanced)
Delete Row(s) From a Table
Deletes a row according to a defined filter.
Table |
Select the table where you want to delete the row. |
Filter |
Set the filter for the row to be deleted. Set filter values. You can also use logical operators, AND/OR, to specify your selection. |
Passing NULL Values into a Table
As of now, it is not possible to pass NULL values in our standard modules, Insert/Update row(s) into a table even using the null pill.
To achieve this, you need to use the Execute a query (advanced) module where you prepare a full SQL statement (either INSERT or UPDATE) as a workaround as shown in the example.
You need to update an existing row in your database with three columns: Name, Email, and Phone Number.
You want to update a contact and set the contact's phone to NULL based on the contact’s email address.
To achieve that, use this statement:
`UPDATE yourtablenamehereSET Name='Joe Doe',Email='joe@doe.com',Phone=NULLWHERE Email='joe@doe.com'`
In your real scenario, map the email address (and the name possibly too) from preceding modules and ensure the mapped pills are in single quotes.
Execute a Query (Advanced)
Continue the execution of the route even if the module returns no results |
If enabled, the scenario will not be stopped by this module. |
Only one SQL statement is allowed (one semicolon ; as a statement terminator per query).
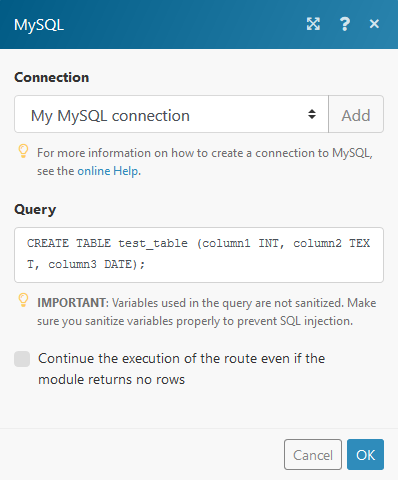
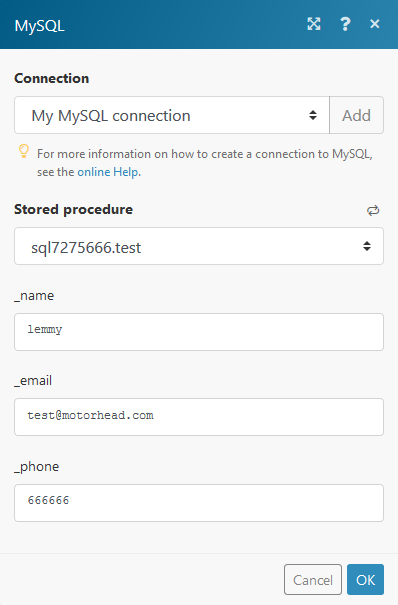
Execute a Stored Procedure
Stored procedure |
Select the stored procedure you want to execute. The stored procedure must already be created. Here is a sample SQL statement that creates a stored procedure that simply inserts the values passed in the three parameters into a table:
|
Fields |
Contains the parameter fields from the stored procedure. E.g., enter values you want to insert into the table during the stored procedure execution. |
Example
The following example adds 2 to the provided parameter (e.g., in the Execute a Stored Procedur*e module), and returns the result, together with the current date (can be further iterated using the *Iterate Recordset of a Stored Procedure module).
1 2 3 4 5 | |
Searches
Select Row(s) From a Table
This action selects a row from a table according to a defined filter.
Table |
Select the table you want to select a row from. |
Filter |
Set the filter for the row to be selected. Set filter values. You can also use logical operators, AND/OR, to specify your selection. Example: On the following MySQL dialog, the row that contains number 1 or 2 in the "column1" column will be selected. 
|
Continue the execution of the route even if the module returns no results |
If enabled, the scenario will not be stopped by this module. |
Note
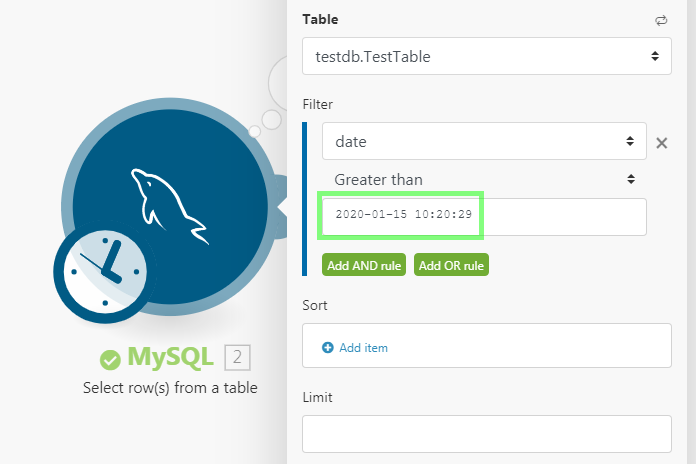
You may also use the existing basic text operators for comparing dates and datetimes. Just use text formatted date/datetime as the second operand:
-
YYYY-MM-DDfor date type -
YYYY-MM-DD HH:mm:ssfor datetime type
Literal static datetime value example:
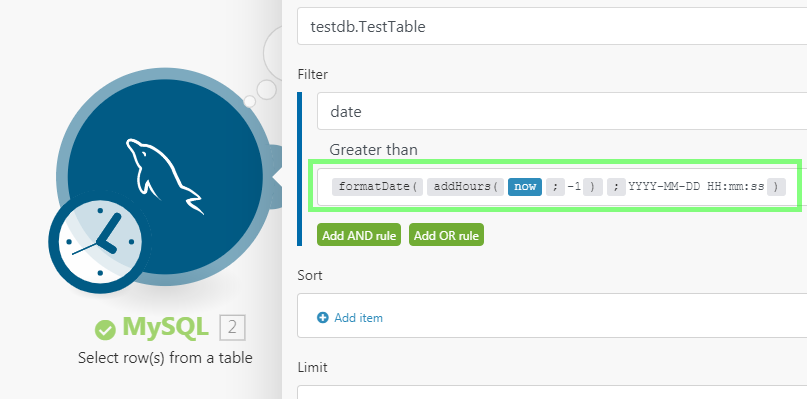
Formatted dynamic datetime value example:
Iterators
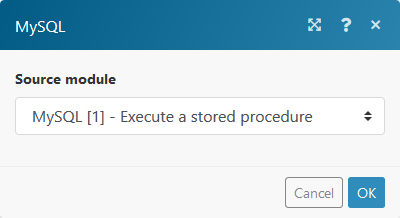
Iterates Recordset of a Stored Procedure.
| Source module | Select the source module containing the stored procedure recordset you want to iterate. |
Troubleshooting
Error: ER_NOT_SUPPORTED_AUTH_MODE: Client does not support authentication protocol requested by server; consider upgrading MySQL client:
MySQL 8 uses an authentication method that is not supported by Ibexa Connect yet.
Solution
Use the mysql_native_password plugin to make the account fall back to the "traditional" process during the handshake, keeping compatibility by default for any previously supported server version.
Create the account using the mysql_native_password authentication plugin:
CREATE USER 'new_user'@'%' IDENTIFIED WITH mysql_native_password BY 'user_password';
Or, modify the existing user account, and specify the mysql_native_password authentication plugin:
ALTER USER 'root'@'localhost' IDENTIFIED WITH mysql_native_password BY 'YourRootPassword';
(Reference: https://github.com/mysqljs/mysql/issues/2046#issuecomment-396039909)
Error: ER_LOCK_WAIT_TIMEOUT: Lock wait timeout exceeded; try restarting transaction:
This error occurs when you modify the same data using multiple modules. It is caused by SQL transactions.
When any SQL module is executed, then it starts the transaction (1), and the transaction is finished after the scenario is fully executed. If another module tries to access the same data used in another unfinished transaction (1), then it has to wait until the previous transaction (1) is finished. This, however, never happens because the first transaction (1) will be finished when the scenario is finished.
Solution
Turn on Auto-commit. It finishes (commits) every transaction immediately after the module execution is done.
1. Open Scenario settings.
2. Enable the Auto commit checkbox.
3. Confirm the settings dialog by clicking the OK button.