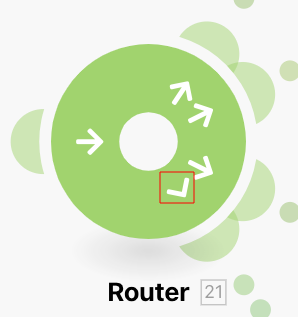
Router
The Router module allows you to branch your flow into several routes and process the data within each route differently. Once a Router receives a bundle, it forwards it to each connected route in the order the routes were attached to the Router.
Tip
To verify the order of the routes, you can click the Auto-align icon  , which will arrange the routes according to the order from top to bottom.
To change the order, just remove the Router module and re-connect the routes in the desired order.
Note
Routes are processed sequentially, not in parallel. A bundle is not sent to the next route until it has been completely processed by the previous route.
Template
See our scenario template for the Controlled distribution of data flow.
Adding a router to a scenario
A Router can be added to a scenario in one of the following ways:
-
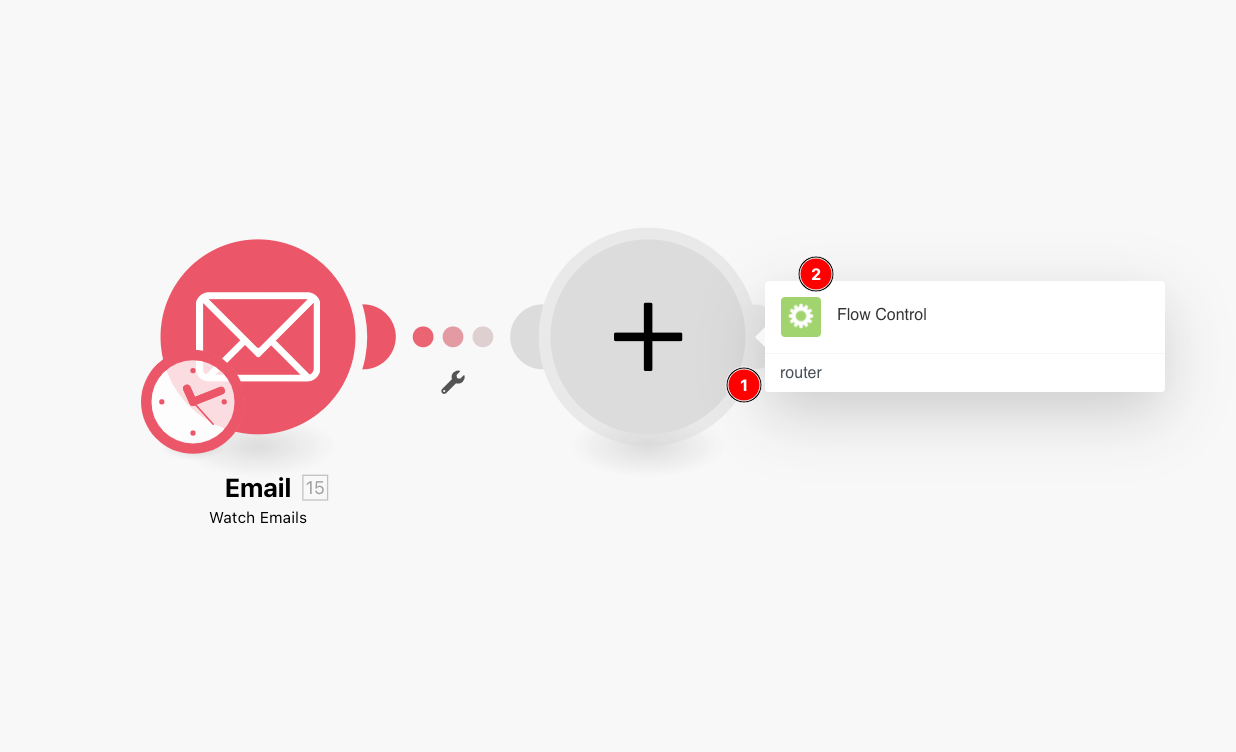
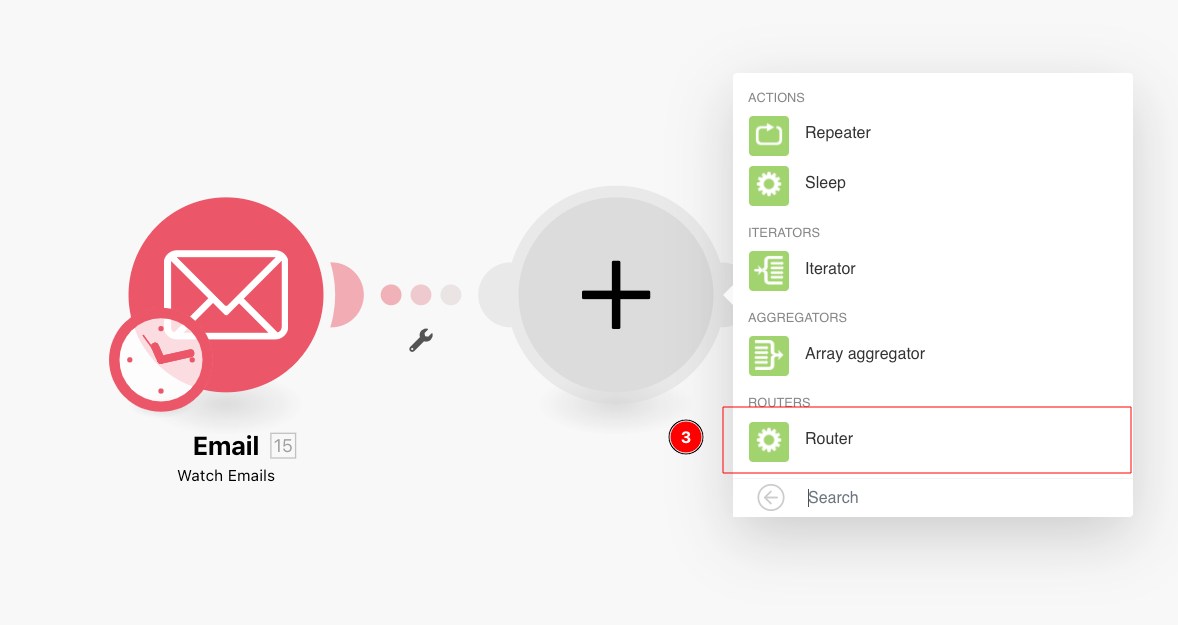
If you wish to connect the Router after a module, click on the module's right "ear" and choose Flow Control > Router from the list of modules.
-
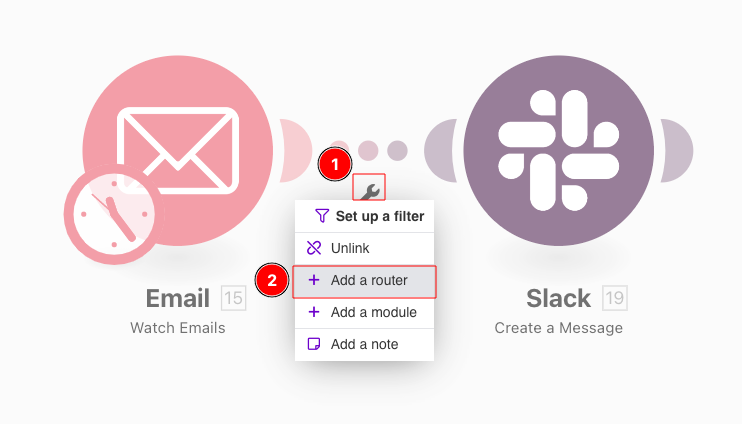
If you wish to insert the Router between two modules, click on the wrench icon below the route connecting the two modules (or right-click the route) and choose "Add a router" from the menu.
-
A Router can also be inserted automatically in the case when you try to connect module
Ato moduleBto which another module is already connected. Just drag the left "ear" of the moduleAand drop it on to moduleB.
Filters
You can place a filter on a route after the Router to filter bundles as on any other route: just click on the route, add conditions and click on the "OK" button to save the filter setup:

The fallback route
The filter setup on a route after a Router contains a special option: The fallback route:
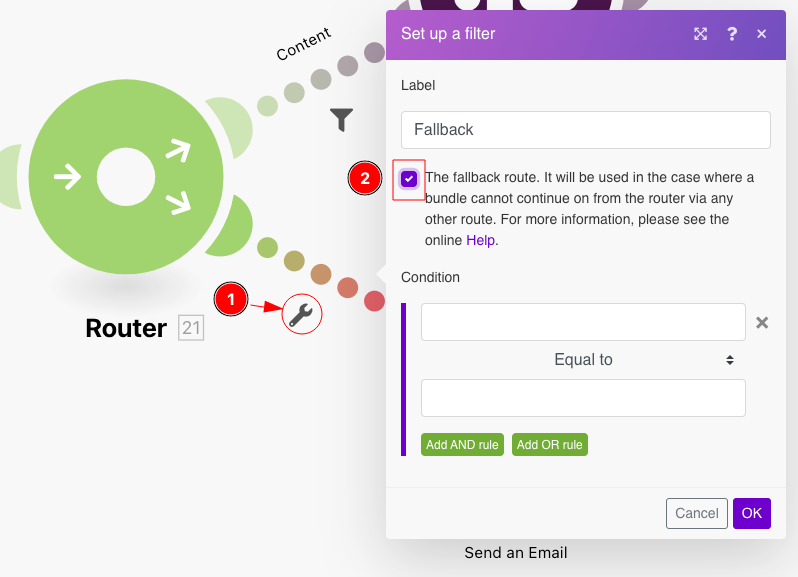
When enabled, this route is used in the case when a bundle cannot continue on from the Router via any other route because the filters on the other routes filtered it out. The Fallback route is distinguished with a different arrow sign inside the Router module:
If/Else
A typical use case of the fallback route is to continue the flow with route A if the condition is met and with route B if it is not. This can be achieved with the following steps:
-
Insert a Router in your scenario.
-
Connect both routes (
AandB) to the Router. -
Click on the route
Aand specify a condition: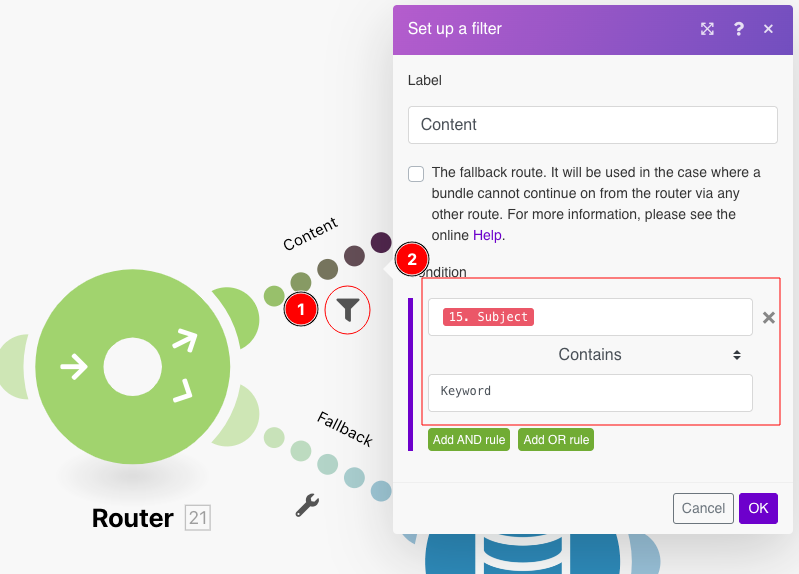
-
Click on the route
Band enable The fallback route option: