Chatfuel
The Chatfuel modules allow you to create broadcast messages and send JSON responses from your Chatfuel account.
Prerequisites
-
A Facebook account through which you connect Chatfuel
-
A Facebook page
In order to use Chatfuel with Ibexa Connect, it is necessary to have a Chatfuel account. If you do not have one, you can create a Chatfuel account at https://chatfuel.com/.
Note
The module dialog fields that are displayed in bold (in the Ibexa Connect scenario, not in this documentation article) are mandatory!
Triggers
JSON Listener
Listens for incoming messages from Chatfuel's JSON API plugin. The enclosing scenario has to be run once, in order for user attributes from Chatfuel to become visible and available for mapping.
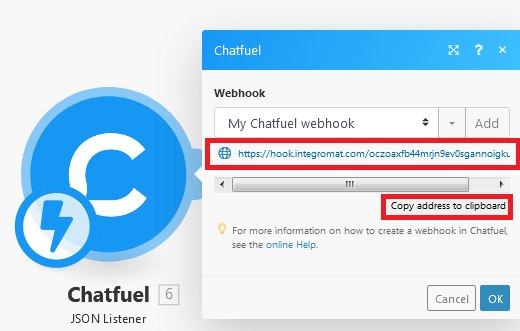
Connecting to JSON Webhook
-
Go to Ibexa Connect and open the JSON Listener module. Enter a name for the webhook and click Save.
-
Copy the URL to the clipboard.
-
Log into your Chatfuel account, select the bot, and then select Automate.
-
Open the block containing the JSON API, select the Type as POST, and enter the URL copied in step 2.

The connection has been established.
Now you can start building the scenarios in Ibexa Connect.
Sending a response is as simple as inserting a JSON Response module in the scenario's data flow.
Following is an example scenario which uses filters to send a personalized greeting if a user's first name is available, and a generic greeting otherwise.
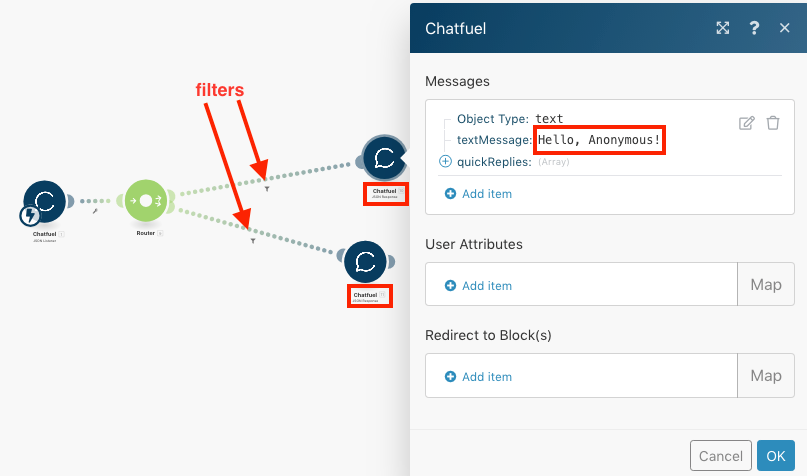
With this scenario setup, sending the first name as part of the user attributes from Chatfuel causes the default "Hello, Anonymous" response to instead include the user's first name.
Actions
Broadcast Message
Sends any block from the bot's structure or sets user attributes.
Bot ID |
Enter the Bot ID from which you want to send the message. |
Broadcasting API Token |
Enter the Secret API token to connect to the Bot ID. |
Messenger User ID |
Enter the Messenger User ID to whom you are sending the message. |
Select Block By |
Select the option to send the block:
|
Message Tag |
Select a tag for the message to send to a specific group or person. |
User Attributes |
Add the user attributes: Attribute Name Enter the name of the attribute. Attribute Value Enter the value of the attribute. |
JSON Response
Sends a response to the address from which a message was received.
Messages |
Select the message type:
|
||||||||
Text |
|
||||||||
User Attributes |
Add the user attributes: Attribute Name Enter the name of the attribute. Attribute Value Enter the value of the attribute. |
||||||||
Redirect to Block(s) |
Add the details to redirect the user to the block or a sequence of blocks: Block Name Enter the block name. |