PayPal
The PayPal modules enable you to monitor notifications, payments, plans, and transactions, create and execute payments and agreements, or manage plans and agreements in your PayPal account.
Getting Started with PayPal
Prerequisites
- A PayPal account (a business account to use in the production environment)
In order to use PayPal with Ibexa Connect, it is necessary to have a PayPal account. If you do not have one, you can create a PayPal account at paypal.com.
Note
The module dialog fields that are displayed in bold (in the Ibexa Connect scenario, not in this documentation article) are mandatory!
Connecting PayPal to Ibexa Connect
To connect your PayPal account to Ibexa Connect, you'll need to create a new app in PayPal Developer to obtain the client ID and client secret.
-
Go to PayPal Developer, and log in to your Dashboard.
-
Navigate to Dashboard > My Apps & Credentials, and click Create app to create a new app in the sandbox.
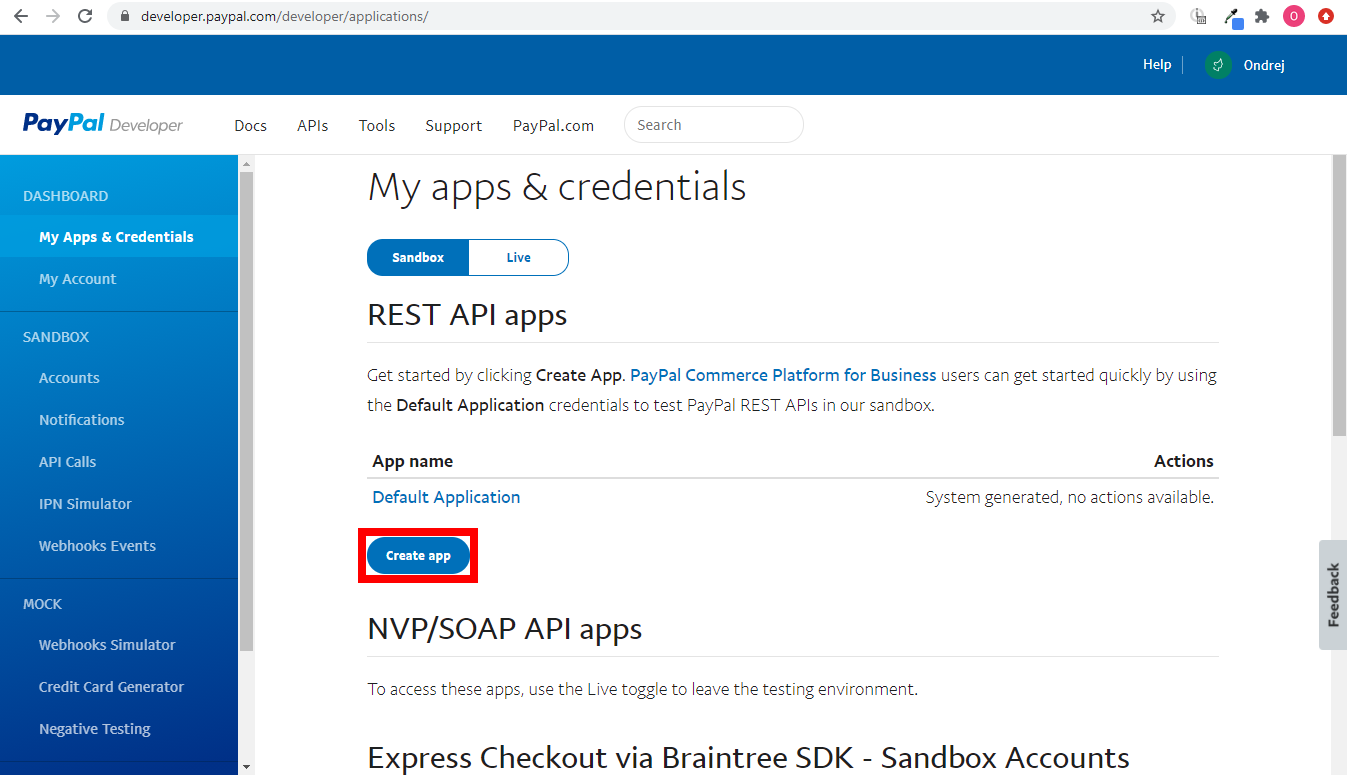
-
Enter the desired app name (e.g., Ibexa Connect), and select the sandbox account to associate the app with.
-
Click Create App.
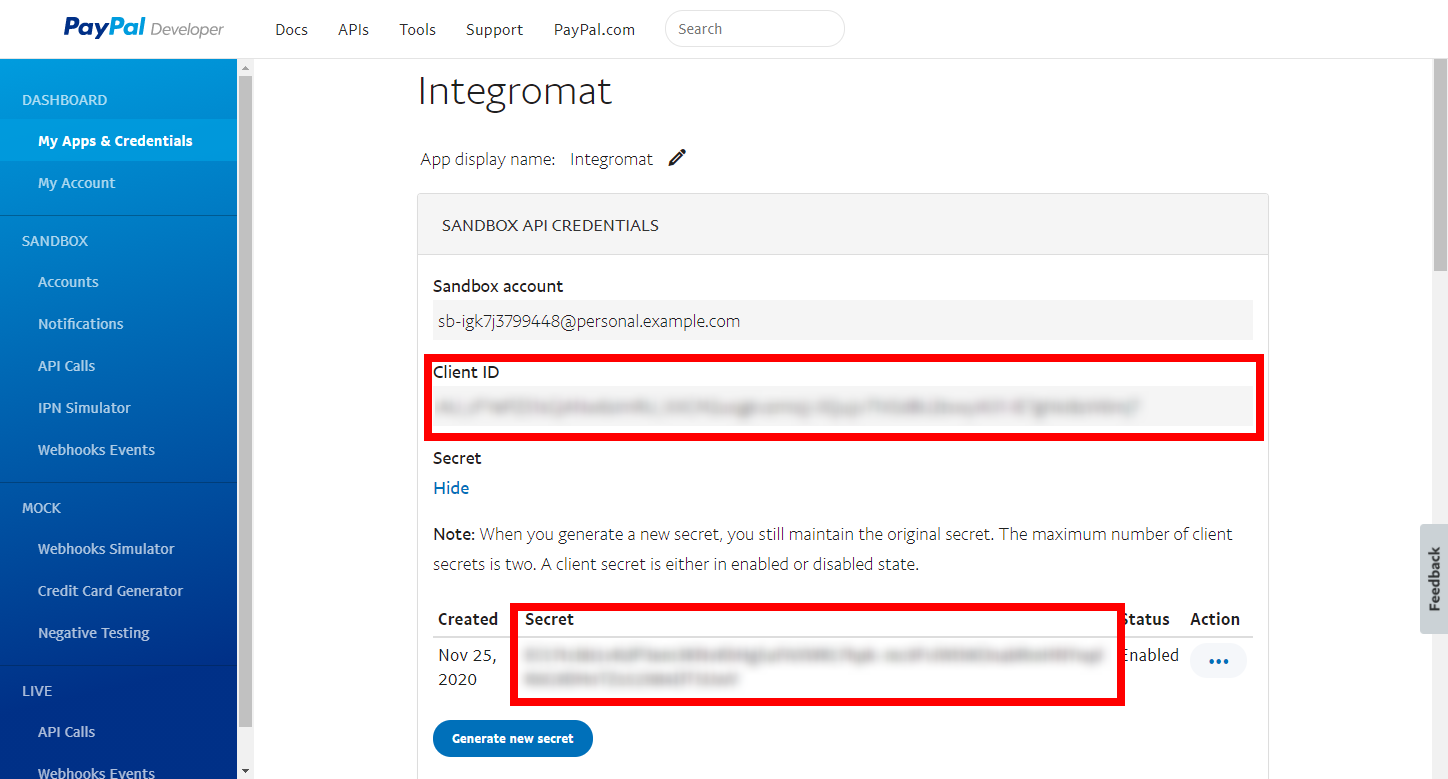
-
Copy the provided Client ID and Secret, and save them in a safe place.
-
Go to Ibexa Connect, and open the PayPal module's Create a connection dialog.
-
Enter the Client ID and Secret you have copied in step 5 in the respective fields.
Note
-
Click the Continue button to establish the connection.
The connection has been established. You can proceed with setting up the module.
Note
If you are logged in to your PayPal account in another browser tab or in the same browser session that the Ibexa Connect website is opened in, the PayPal account you are logged into is then automatically used when creating a connection in Ibexa Connect.
To ensure you connect the correct PayPal account to Ibexa Connect, log out of the PayPal account before you create the connection in Ibexa Connect.
To move your application into PayPal's production environment, click on Live:
Note
A Business account is required to go Live.

Triggers
New notification
Triggers when an Instant Payment Notification is received.
The webhook URL needs to be generated in Ibexa Connect and then added to PayPal's integrations settings.
-
Add the New Notification module to your Ibexa Connect scenario.
-
Generate and copy the webhook URL.
-
Log in to your PayPal account.
-
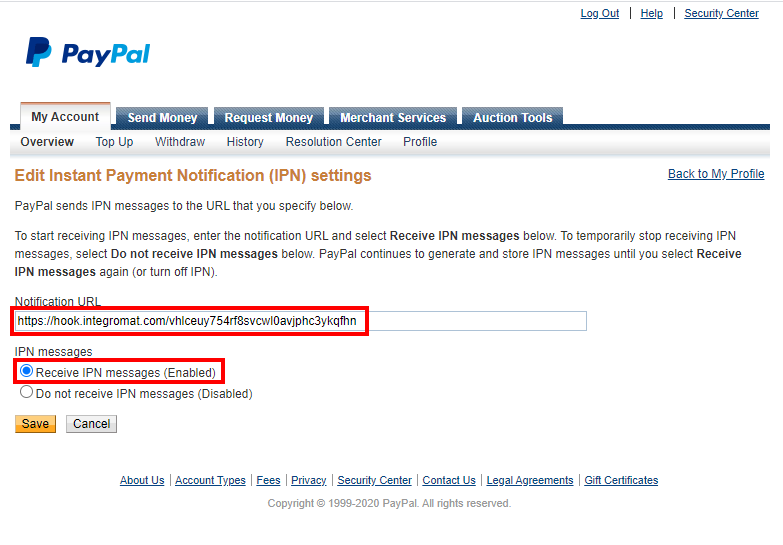
Open PayPal IPN settings.
-
Click Choose IPN Settings button.
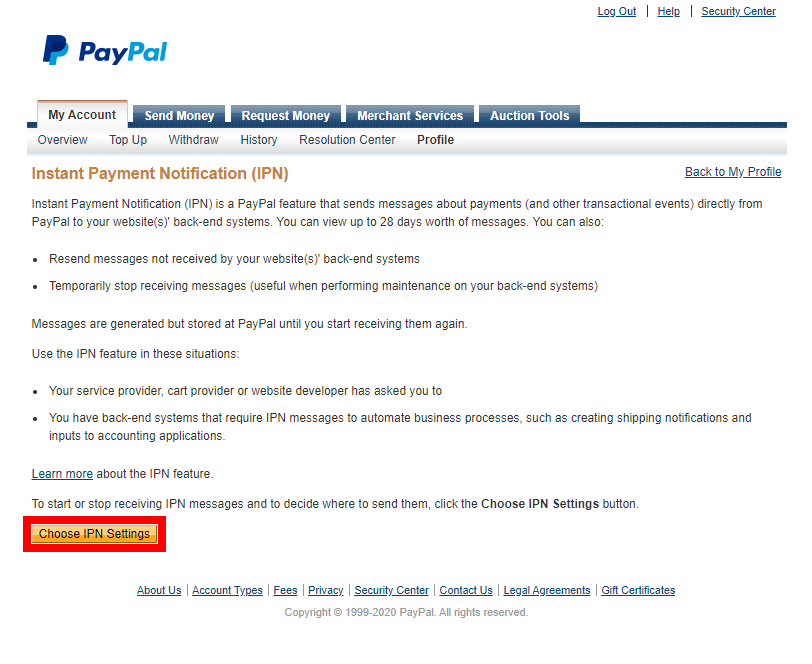
-
Enter the Webhook URL copied in step 2 above in the Notification URL field, select Receive IPN messages (Enabled), and click Save.
Now, every time the notification is received, the New notification module in your Ibexa Connect scenario is triggered.
How to send instant payment notifications (IPNs) to multiple Ibexa Connect scenarios
Let's assume that you have already configured the PayPal > New notification trigger in your PayPal scenario, and you need to execute one or more additional scenario by one received PayPal notification. The PayPal user interface allows you to set only one URL where the notification will be sent.
-
Create a new scenario. This is the additional scenario that will be executed from your original (existing) PayPal scenario.
-
2. Add the Webhooks > Custom Webhook module to the newly created scenario, and generate and copy the generated Webhook URL.
-
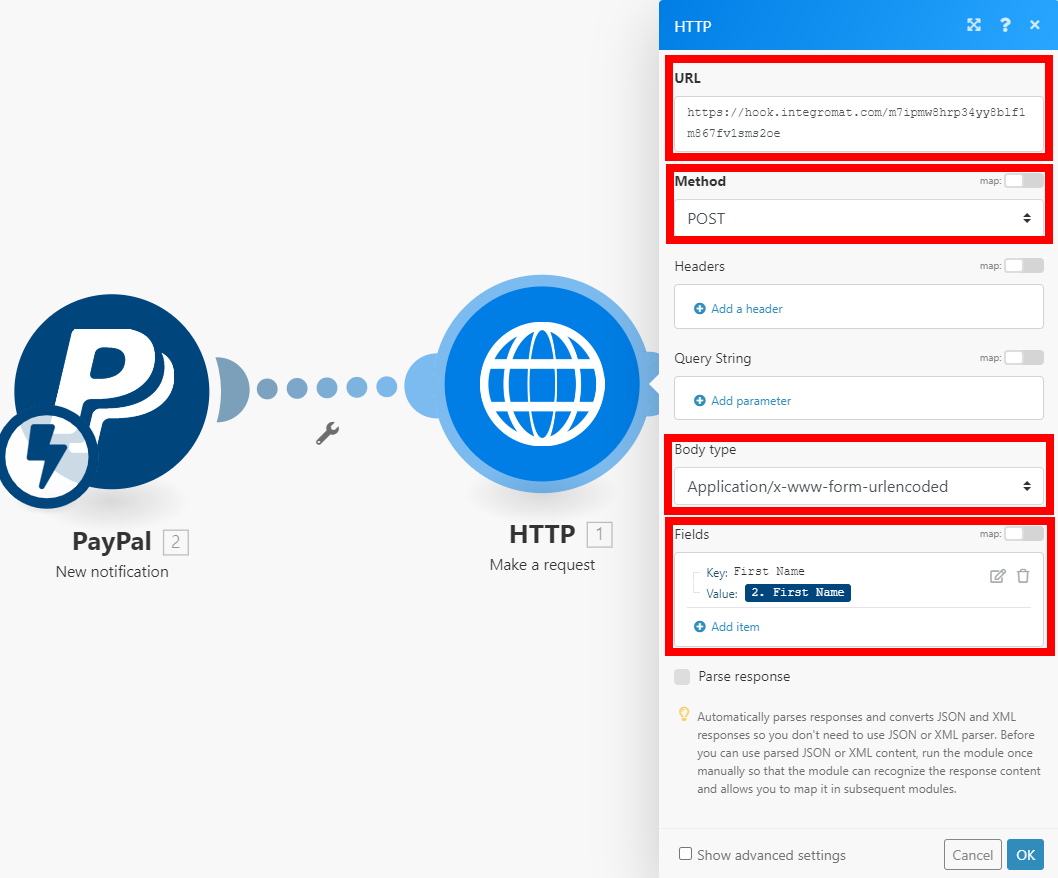
Open the original PayPal scenario that contains the PayPal > New Notification instant trigger, and add the HTTP > Make a Request module in the scenario.
Fill in the module's fields as follows:
URL |
Enter the Webhook URL from the new scenario you have generated and copied in step 2 (above). |
Method |
Select the |
Body type |
Select the |
Fields |
Enter the name of the field in the Key field, and map the desired field from the New notification module to the Value field. These fields will be sent to your new scenario, which will be executed by the Custom Webhook module. |
Now, every time the PayPal > New notification module triggers in your original PayPal scenario, the desired received data will transfer to your new scenario via the HTTP > Make a request module, where the Webhooks > Custom Webhook module will trigger.
Creating a new payment
To create a new payment, follow these two steps:
-
Create a payment
-
Execute a payment
The Create a payment action consists of entering all payment details and getting an approval URL. The approval URL is then sent to a user who logs into his/her PayPal account and approves the payment. Afterward, the user is redirected to the Redirect URL (Return or Cancel URL) that was specified during Step 1. Paypal appends to the return URL a Payer ID and Payment ID. Make sure you store these IDs, you will need them in Step 2.
As soon as the user approves the payment, run the Execute a payment action (step 2). Here, fill in the Payer and Payment IDs that were appended to the Return URL. After you run the action, the payment is executed.
Creating an agreement
To create a new agreement, follow these two steps:
-
Create an agreement
-
Execute an agreement
Before creating an agreement, you must define and activate a billing plan (for example, using the action Create a plan).
The first action involves entering all necessary details needed to set up a payment and generate an approval URL. This approval URL is then sent to a user so that the user can approve the agreement. The user must approve the agreement before you can execute it. To activate the agreement, run the Execute an agreement action (Step 2). ecute it. To activate the agreement, run the Execute an agreement action (Step 2).