Connecting Ibexa Connect to any web service that uses API tokens authorization
There are some services that do not allow Ibexa Connect (and other integration platforms) to create an app that you can easily use in your scenario.
Fortunately, there is a workaround. You can connect the desired service (app) to Ibexa Connect using Ibexa Connect's HTTP module.
In the following article, we will describe how to connect almost any web service to Ibexa Connect using an API Key/API token.
Like it is for most web services, the procedure of connecting the service via an API token is similar and consists of the following steps:
-
Create an application on the web service's website.
-
Obtain the API Key/API token.
-
Add Ibexa Connect's HTTP > Make an API Key Auth request module to your scenario.
-
Set up the module according to the web service's API documentation and run the scenario.
Note
We will use the Pushover notification service as an example.
Creating a new application and obtaining the API token
-
Log in to your Pushover account.
-
Click Create an Application/API Token.
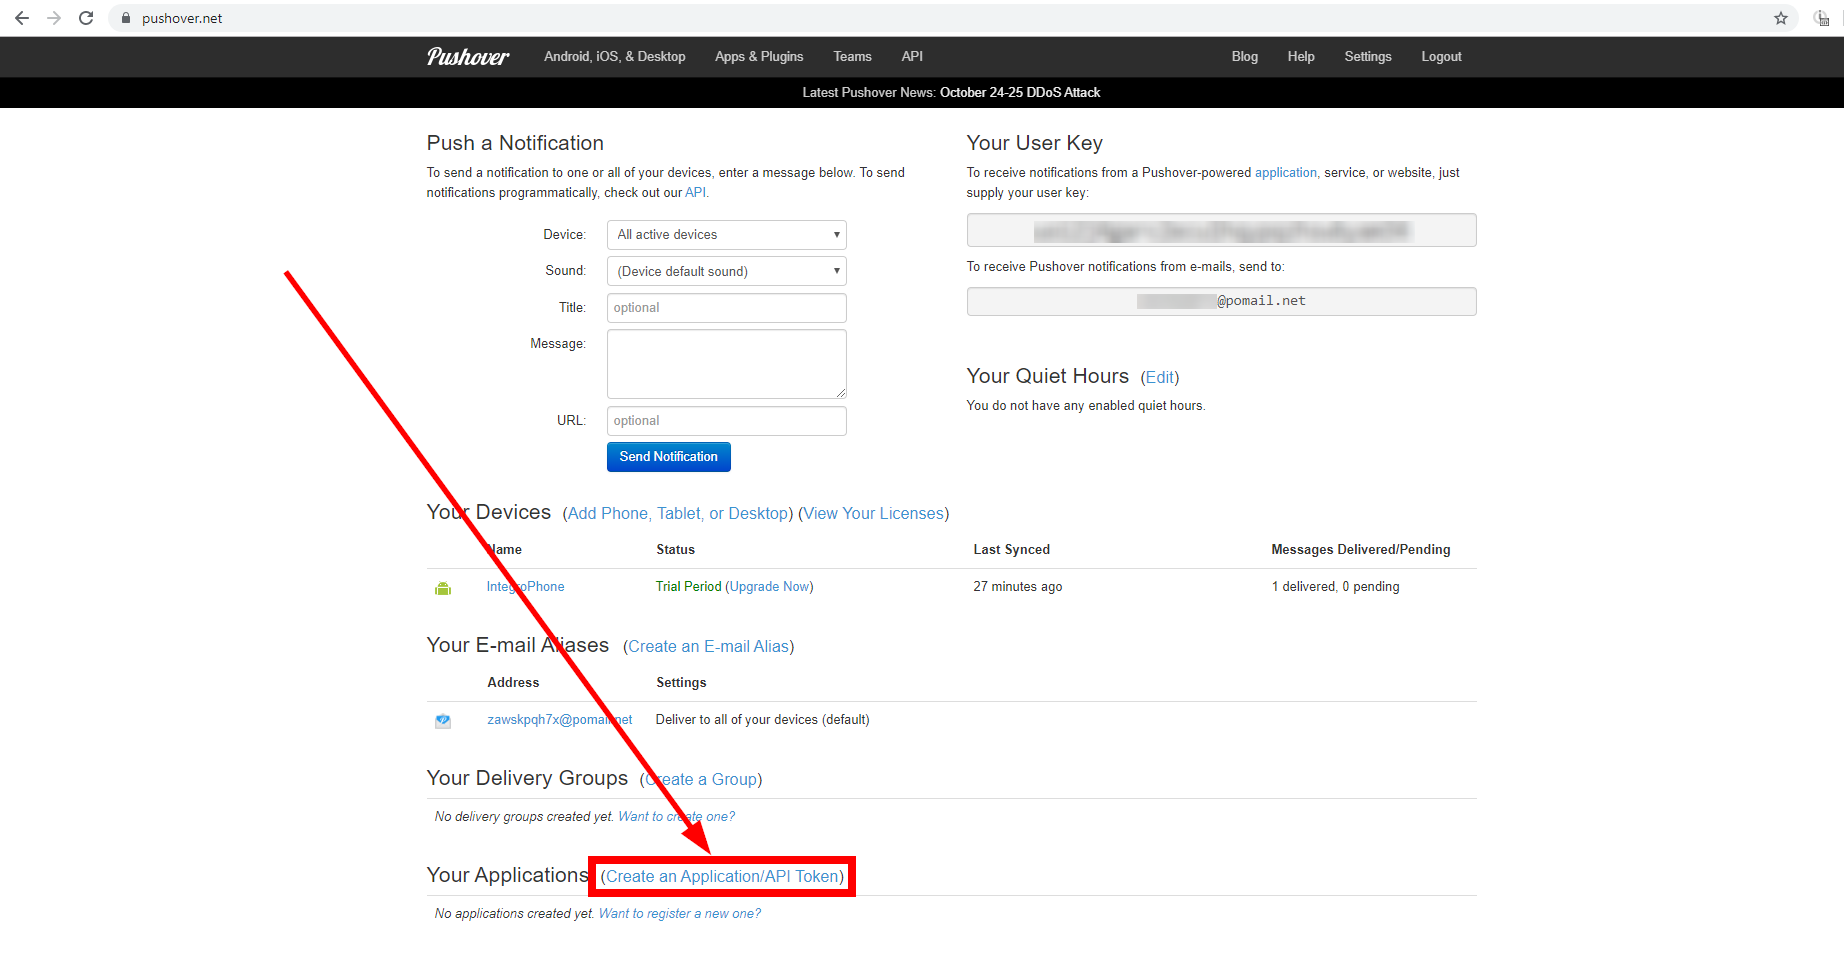
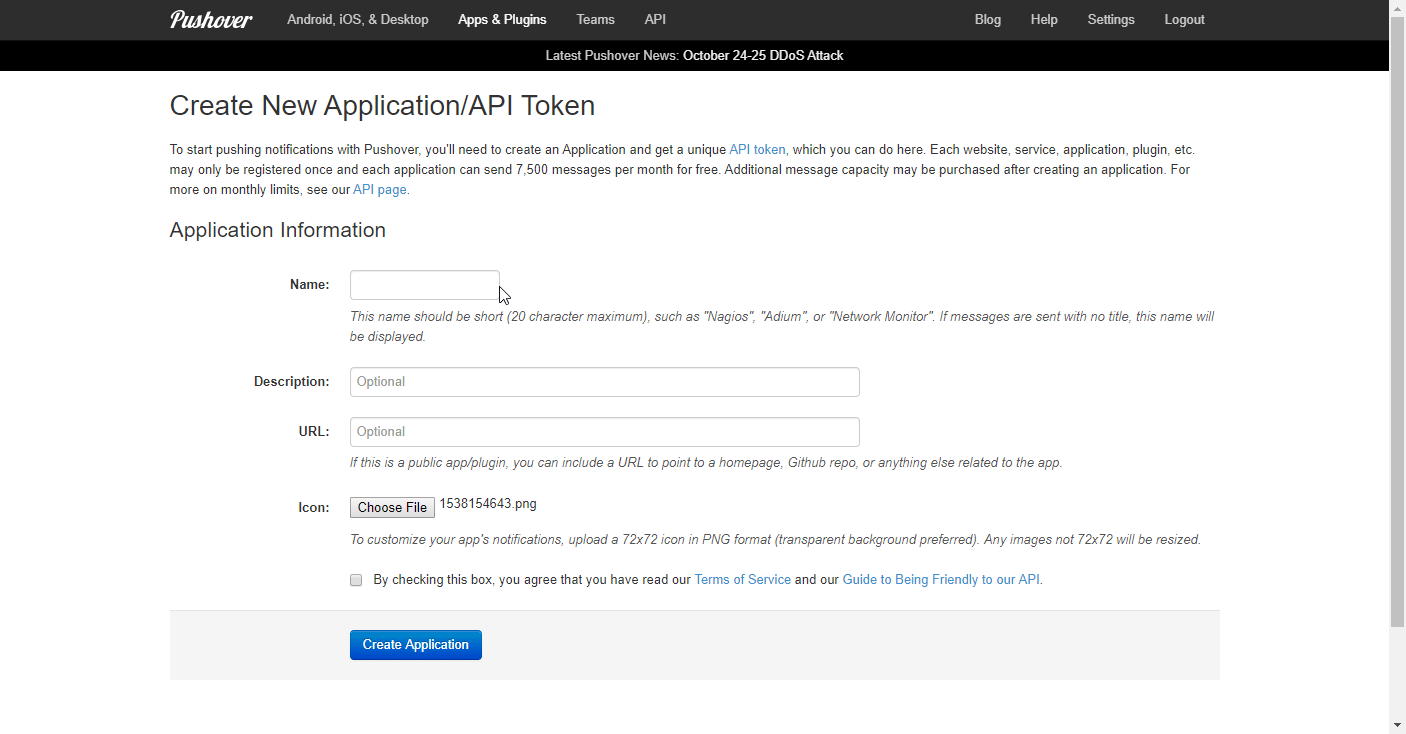
-
Fill in the application information and click Create an Application.
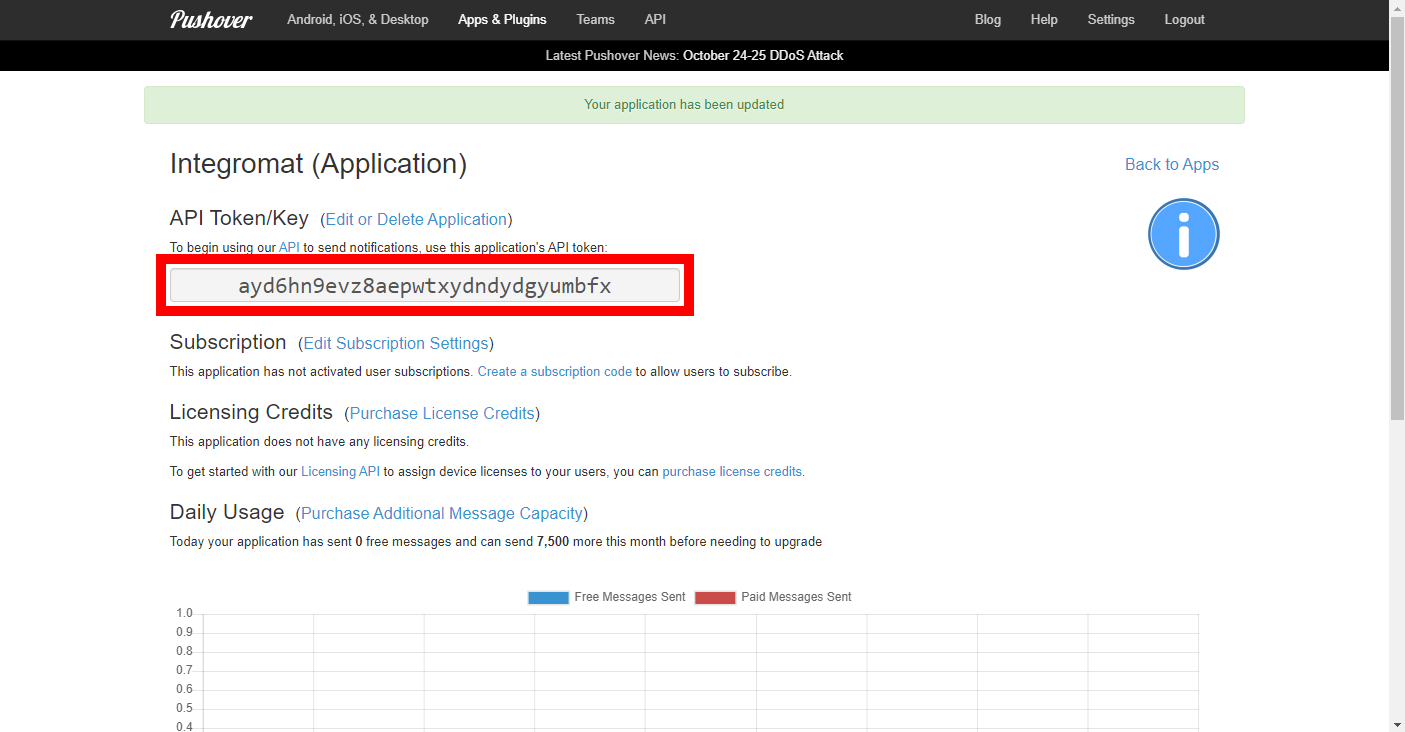
-
Store the provided API token in a safe place. You will need it for your HTTP > Make an API Auth Key Request module to connect to the desired web service (Pushover, in this case).
Setting up the HTTP module
To connect a web service to your Ibexa Connect scenario, you need to:
-
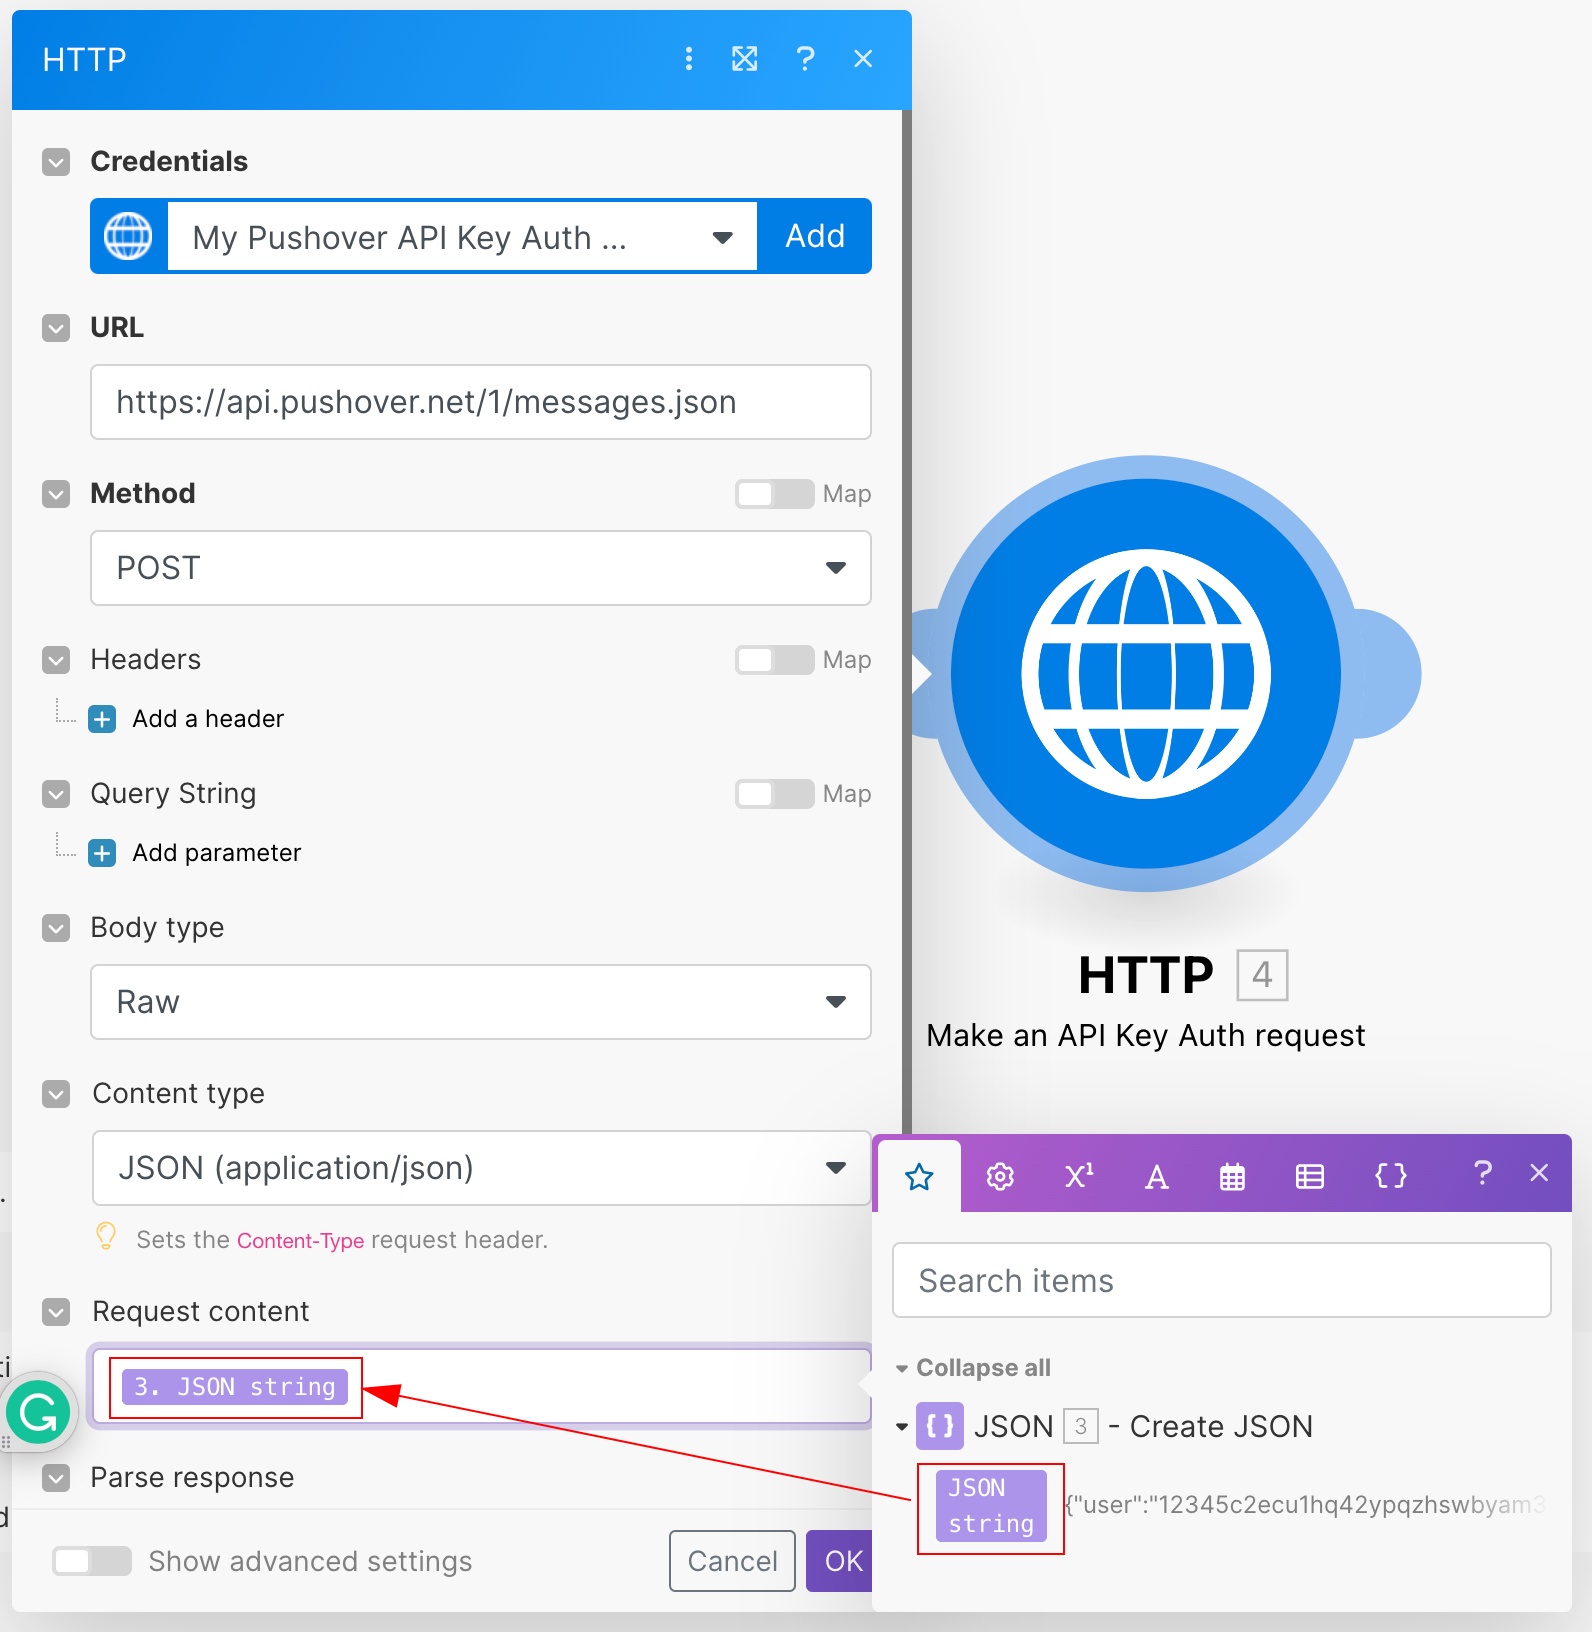
Add the HTTP > Make an API Key Auth request module to your Ibexa Connect scenario.
-
Set up the HTTP > Make an API Key Auth request module according to the web service's API documentation.
-
Add the HTTP > Make an API Key Auth request module to your scenario.
-
Under Credentials, click Add.
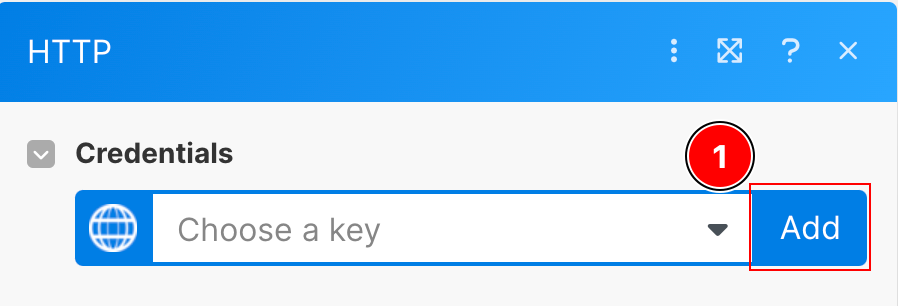
- Enter your Pushover API Key into the Key field. Ibexa Connect hides your key. You can click on the visibility icon to view your key.
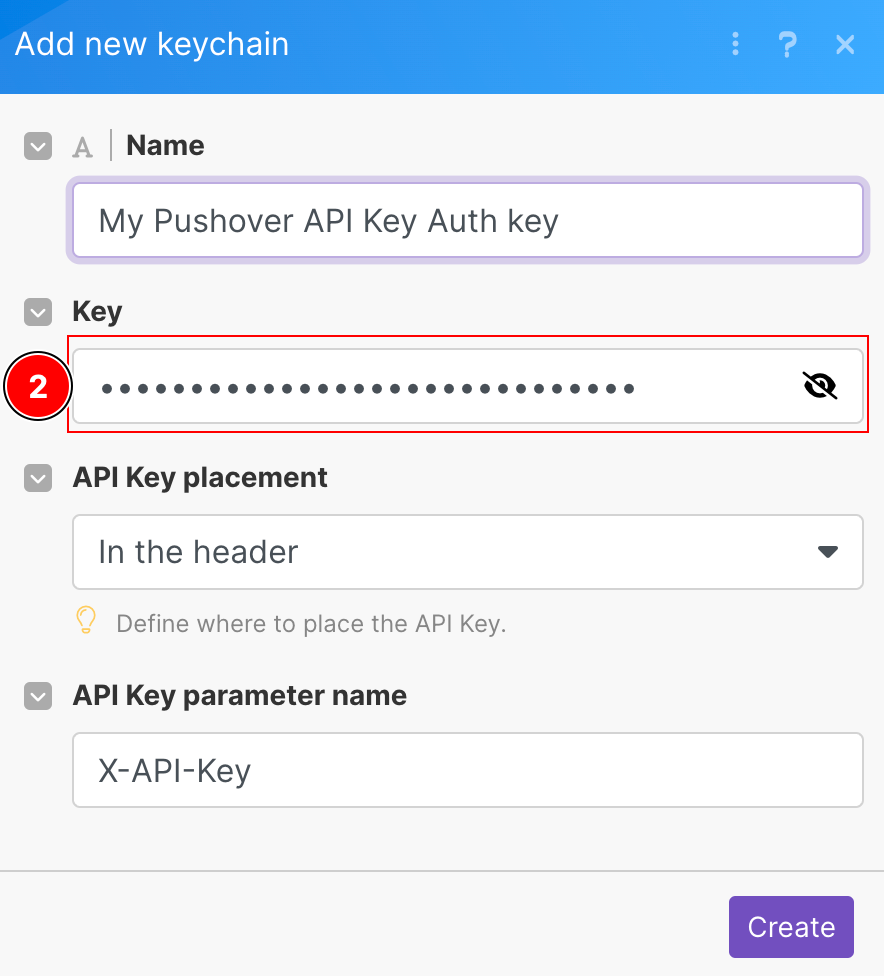
- Enter the following to integrate your Pushover account with Ibexa Connect:
Note
These module settings correspond to the Pushover web service API documentation. Settings vary across web services. For example, some services require the API token in the Header and not in the Body field.
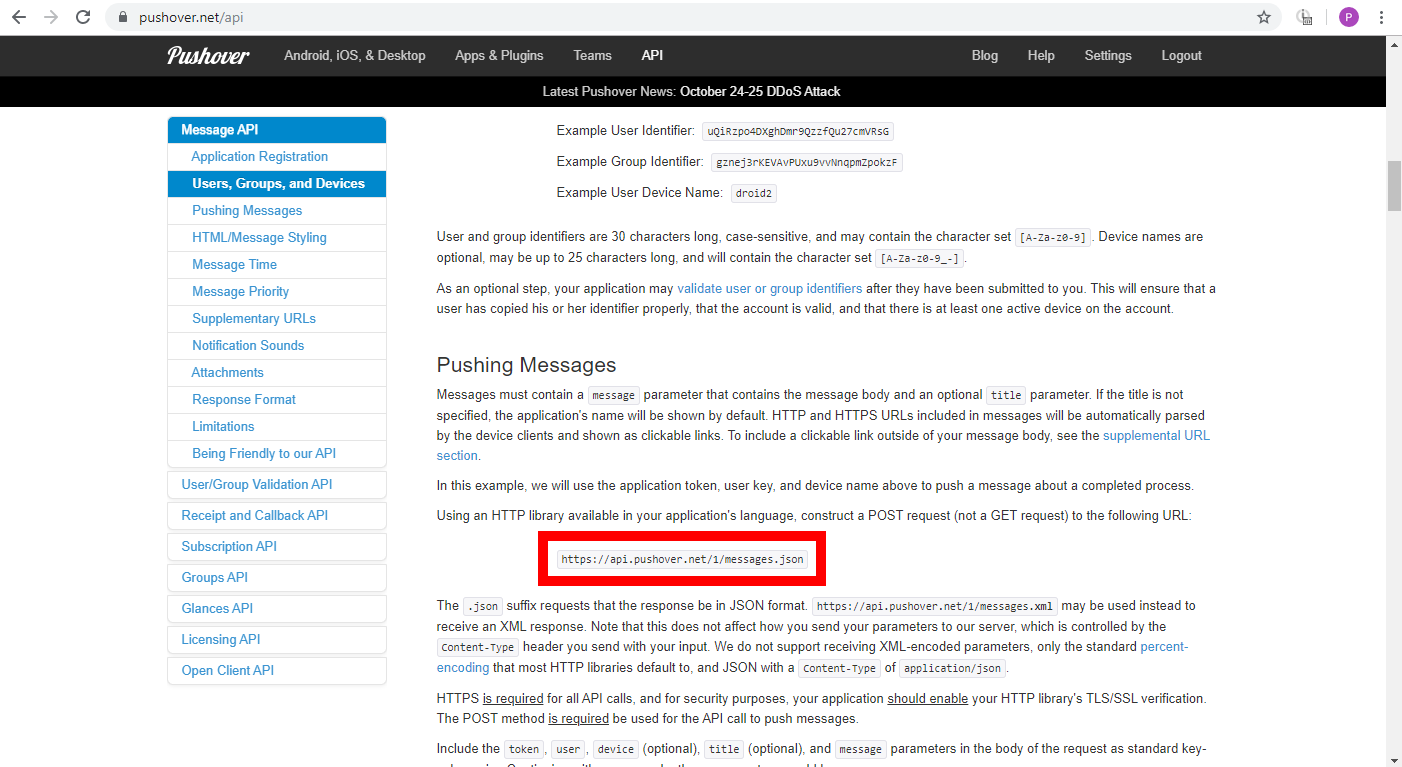
- URL :
https://api.pushover.net/1/messages.json
The URL field contains the endpoint that you can find in the respective web service's API documentation.
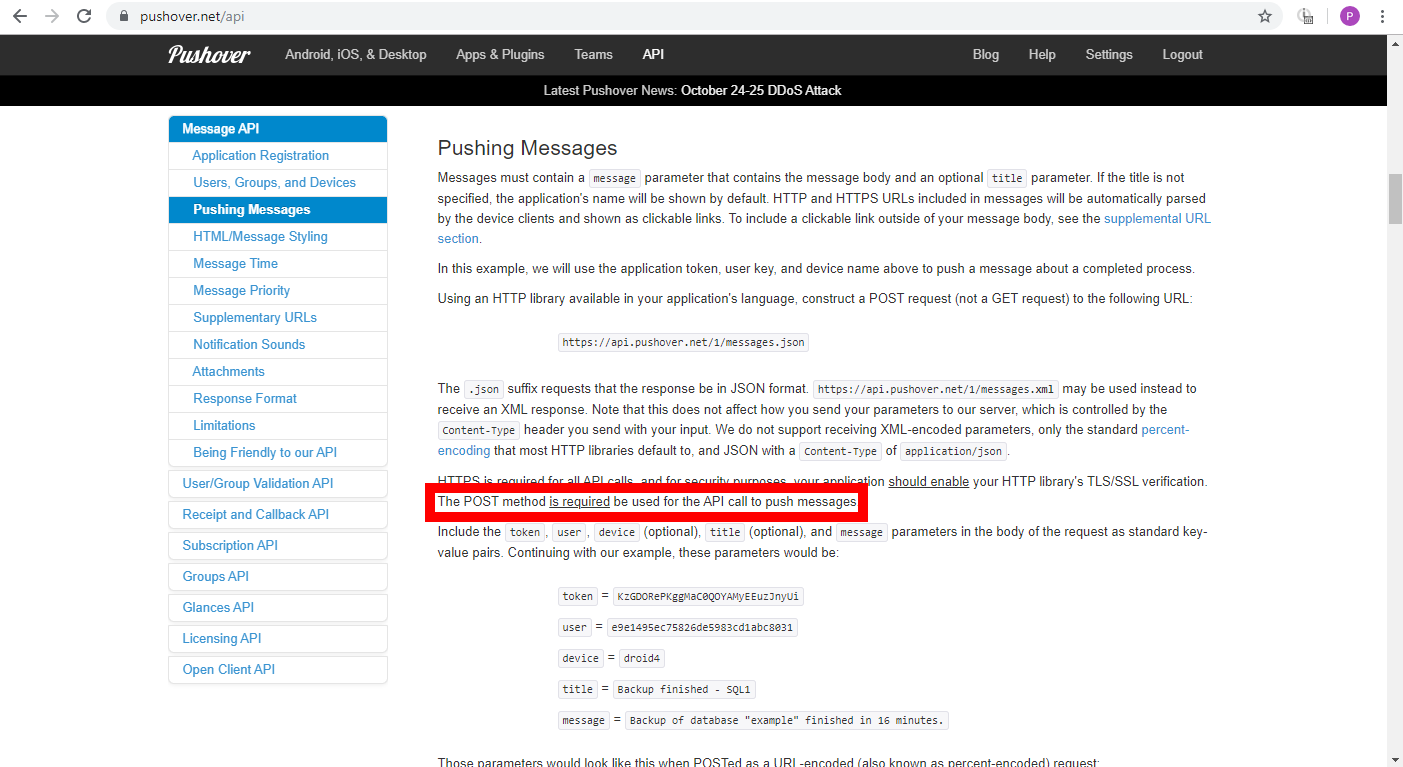
- Method:
POST
Select a method based on the endpoint you want to use. The Pushover endpoint for pushing messages requires the POST method.
-
Headers: Some web services may use Headers to specify the API token authentication and/or other parameters. This is not the case in our example as the Pushover's endpoint for pushing messages uses Body (see below) for all request types.
-
Query String: Some web services may use Query String to specify other parameters. This is not the case in our example as the Pushover web service uses Body (see below) for all request types.
-
Body Type:
Raw- This setting allows you to select the JSON content type in the Content Type field below. -
Content Type:
JSON (application/json)
JSON is the required content type by the Pushover app. This may differ from other web services.
- Request Content: Enter the Body request content in the JSON format. You can use the JSON > Create JSON module or enter the JSON content manually.
Note
See the web service's API documentation for the required parameters (fields).
Manually enter the JSON request body
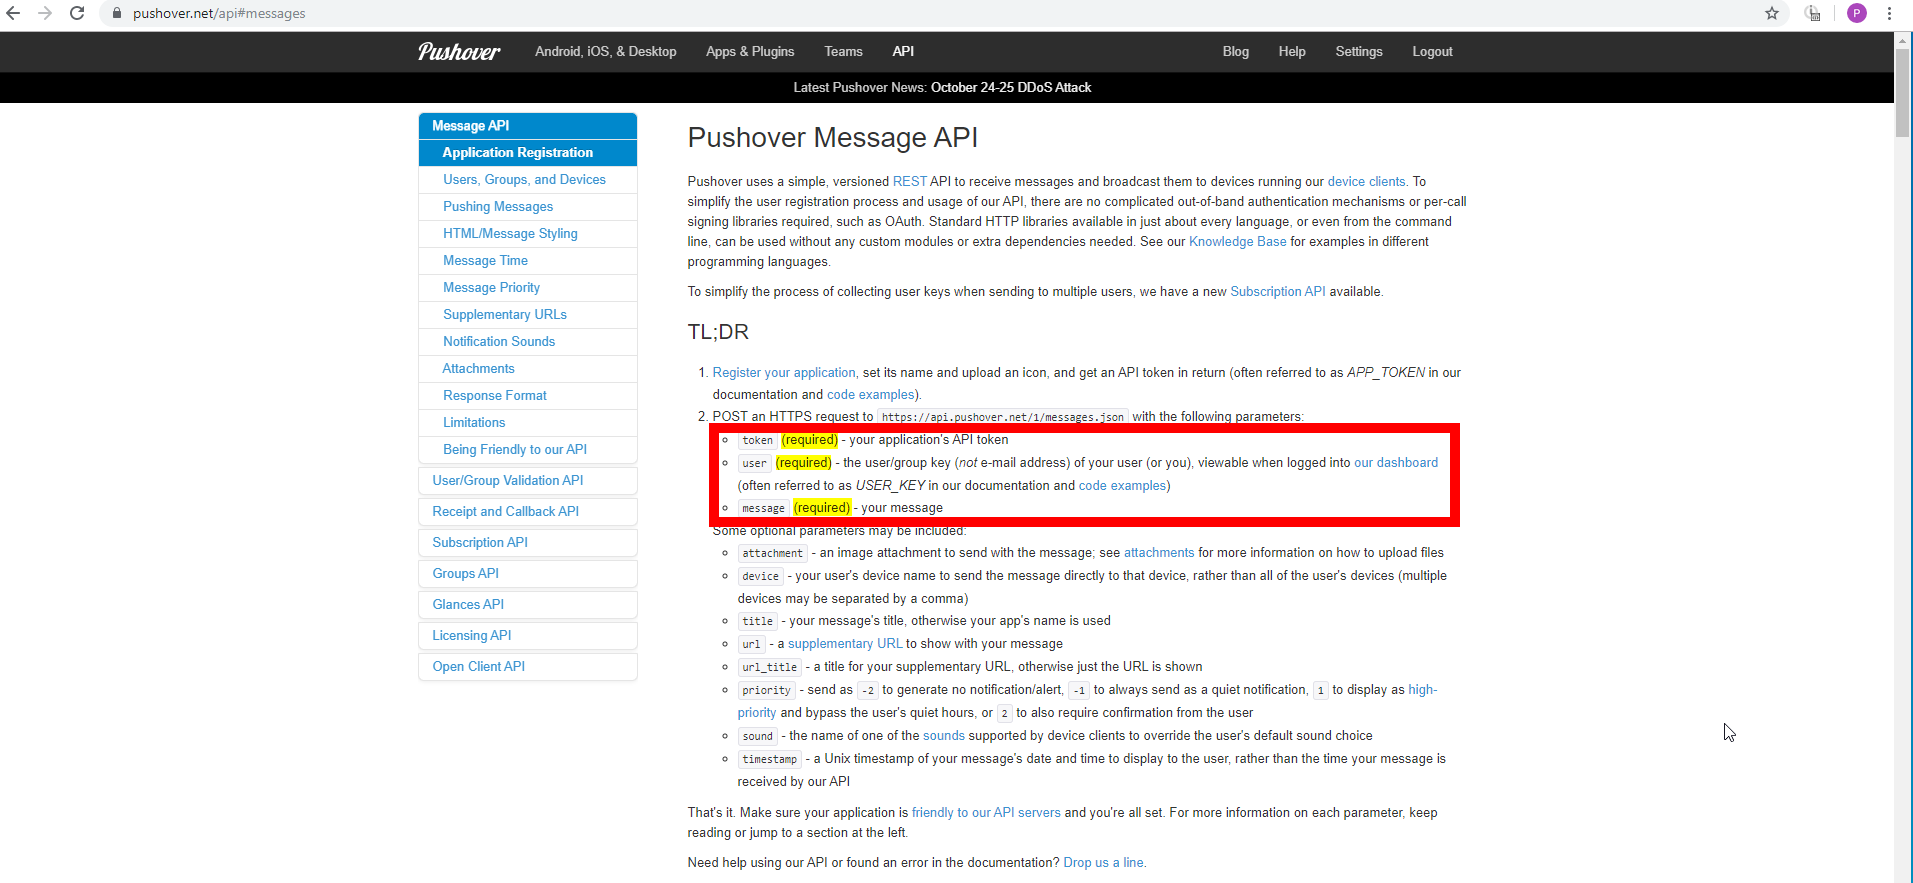
Specify the following parameters in JSON format:
| user | The user key from your Pushover dashboard.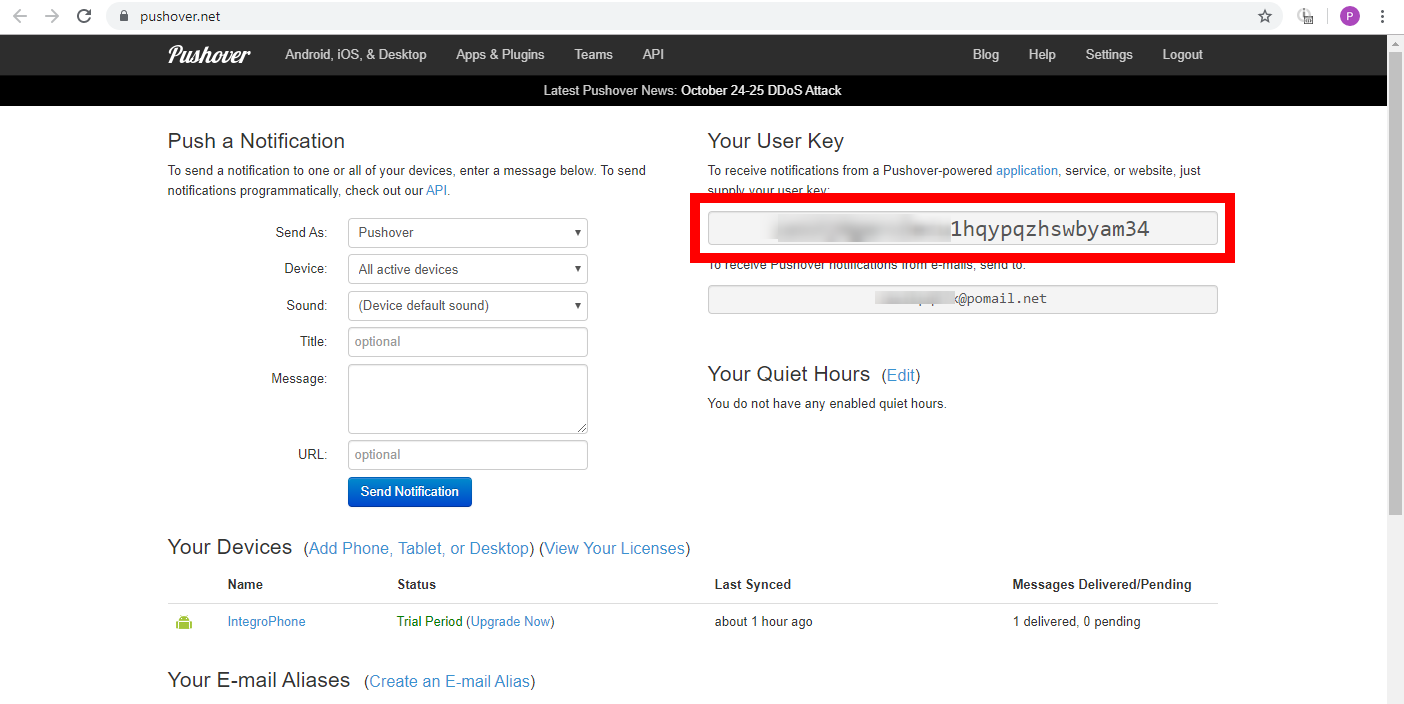 |
| token | The API token that you generated in step 4. |
| message | The text content of the push notification sent to your devices. |
| title | Optional The message's title. If left blank, your app's name is the title by default. |
Example:
1 2 3 4 | |
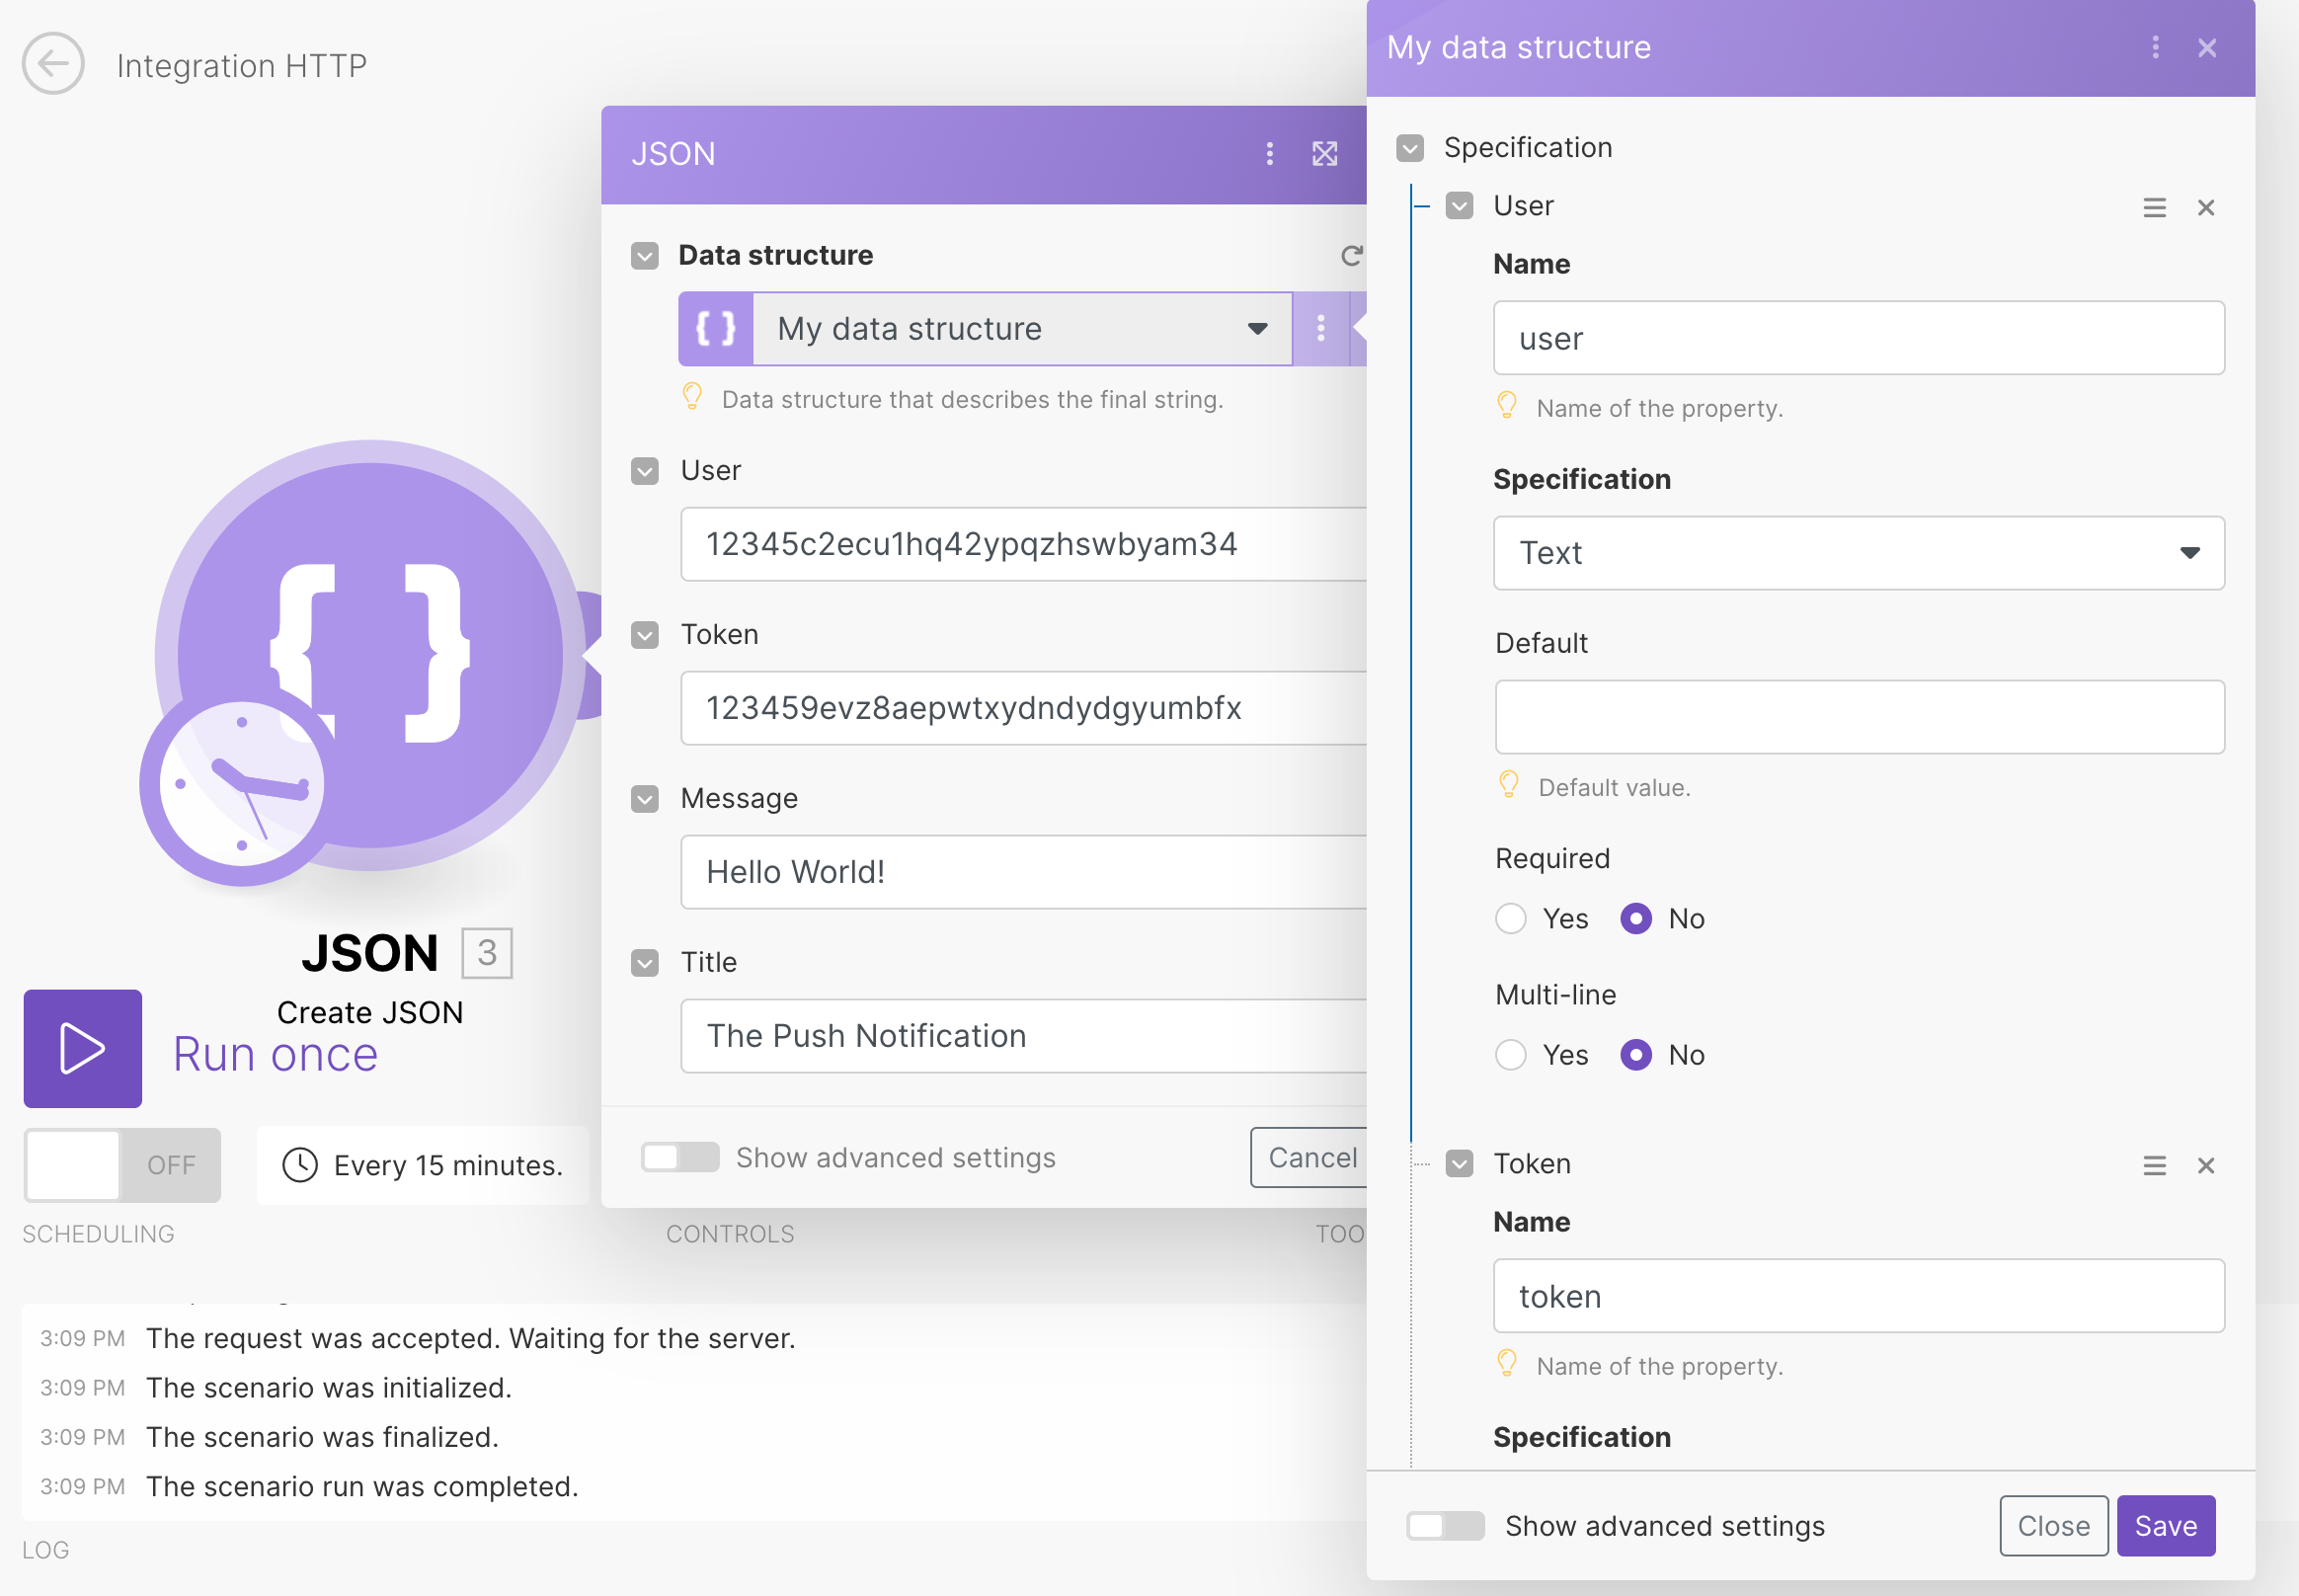
JSON body mapped using the JSON > Create JSON module
The Create JSON module helps you create the JSON required for your request body. It also gives you the possibility to define values dynamically. For more information about the JSON modules please refer to the JSON documentation.
-
Enter (or map) the values you want to create JSON from.
-
Connect the** JSON > Create JSON** module to the HTTP > Make an API Key Auth Request module you have already set up (above).

-
Map the JSON string from the Create JSON module to the Request content field in the HTTP > Make an API Key Auth Request module.
Now when you run the scenario, the push notification is sent to the device registered in your Pushover account.