DocuSign
The DocuSign modules enable you to monitor and retrieve envelope status, search and retrieve envelopes, or download and send a document to sign in your DocuSign account.
Getting Started With DocuSign
Prerequisites
- A DocuSign account
In order to use DocuSign with Ibexa Connect, it is necessary to have a DocuSign account. If you do not have one, you can create a DocuSign account at go.docusign.com/o/trial.
Note
The module dialog fields that are displayed in bold (in the Ibexa Connect scenario, not in this documentation article) are mandatory!
Connecting DocuSign to Ibexa Connect
-
Go to Ibexa Connect, and open the DocuSign module's Create a connection dialog.
-
Enter the name of the connection in the Connection name field, and click Continue.
After you click the Continue button, Ibexa Connect will redirect you to the DocuSign website, where you will be prompted to log in and grant Ibexa Connect access to your account.
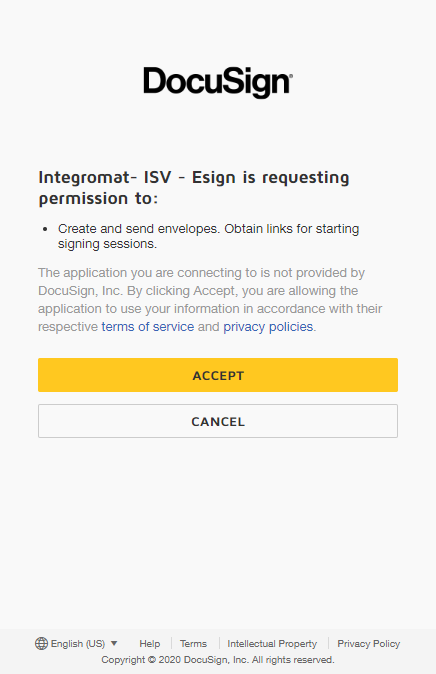
Confirm the dialog by clicking the Accept button.
Envelope
Watch Events
Triggers when an envelope changes its status.
Note
This is available only for Business Pro DocuSign eSignature pricing plan and higher.
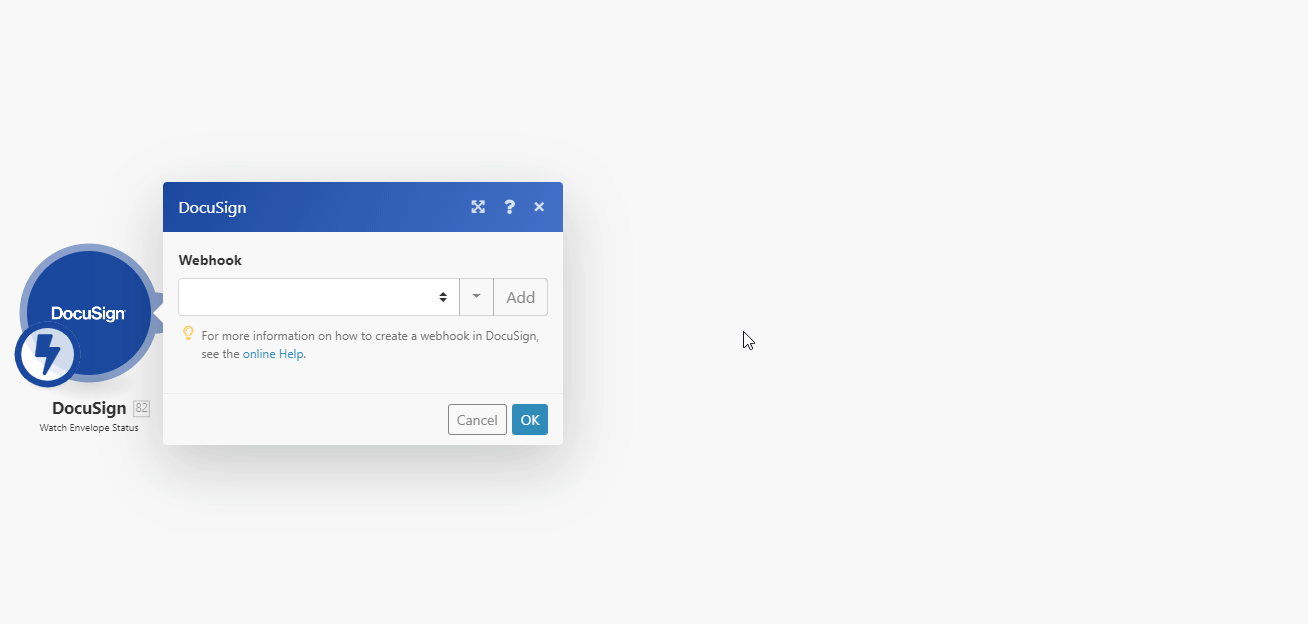
The webhook URL needs to be generated in Ibexa Connect and then added to DocuSign's integrations settings.
-
Add the Watch Events module to your Ibexa Connect scenario.
-
Generate and copy the webhook URL.
-
Log in to your DocuSign account.
-
Go to Settings > Connect.
-
Click Add Configuration, and select Custom.
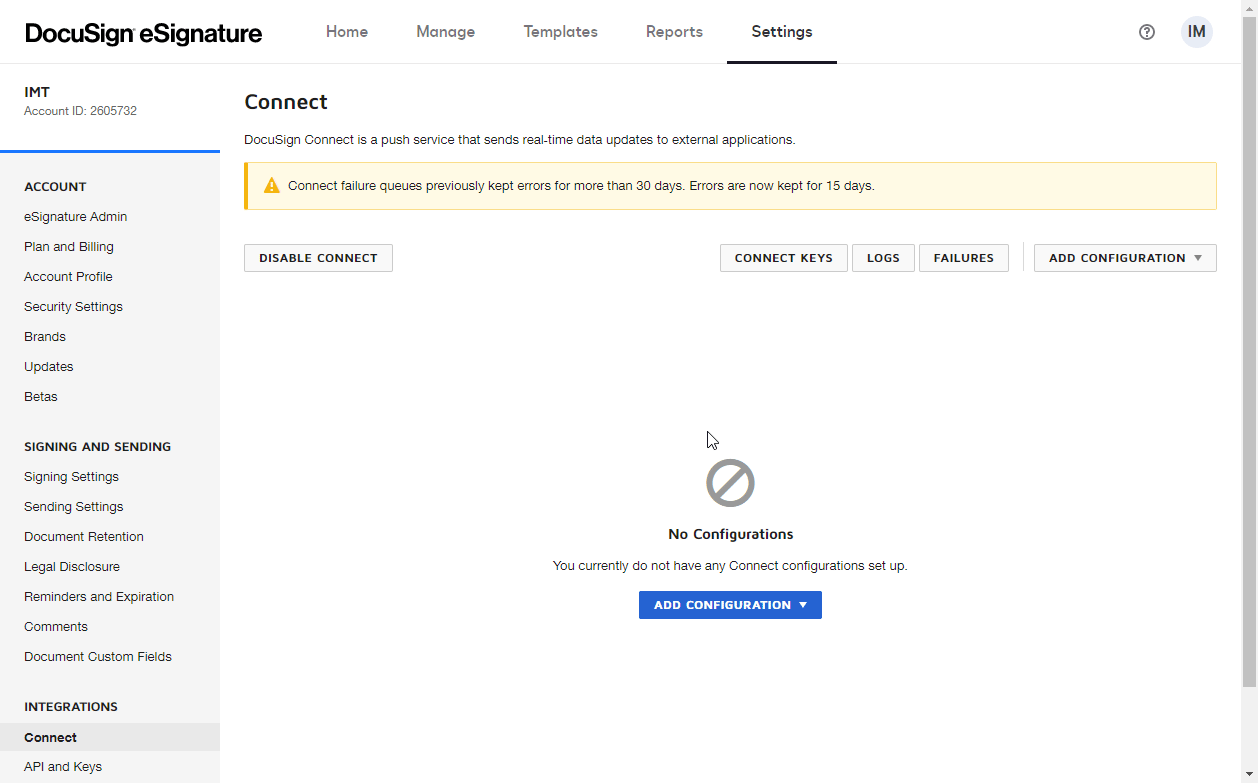
-
Fill in the fields as follows:
Name Enter the name of the webhook. URL to Publish Enter the webhook URL you have copied in step 2 above. Include Select the information that you want to include in the webhook. Trigger Events Select events that will trigger the webhook and the Watch Events module in your Ibexa Connect scenario. -
Click the Add button (
 ) to save and close the dialog.
Now, every time the specified events occur in your DocuSign account, the Watch Events module in your Ibexa Connect scenario is triggered.
Note
Search Envelopes
Searches for envelopes by the filter settings.
Account |
Select the account you want to search for envelopes. |
From Date |
Enter the date and time to start looking for status changes. Please refer to the list of supported date and time formats. |
To Date |
Enter the date and time to stop looking for status changes. Please refer to the list of supported date and time formats. |
Envelope IDs |
Add the envelope IDs to filter returned envelopes by. |
Transaction IDs |
Add the envelope transaction IDs to filter returned envelopes by. Transaction IDs are only valid for seven days. |
Status |
Select the envelope statuses you want to be included in the result. |
From To Status |
Select the envelope status that you are checking for. For example, if you select |
Search |
Enter the search term you want to use to filter the list of returned envelopes. |
Order |
Select whether you want to return envelopes in ascending or descending order. |
Order By |
Select the property you want to sort returned envelopes by. |
Limit |
Set the maximum number of envelopes Ibexa Connect will return during one execution cycle. |
User Filter |
Returns envelopes where the authenticated user is the recipient, the sender, or the recipient only. |
Include in Response |
Select additional information to return about the envelopes.
|
Get an Envelope Status
Retrieves envelope details.
Account |
Select the account that contains the envelope you want to retrieve details about. |
Envelope ID |
Enter (map) the ID of the envelope you want to retrieve details about. |
Include in Response |
Select additional information to return about the envelopes.
|
Download a Document
Downloads a specified document from the envelope.
| Account | Select the account you want to download a document from. |
| Envelope ID | Enter (map) the ID or select the envelope that contains the document you want to download. |
| Document ID | Enter (map) the ID or select the document you want to download. |
| Certificate | Select the No option to exclude the envelope signing certificate from the download. |
| Documents by User ID | When the Yes option is selected, it allows the recipients to get documents by their user ID. For example, if a user is included in two different routing orders with different visibilities, using this option returns all of the documents from both routings. |
| Encrypt | When enabled, the PDF bytes returned in response are encrypted for all the key managers configured on your DocuSign account. |
| Show Changes | When set to Yes, any changed fields for the returned PDF are highlighted in yellow, and optional signatures or initials are outlined in red. |
| Watermark | When set to Yes, the account has the watermark feature enabled, and the envelope is not complete, the watermark for the account is then added to the PDF documents. This option can remove the watermark. |
| Language | Select the language of the Certificate of Completion in the output. |
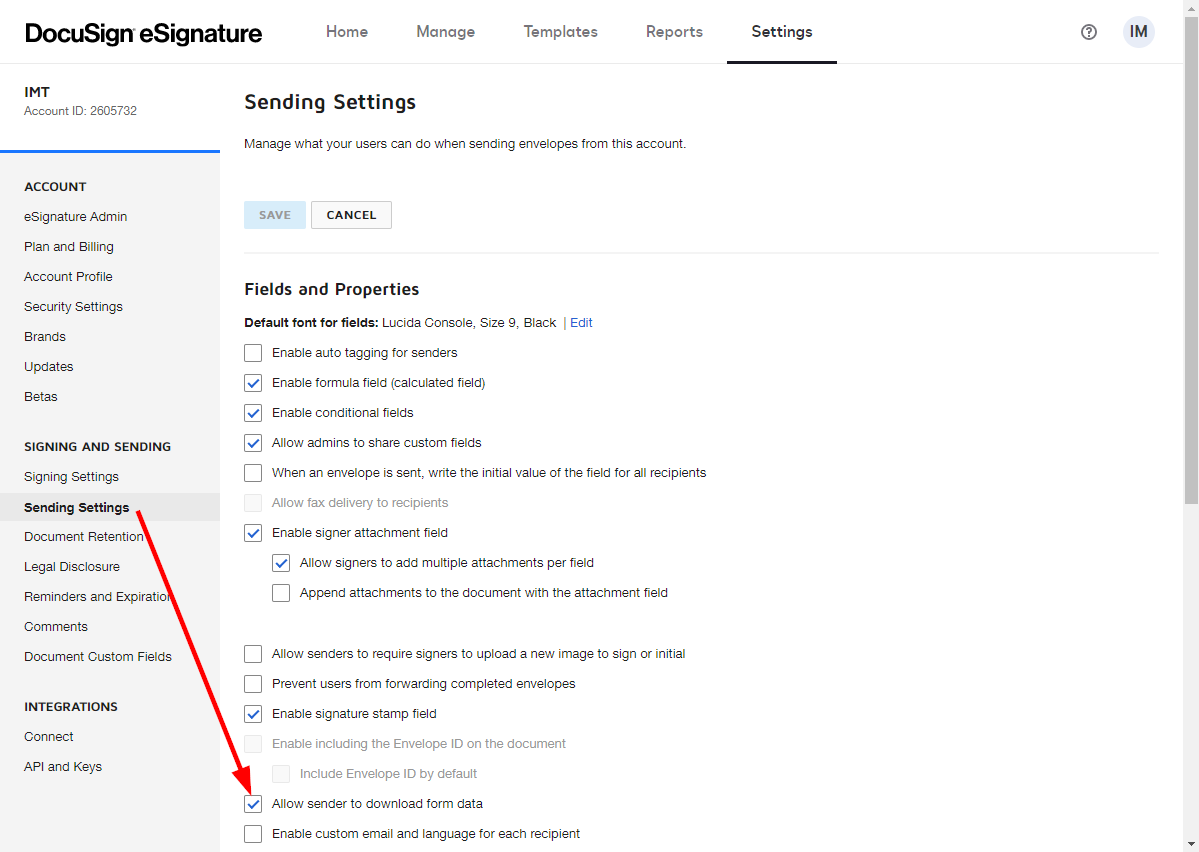
Get Envelope Form Data
Downloads the envelope and field data from any in progress, completed, or canceled envelope that you sent or that is shared with you.
Note
To use this module, go to DocuSign Settings > Sending Settings and enable the Allow sender to download form data option. Otherwise, the [400] This User lacks sufficient permissions error will be returned.
| Account | Select the account that contains the envelope you want to retrieve the form data from. |
| Envelope ID | Enter (map) the ID of the envelope you want to retrieve the form data from. |
Send a Document to Sign
Sends a document to signers.
Account |
Select the account that contains the envelope with the document you want to send in order to be signed. |
||||||
Draft |
Enable this option to save the envelope as a draft. If disabled, the envelope will be sent to recipients. |
||||||
Signers |
Add the signers you want to send the document to.
|
||||||
Add Access Code |
Enable this option, and enter the code. If you enter a value, the recipient must enter the value as the access code to view and sign the envelope. Maximum Length: 50 characters, and it must conform to the account's access code format setting. If blank, but the signer If blank, and the signer |
||||||
Note |
Enter a note that is sent to the recipient in the signing email. This note is unique to this recipient. In the user interface, it appears near the upper left corner of the document on the signing screen. Maximum Length: 1000 characters. |
||||||
Subject |
Enter the subject of the email used to send the envelope. |
||||||
Message |
Enter the content of the email blurb. |
||||||
Documents |
Add documents you want to send.
|
Send a Document From Template to Sign
Creates and sends an envelope from a template.
Account |
Select the account that contains the envelope with the document template you want to send in order to be signed. |
||||||
Template |
Enter (map) or select the template you want to send a document from. |
||||||
Draft |
Enable this option to save the envelope as a draft. If disabled, the envelope will be sent to recipients. |
||||||
Subject |
Enter the subject of the email used to send the envelope. |
||||||
Message |
Enter the content of the email blurb. |
||||||
Template Recipients |
Add the signers of the document.
|
Other
Make an API Call
Allows you to perform a custom API call.
Account |
Select the account you want to make an API call for. |
||
URL |
Enter a path relative to For example: | For the list of available endpoints, refer to the DocuSign API Reference. |
Method
Select the HTTP method you want to use:
GET
to retrieve information for an entry.
POST
to create a new entry.
PUT
to update/replace an existing entry.
PATCH
to make a partial entry update.
DELETE
to delete an entry.
Headers
Enter the desired request headers. You don't have to add authorization headers; we've already done that for you.
Query String
Enter the request query string.
Body
Enter the body content for your API call.
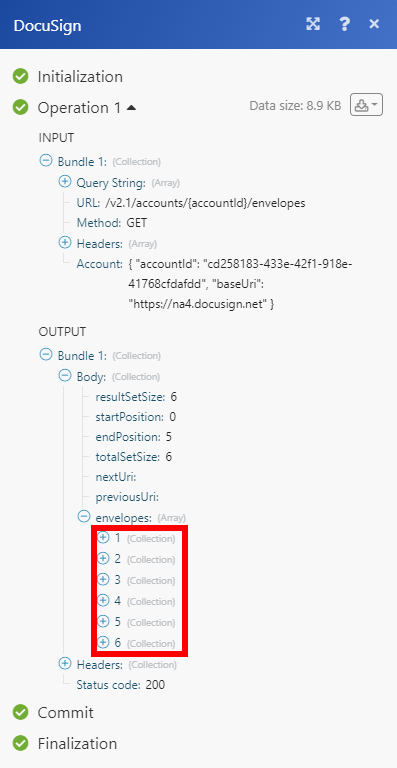
Example of Use - List Envelopes
The following API call returns envelopes from the specified date in your DocuSign account:
URL:
/v2.1/accounts/{accountId}/envelopes/
Method:
GET
Query String:
Key: from_date
Value: YYYY-MM-DD Specifies when the request begins checking for status changes for envelopes in the account.
 |
The result can be found in the module's Output under Bundle > Body > envelopes.
In our example, 6 envelopes were returned: