Scenario inputs
The scenario inputs feature allows everyone to run complex scenarios by just filling in the required scenario inputs.
Scenario inputs allow you to pass data with a predefined structure to a scenario every time you run it. First, you define the expected data structure. Then, whenever you run the scenario, Ibexa Connect shows a form where you enter the data. The data from your scenario input is then made available to all modules in the scenario.
Imagine a new employee is about to start working in your company. You may need to create new accounts for your new employee in several different systems (e.g. JIRA, Slack, Email, Miro, etc). To create these accounts, you need the new employee’s name, email, employee ID, and maybe some other personal information. Without this data, you cannot proceed with the account creation. Once you have all the necessary information, you can start setting up the accounts for the new employee.
To automate this action, you can set up a scenario that will create new accounts for your new employee in all the different systems you need. Use the scenario inputs feature to define the input structure as the starting point of your scenario. You can use the name, email, and employee ID as your scenario inputs. Once you enter and save the employee information to the scenario, the scenario runs and makes all the accounts so your new employee is good to go! The scenario cannot proceed unless it has all the data you define as required.
Moreover, you don't need to know all the complex scenario logic behind it and how the accounts are created in different systems. A Ibexa Connect expert can pre-build the scenario(s) for you. All you need to do is just enter the required inputs (name, email, employee ID) and the scenario will run. In this way, even casual users can run complex automation using scenario inputs.
Some other cases in which you might use scenario inputs:
- Syncing information about a new customer in multiple systems
- Adding offline leads to the CRM, email lists, and creating a proposal
- Creating a new record/invoice/email/order by just providing a set of inputs
Watch the video
Define the scenario input structure
Scenario inputs allow you to pass data with a predefined structure to a scenario every time you run it. First, define the expected data structure necessary to start your scenario. Then, whenever you run the scenario with defined scenario inputs,Ibexa Connect shows a form where you enter the required data. You can use the data from your scenario input in all modules in the scenario.
Note
You can define scenario inputs for your scenario before or after adding your modules.
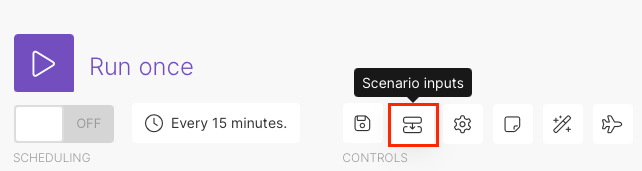
- In the scenario editor, click the scenario input icon.
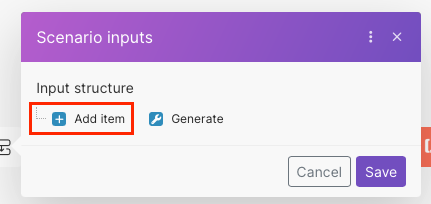
- Click Add item.
The process is the same as defining a data structure.
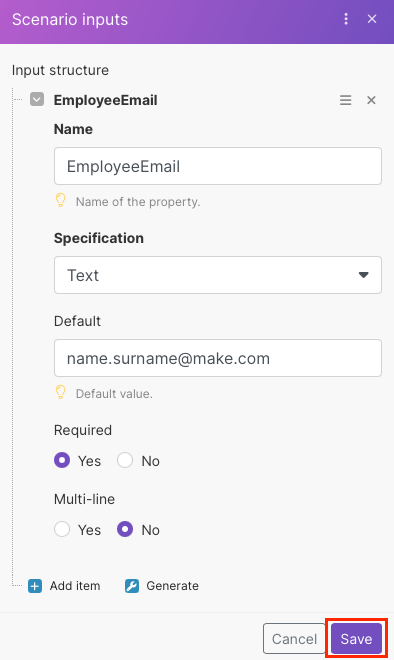
- Enter the Name. This field is mandatory.
Caution
- You cannot use spaces or special characters in the name. You can use letters, numbers, and the underscore symbol (_).
- You can only start with a letter or underscore.
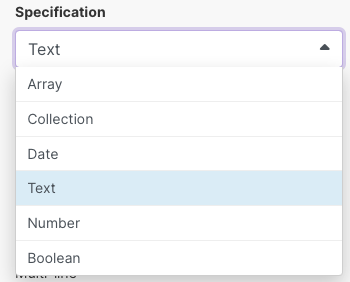
- In Specification, select the input data type from the dropdown menu.
-
Optional: In Default, enter the default value you expect to get.
-
In Required, select whether this input is required or not to start your scenario.
-
If you select Yes, your scenario cannot run unless you provide the required input.
Caution
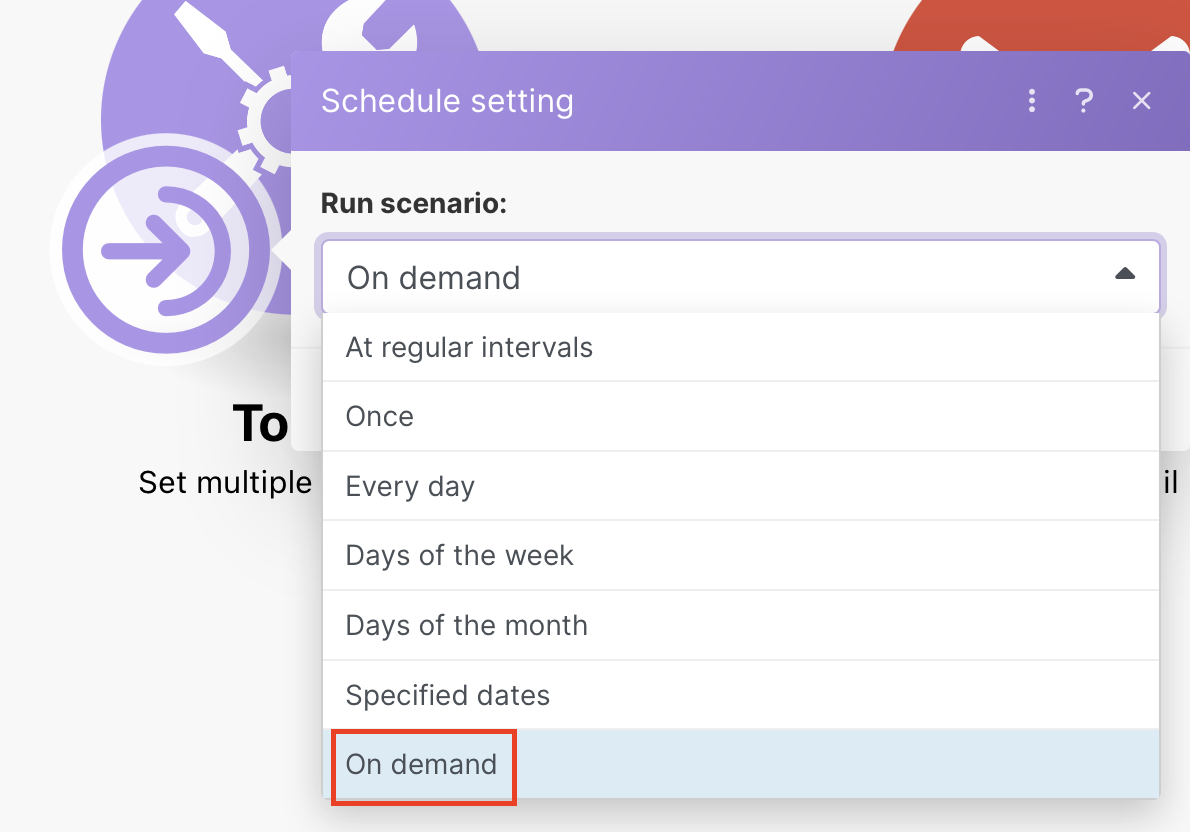
If you have Required inputs, your scenario scheduling type must be On-demand.
Learn more about On demand scheduling.
-
If you select No, the scenario can run without the specific input.
-
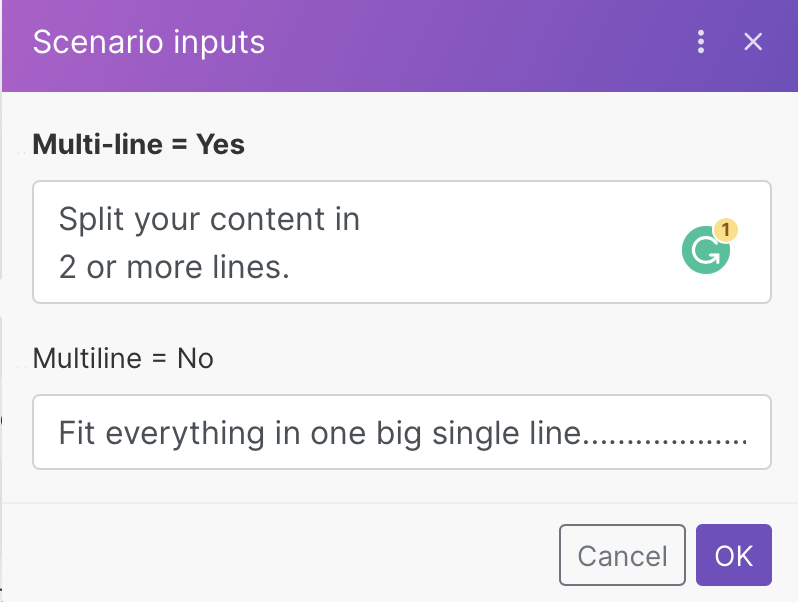
Optional: If you selected Text, Array, or Collection as your Specification, in Multi-line, select how you want your text to show.
-
Selecting Yes shows multiple lines of text to show.
-
Selecting No shows only one line of text.
-
Repeat the process if you need to add more items.
-
Click Save.
Note
Clicking Save in the scenario inputs form interface does not save the inputs. You still need to save your whole scenario.
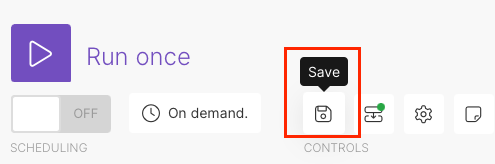
- Click the save icon to save your scenario.
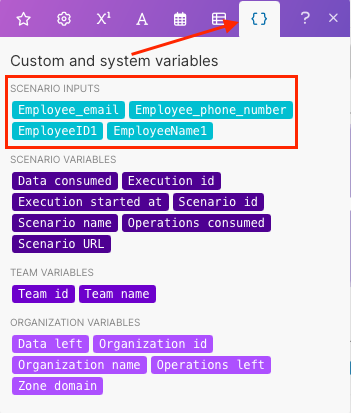
You can use the scenario inputs as mappable values in your scenarios. You can find them under the Variables tab in the mapping dialog.
Tip
Use Generate to generate a data structure descriptor according to your content type.
Tip
You can also define the expected structure of the scenario inputs via an API call. Learn more.
This might be useful, for example, if a third party integrates Ibexa Connect in their product and wants to generate a form for their users to pass data to the scenario.
Using scenario inputs
Once you define your scenario inputs, your defined scenario inputs appear as mappable values under the Variables tab in the mapping dialog. You can use scenario input mappable values in your scenarios.
With defined scenario inputs, every time you trigger a scenario (via Run Once or via API), the scenario inputs window pops up.
The scenario with scenario inputs can run only if you fill in all the required fields with the correct data types.
Edit the scenario input structure
Caution
Editing the input structure item(s) in an active scenario might lead to data inconsistencies and scenario failure.
-
Navigate to the scenario input icon in the scenario editor.
-
Click on the item you want to edit.
-
Make your changes.
Caution
Changing the scenario input name will cause scenarios to fail with errors.
If you need to change the input name, we recommend deleting the old item and adding a new one with the new name.
Caution
If you change the inputs from not required to required, you need to change your scheduling to On-demand.
Learn more about On demand scheduling.
-
Click Save.
Once you save your changes, the changes update automatically everywhere you use the specific input mappable value. This does not refer to the scenario input name (see above).
Delete items in the scenario input structure
Caution
Deleting the input structure item(s) in the active scenario might lead to data inconsistencies and scenario failure.
-
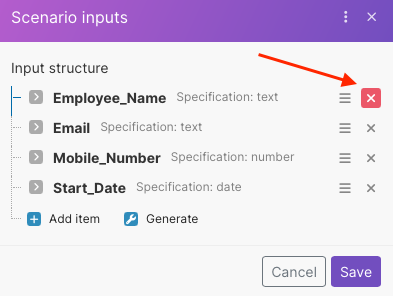
To delete an item from an input structure, navigate to the scenario input icon in the scenario editor.
-
Find an item you want to delete.
-
Click X to delete the item.
To delete all items, click X for all of the items.
-
Click Save to save your changes.
Related APIs
The Ibexa Connect API allows you to define scenario inputs programmatically, as well as use the API to pass input values to a scenario and run it.
In the API, the definition of scenario inputs is called scenario interface.
The following endpoints are available: