Customerly
With the Customerly modules in Ibexa Connect, you can:
-
list, retrieve, create, update and delete the users
-
list, retrieve, create, update and delete the leads
-
list, add, untag and delete the tags
To get started with Customerly, create an account at customerly.io.
Connect Customerly with Ibexa Connect
To connect the Customerly app with the Ibexa Connect:
-
Log in to your Customerly account.
-
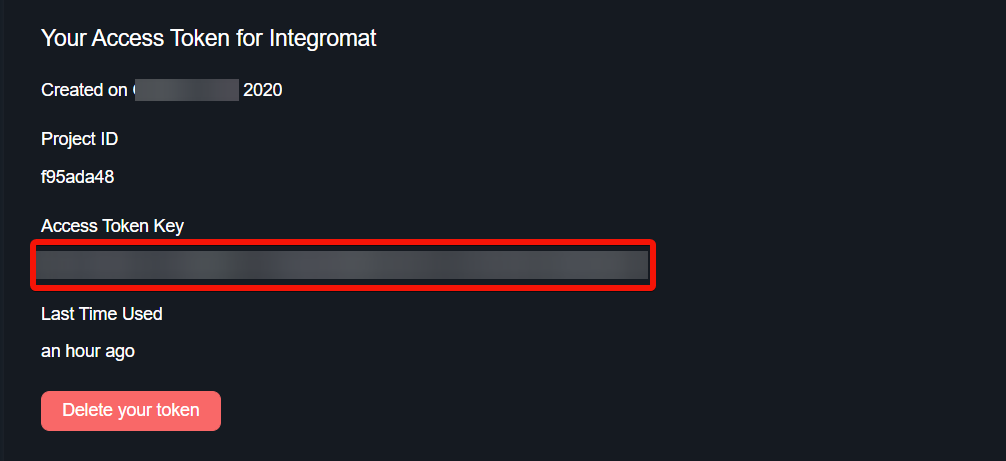
Click Profile > Settings > Installation > Public API.
-
Copy the API Token to a safe place.
-
Log in to your Ibexa Connect and add a module from the Customerly into a Ibexa Connect scenario.
-
Click Add next to the Connection field.
-
In the Connection name field, enter a name for the connection.
-
In the API Token field, enter the details copied in step 3 and click Save.
You have successfully connected the Customerly app with Ibexa Connect and can now build scenarios.
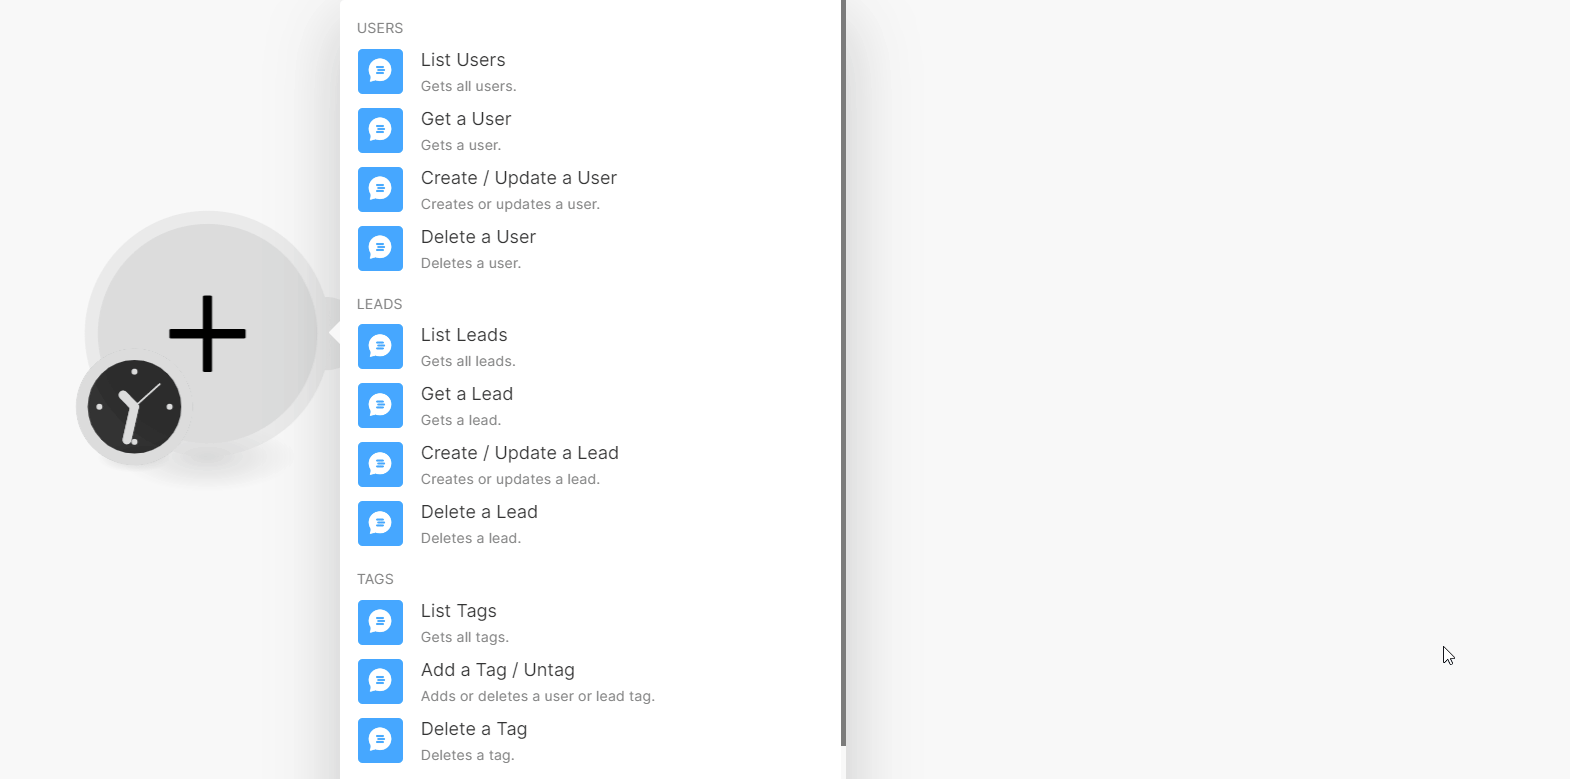
Users
You can list, retrieve, create, update, and delete users using the following modules.
List Users
Gets all users.
Limit |
Set the maximum number of users Ibexa Connect will return during one execution cycle. The default value is 10. |
Sort by |
Enter (map) a field to sort the users. For example, name. |
Sort Direction |
Select or map the order to sort the users:
|
Get a User
Gets a user.
Get User by |
Select or map a method to retrieve the user details:
|
User Email |
Select or map the user's email address whose details you want to retrieve. |
User ID |
Select or map a User ID whose details you want to retrieve. |
Create/Update a User
Creates or updates a user.
Select or map an email address to create or update the user details. | If a non-existent email is entered, it will create a new user, if an existing email is entered, it will update the user. |
User ID
Enter (map) the User ID for the user.
Name
Enter (map) the user's name.
Tags
Enter (map) the user's tags. For example, purchased.
Attributes
Enter (map) attributes key-value pair to save custom data of a particular user. For example, user's company name.
Delete a User
Deletes a user.
Get User by |
Select a method to retrieve the user you want to delete:
|
User Email |
Select or map the user's email address you want to delete. |
User ID |
Select or map a User ID you want to delete. |
Leads
You can list, retrieve, create, update and delete leads using the following modules.
List Leads
Gets all leads
Limit |
Set the maximum number of leads Ibexa Connect will return during one execution cycle. The default value is 10. |
Sort by |
Enter (map) a field to sort. For example, |
Sort Direction |
Select or map the order to sort the leads:
|
Get a Lead
Gets a lead.
| Lead Email | Select or map the lead's email address whose details you want to retrieve. |
Create/Update a Lead
Creates or updates a lead.
| Select or map the email address to create or update a lead. If the email does not exist, a new user is created. If the email exists, the user details are updated. | |
| User ID | Enter (map) the User ID of the lead. |
| Name | Enter (map) the lead's name. |
| Tags | Enter (map) the lead's tags. For example, purchased. |
| Attributes | Enter (map) attributes key-value pair to save custom data of a particular user. For example, lead's company name. |
Delete a lead
Deletes a lead.
| Lead Email | Select or map a lead's email address you want to delete. |
Tags
You can list, add, untag and delete the tags using the following modules.
List Tags
Gets all tags.
| Limit | Set the maximum number of tags Ibexa Connect will return during one execution cycle. The default value is 10. |
Add a Tag/Untag
Adds or deletes a user or lead tag.
Tag |
Select or map the tag that you want to add or remove from the lead. If the tag does not exist, then the module creates a new tag. |
Tag for |
Select or map the option to which you want to add or remove the tag:
|
Get User by |
Select or map the option to choose the user by:
|
User Email |
Select or map the Email address of the user to tag or untag. |
User ID |
Select or map the User ID to add the tag or untag. |
Lead Email |
Select or map the email address of the lead to add the tag or untag. |
Untag |
Select whether to untag the tag. |
Delete a Tag
Deletes a tag.
| Tag | Select or map a tag you want to delete. |
Triggers
You can add triggers using the following module.
Universal Triggers
Triggers when the entity to which you attached the webhook is executed.
| Webhook name | Enter a name for the webhook. |
To set up the webhooks, see Setting Up Customerly Webhooks.
Other
You can call APIs using the following module.
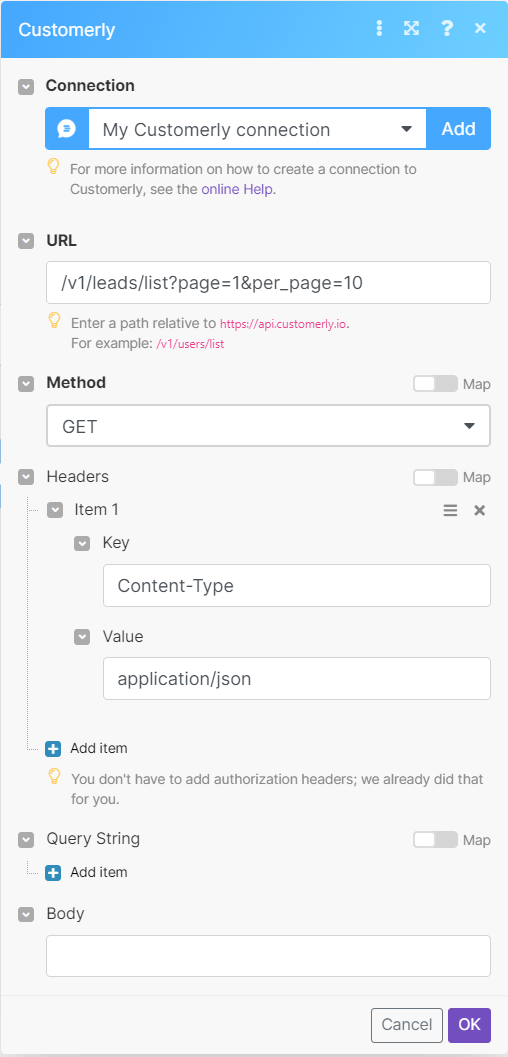
Make an API Call
Performs an arbitrary authorized API call.
URL |
Enter a path relative to | For the list of available endpoints, refer to the Customerly API documentation. |
Method
GET
to retrieve information for an entry.
POST
to create a new entry.
PUT
to update/replace an existing entry.
PATCH
to make a partial entry update.
DELETE
to delete an entry
Headers
Enter the desired request headers. You don't have to add authorization headers; we already did that for you.
Query String
Enter the request query string.
Body
Enter the body content for your API call.
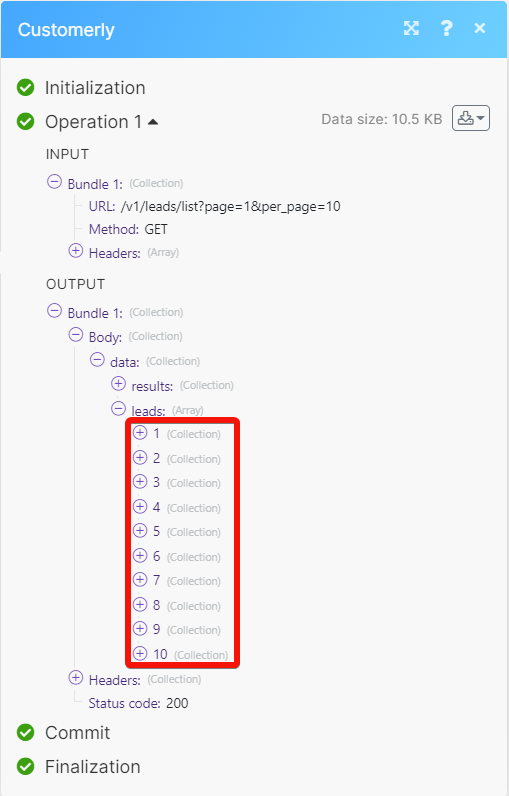
Example of Use - List Leads
The following API call returns the leads from your Customerly account:
URL:
/leads/list
Method:
GET
Matches of the search can be found in the module's Output under Bundles > Body > data > leads.
In our example, 10 leads were returned:
Setting Up Customerly Webhooks
To set up Customerly webhooks:
-
Open the Universal Triggers module, enter a name for the webhook, establish a connection, click Save, and copy the URL address to your clipboard.
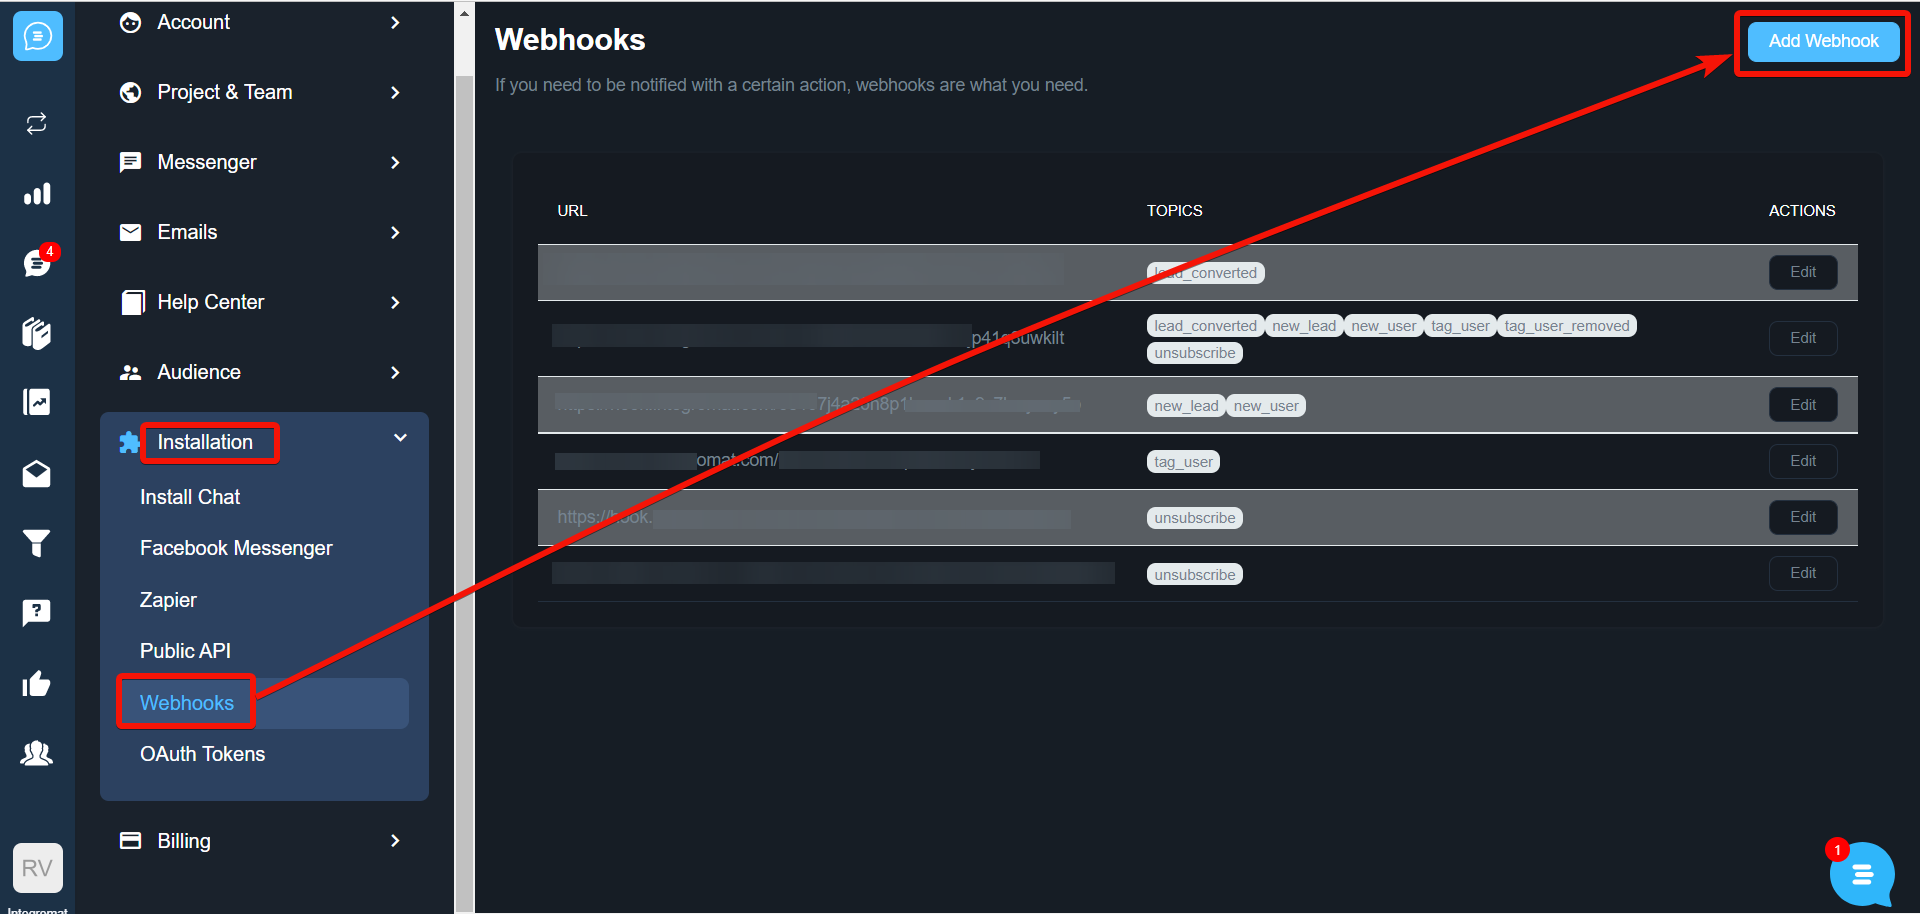
-
Log in to your Customerly account, click Profile > Settings > Installation > Webhooks.
-
Click Add Webhook to create a new webhook.
-
In the Webhook URL field, enter the URL address copied in step 1, select the notification to watch, and click Save.
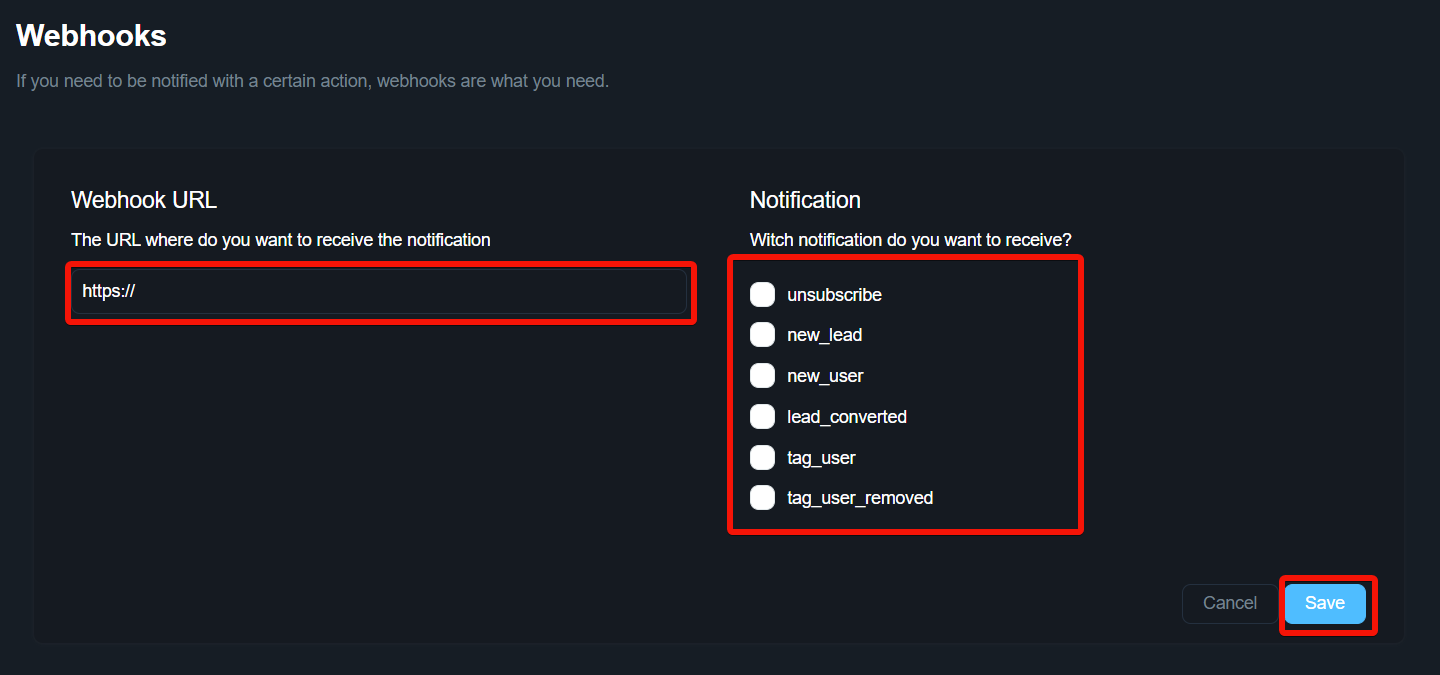
The webhook is successfully added and will receive alerts when the specified events occurs. URL address to your clipboard.
1 | |
-
Log in to your Customerly account, click Profile > Settings > Installation > Webhooks.
-
Click Add Webhook to create a new webhook.
-
In the Webhook URL field, enter the URL address copied in step 1, select the notification to watch, and click Save.
The webhook is successfully added and will receive alerts when the specified events occurs.