amoCRM (Legacy)
Getting started with amoCRM
Prerequisites
- An amoCRM account. Create an account at amoCRM website
Creating a connection to amoCRM
There are three required fields when creating a connection to amoCRM – Email, API Key, and Full domain.
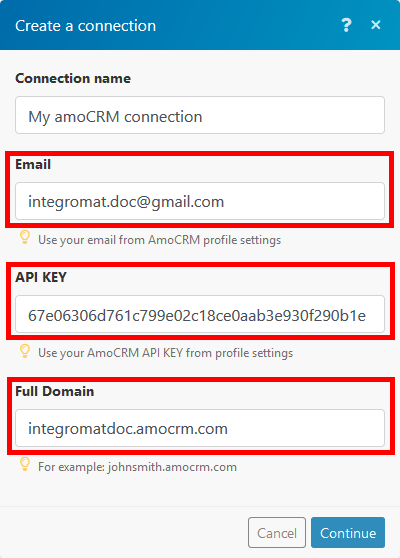
Enter the email used for your amoCRM registration. This email can be found in your profile settings – YourUsername.amocrm.com/settings/profile/ |
|
| API KEY | Enter the API key. This can be found also in your profile settings.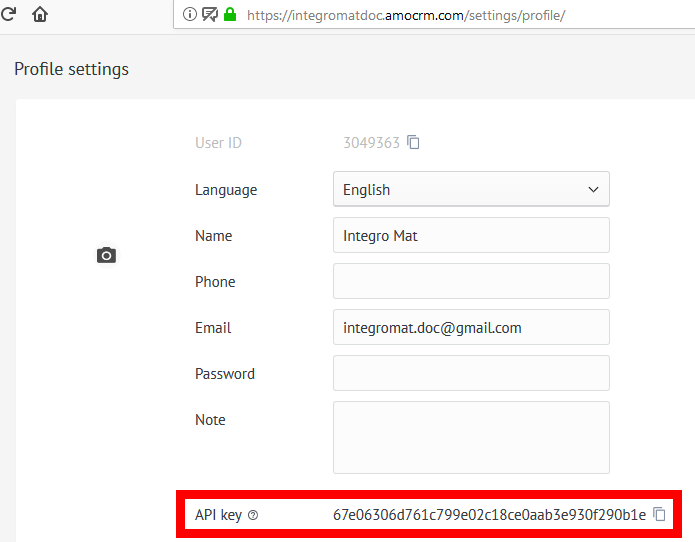 |
| Full domain | Enter your amoCRM domain. YourUsername.amoCRM.com |
Events
Watch Tasks
Obtains a list of tasks with the possibility of filtering and paging.
| Limit | Maximum number of returned results during one execution cycle. |
| Task ID | Enter the task ID if needed. |
| Rows limit | The maximum number of rows that can be selected. |
| Offset | Set from the which row to select. Row limit must be set. |
| Related object ID | Enter the ID of a related object. |
| Responsible | Filter by the responsible person for the task. Select the person. |
| Offset | Set the offset if required. |
Watch Events
This instant trigger monitors amoCRM for selected changes (events).
1. Add a webhook with your amoCRM connection.
2. Use checkboxes to select the events you want to watch.
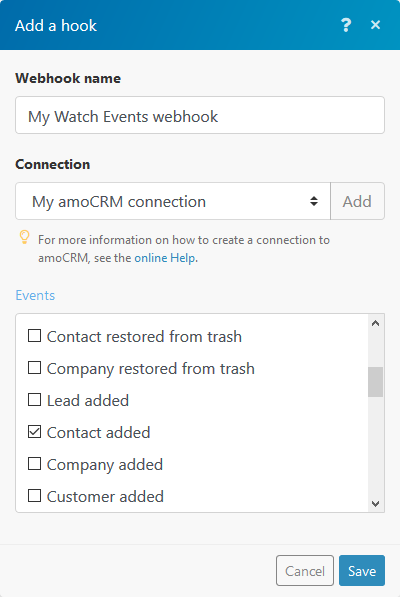
3. Save the dialog and run the scenario.
4. Now you are watching amoCRM for changes as selected above.
Leads
Create a Lead
| Name | Enter the lead name. |
| Responsible user | Set the responsible user for the entry. |
| Pipeline | Select a pipeline you want to create the lead in. |
| Created by | Select the user who created the entry. |
| Created at | Enter the date when the entry was created. the list of supported date and time formats. |
| Updated at | Enter the date when the entry was updated. the list of supported date and time formats. |
| Sale | Enter the deal budget. |
| Tags | If you want to specify new tags, list them inside the string variable, separated by commas. If you need to attach existing tags, pass an array of numeric id values for existing tags. |
| Contacts | Assign contacts for the new lead. |
| Company ID | Select the company ID. |
| Custom fields | Add a custom field if needed. |
Create Leads
Allows you to create multiple leads.
Leads |
Here you can enter one or more leads you want to create. Click the Add item button and follow the Create a lead instructions above. |
Get Lead Info
Retrieves all available lead information
| Lead ID | Select the lead you want to get information about. |
Get Leads
Retrieve leads by specified filter settings.
| Lead ID | Filter results by one lead ID, list of comma-separated lead IDs, or array of leads from another module |
| Search Query | Enter the search term you want to filter results by. |
| Limit | Set the maximum number of leads Ibexa Connect will return during one execution cycle. |
| Responsible User | Select or map the user to filter results by. |
| Pipeline | Select or map the ID of the pipeline to filter results by. |
| Lead Status ID | Select or map the ID of the lead status to filter results by. |
| Offset | Shift the selection (from which row to choose). Works only if Rows Limit is also specified. |
Update a Lead
Updates an existing lead.
| Lead | Select the lead you want to update. |
| Pipeline | Select a pipeline containing the selected lead. |
| Status | Select the status of the lead |
| Updated at | Enter the date when the entry was updated. the list of supported date and time formats. |
| Unlink contacts | Select the contact(s) you want to unlink from the lead. |
| Unlink company | The ID of the company to be uninstalled. |
| Name | Enter the desired name of the lead. |
| Responsible user | Set the responsible user for the lead. |
| Created by | The ID of the user who created the lead. |
| Created at | Enter the date when the lead was created. the list of supported date and time formats. |
| Sale | Enter the budget of the lead. |
Contact
Create a Contact
| Company ID | Enter the company ID. |
| Name | Enter the name of the contact to be added. This field is mandatory. |
| Responsible user | Set the responsible user for the entry. |
| Created by | Add the user who created the entry. |
| Created at | Set the date when the entry was created. the list of supported date and time formats. |
| Updated at | Set the date when the entry was updated. the list of supported date and time formats. |
| Lead | Select the lead from the drop-down menu. |
| Tags | Enter a tag. |
| Custom fields | Add a custom field if required. |
Create a Company
| Name | Enter the company name. |
| Responsible user | Set the responsible user for the entry. |
| Created by | Select the user who created the entry. |
| Created at | Enter the date when the entry was created. the list of supported date and time formats. |
| Lead ID | Select the Lead ID. |
| Customer ID | Select the Customer ID. |
| Contact ID | Select the Contact ID. |
| Tags | Enter a tag. |
| Custom fields | Add a custom field if needed. |
Create Contacts
This module allows you to create multiple contacts at once.
Contacts |
Here you can enter one or more contacts that you want to create. Click the Add item button and follow the Create a contact instructions above. |
Get Company Info
Retrieves details about the company.
| Company ID | Select the company or map the ID of the company you want to retrieve details about. |
Get Contacts
Retrieves contacts by the specified filter settings.
| Contact ID | Select the contact you want to retrieve details about. |
| Responsible ID | Select the responsible person to filter results by. |
| Search Query | Enter the search term you want to filter results by. |
| Limit | Set the maximum number of contacts Ibexa Connect will return during one execution cycle. |
| Offset | Shift the selection (from which row to choose). Works only if limit_rows is also specified |
Get Customers
Use this module to get the customer list.
Note
Your profile must contain customers otherwise this module returns error 400. Customers are not available when using the free trial account! The Recurring purchases (Settings > General settings) option must be enabled.
| Customer ID | Select the element with the given ID (If this parameter is specified, all the others are ignored). |
| Rows limit | Set the limit of rows that can be selected. |
| Offset | Selection reference (from which row to choose). Works only if limit_rows is also specified. |
| Responsible user | Select one or more responsible user(s). |
| From | The date from which to start the selection. Use format MM/DD/YYYY. |
| To | The date to which you want to end the selection. Use format MM/DD/YYYY. |
| Next date from | The next date from which to start the selection. Use format MM/DD/YYYY. |
| Next date to | The next date to which you want to end the selection. Use format MM/DD/YYYY. |
| Type | Filter the list by type. |
Get Contact Info
Retrieves information for a selected contact.
| Contact ID | Select the contact you want to retrieve information about. |
Update a Contact
| Contact | Select a contact to update. |
| Name | Enter the contact name. |
| Responsible user | Set the responsible user for the entry. |
| Created by | Select the user who created the entry. |
| Created at | Enter the date when the entry was created. the list of supported date and time formats. |
| Updated at | Enter the date when the entry was updated. the list of supported date and time formats. |
| Leads ID | Select the Lead ID |
| Tags | Enter a tag. |
| Company ID | Select a company ID from the drop-down menu. |
| Unlink | Unlink lead, company or customer if needed. |
Update a Company
| Company ID | Enter a company ID. |
| Name | Enter the contact name. |
| Responsible user | Set the responsible user for the entry. |
| Created by | Add the user who created the entry. |
| Created at | Enter the date when the entry was created. the list of supported date and time formats. |
| Leads ID | Select the Lead ID. |
| Customers ID | Select the Customer ID. |
| Tags | Enter a tag. |
| Custom fields | Add a custom field if needed. |
Task
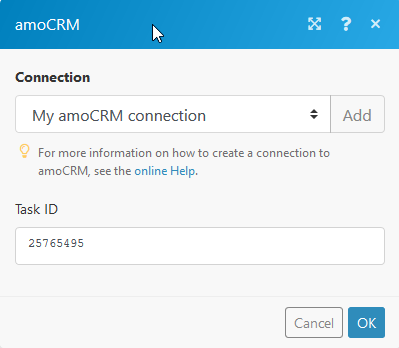
Get Task Info
Retrieves available task information.
| Task ID | Enter the task ID of the task you want to get information about. |
Get Tasks
| Task ID | Enter the ID of the task. |
| Rows limit | Set the limit of rows that can be selected. |
| Offset | Selection reference (from which row to choose). Works only if the Rows limit is also specified. |
| Related object ID | An additional search filter, according to the ID elements of the entity. |
| Responsible user | Select one or more responsible user(s). |
| Object type | Obtains information by the type of the specified entity (lead/contact/company/customer) |
Update a Task
| Task | Select the task you want to update. |
| Text | Enter the updated text. |
| Updated at | Enter the date when the entry was updated. the list of supported date and time formats. |
| Responsible user | Set a responsible user for the entry. |
| Tak completed | Set Yes if the task has been already completed. |
| Due date | Enter the due date for the task. the list of supported date and time formats. |
Create a Task
| Element type | Select an element type from the drop-down menu. |
| Task type | Select the task type you want to create. |
| Text | Enter the text of the new task. |
| Created at | Enter the date when the entry was created. the list of supported date and time formats. |
| Updated at | Enter the date when the entry was updated. List of supported date formats. the list of supported date and time formats. |
| Responsible user | Select the responsible user from the drop-down menu. |
| Created by | Select the user who created the task. |
| Task completed | Use the radio buttons to set the status of the task. |
| Due date | Enter a required due date for the task. |
Note
Create a Note
| Element | Enter the element ID. |
| Element type | Select the element type for the note you want to create. |
| Note type | Select the event you want to create a note for. |
| Text | Enter the new text of the updated note. |
| Created at | Enter the date when the entry was created. the list of supported date and time formats. Use the TIMESTAMP variable. |
| Updated at | Enter the date when the entry was updated. the list of supported date and time formats. |
| Responsible user | Set a responsible user for the entry. |
| Params | Define parameters if needed. |
Update a Note
| Note ID | Enter the note ID. |
| Element | Enter the element ID. |
| Element type | Select the element type containing the note you want to update. |
| Note type | Select the event you want to update. |
| Text | Enter the new text of the updated note. |
| Created at | Enter the date when the entry was created. the list of supported date and time formats. |
| Updated at | Enter the date when the entry was updated. the list of supported date and time formats. |
| Responsible user | Set a responsible user for the entry. |
| Params | Define parameters if needed. |
Get Notes
Retrieves note by the specified filter settings.
| ID | Enter the ID of the note you want to retrieve. |
| Type | Select the type the entity the note is associated with. |
| Element ID | Enter the unique identifier of the entity element to filter results by. |
| Modified Since | Filter notes that have been changed from a specific date. the list of supported date and time formats. |
| Note Type | Select the contact or lead to filter results by. |
| Parameters | Specify the parameters to filter results by. |
| Limit | Set the maximum number of notes Ibexa Connect will return during one execution cycle. |
Other
Get Account Info
Retrieves an account's details.
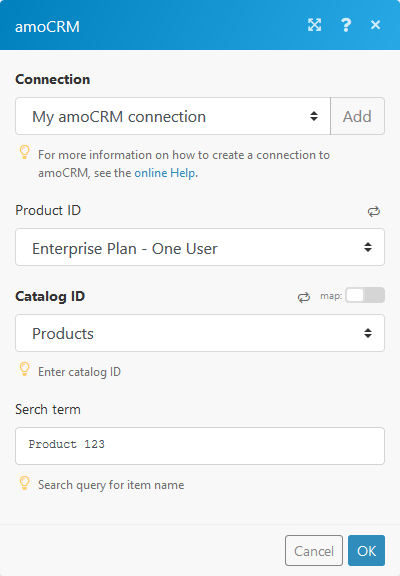
Get Products
| Product ID | Select the Product ID of the item from the catalog. |
| Catalog ID | Select what catalog you want to retrieve products from. |
| Search term | Enter the name of the item you are searching for. |
Link Entities
Creates links between entities. It allows you to connect catalog items and entities.
| From | Select the entity you want to link to. |
| From ID | Enter the ID of entity item. |
| To | Select the linked entity (catalog_elements). |
| Catalog element | Select the item you want to link. |
| From catalog | Select the catalog from which you want to create a link. |
| To catalog | Select the catalog you want to create a link with. |
| Quantity | Quantity of linked items. |
Unlink Entities
Deletes links between entities.
| From | Select the entity you want to remove the link from. |
| From ID | Enter the ID of entity item. |
| To | Select the linked entity (catalog_elements). |
| Catalog element | Select the item you want to unlink. |
| From catalog | Select the catalog from which you want to delete the link. |
| To catalog | Select the catalog you want to delete the link with. |
| Quantity | Quantity of linked items. |
Shorten a Link
Creates a shortlink.
Link |
Select the entity you want to remove the link from.
|
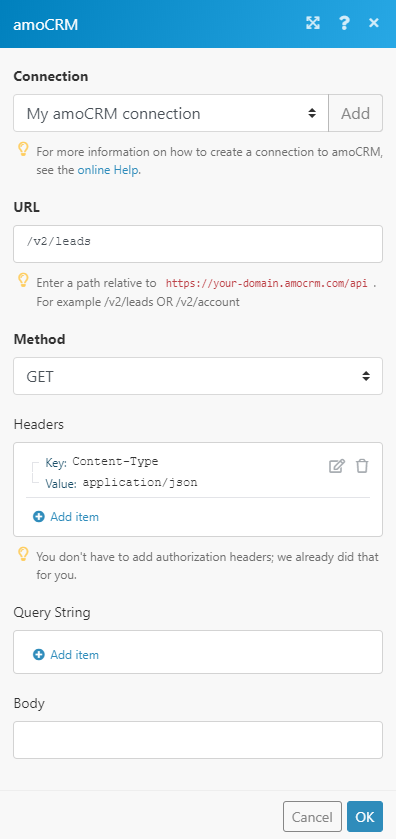
Make an API Call
Allows you to perform a custom API call.
URL |
Enter a path relative to | For the list of available endpoints, refer to the amoCRM API Documentation. |
Method
Select the HTTP method you want to use:
GET
to retrieve information for an entry.
POST
to create a new entry.
PUT
to update/replace an existing entry.
PATCH
to make a partial entry update.
DELETE
to delete an entry.
Headers
Enter the desired request headers. You don't have to add authorization headers; we already did that for you.
Query String
Enter the request query string.
Body
Enter the body content for your API call.
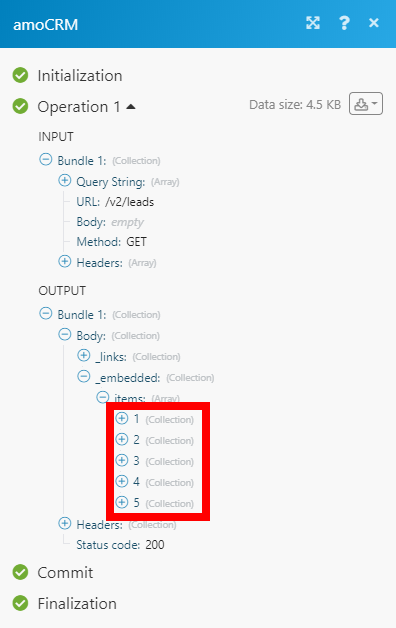
Example of Use - List Leads
The following API call returns the list of all leads in your amoCRM account:
Matches of the search can be found in the module's Output under Bundle > Body > _embedded > items. In our example, 5 leads were returned: