HTTP
The HTTP app provides various modules for communication based on Hypertext Transfer Protocol (HTTP). HTTP is the foundation of data communication for the World Wide Web. The modules enable you to download web pages and files, call webhooks and API endpoints, etc.
Getting Started with HTTP
The right choice of the module depends on the authentication/authorization mechanism the resource you wish to access employs:
-
Make a request - universal module primarily intended for resources not employing any type of authentication/authorization
-
Make a Basic Auth request - for resources employing HTTP Basic Authentication (BA)
-
Make an OAuth 2.0 request - for resources employing OAuth 2.0 authorization protocol
-
Make a Client Certificate Auth request - for resources employing an authorization protocol that requires a client-side certificate
-
Get a file - to download a file from the specified URL
-
Resolve a target URL - to retrieve a target URL from the chain of HTTP redirections
-
Retrieve headers - to return headers (name and value) from the specified HTTP request module in separate bundles.
Caution
The module dialog fields that are displayed in bold (in the Ibexa Connect scenario, not in this documentation article) are mandatory!
Make a request
A universal module that enables you to configure an HTTP request and submit it to a server. The received HTTP response is then contained in the output bundle.
Evaluate all states as errors (except for 2xx and 3xx)
Use this option to set up error handling.
URL
Enter a URL you want to send a request to, e.g., API endpoint, website, etc.
Method
Select the HTTP method you want to use:
- GET - to retrieve information for an entry.
- POST - to create a new entry.
- PUT - to update/replace an existing entry.
- PATCH - to make a partial entry update.
- DELETE - to delete an entry.
Headers
Enter the desired request headers. For example, an authorization.
Caution
By default, the request does not contain the Accept header. If an unexpected response is returned, try adding the Accept: */* header.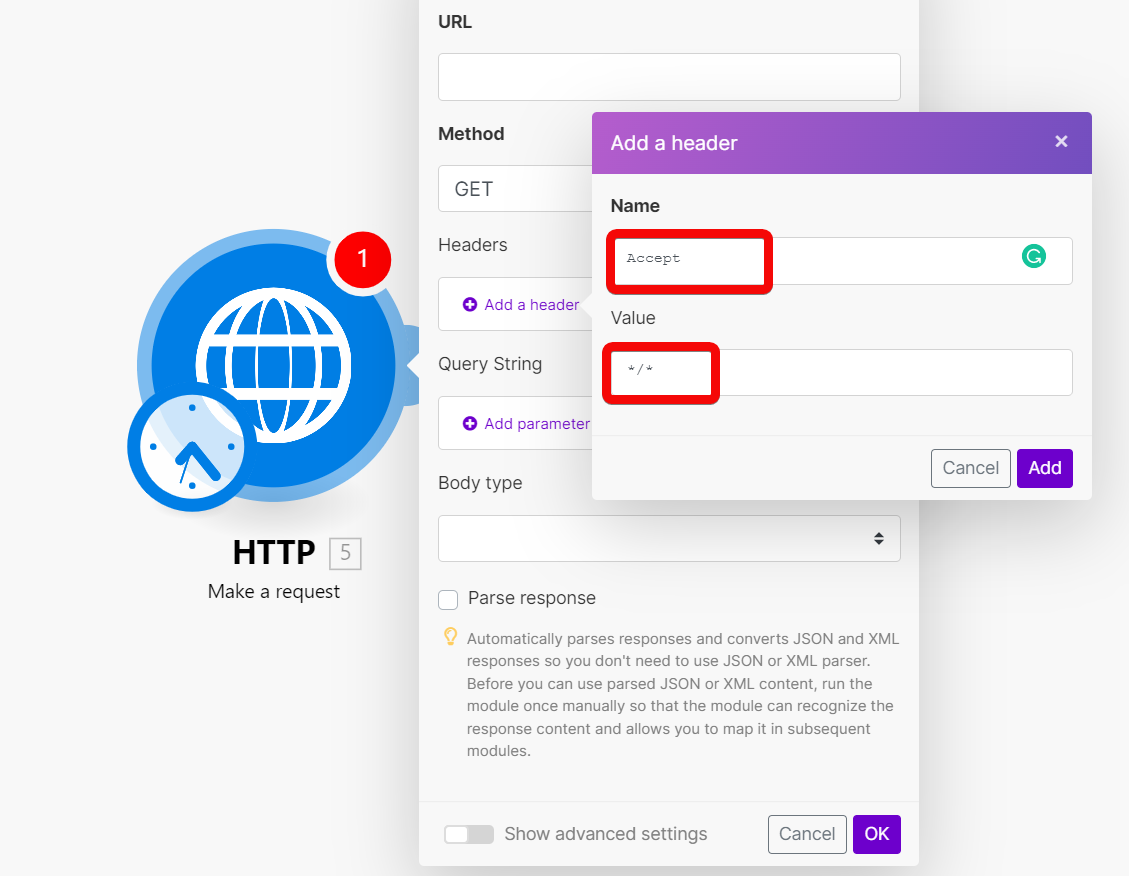
Query String
Enter the desired query key-value pairs.
Body type
HTTP Body is the data bytes transmitted in an HTTP transaction message immediately following the headers if there are any to be used.
Raw
The Raw body type is generally suitable for most HTTP body requests, even in situations where developer documentation does not specify data to send.
Specify a form of parsing the data in the Content type field.
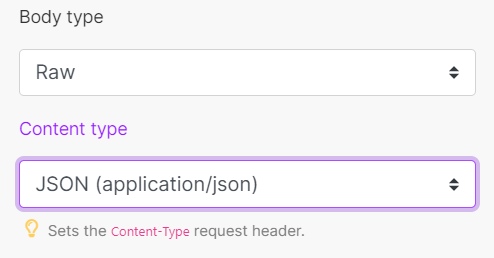
Despite the content type selected, data is entered in any format that is stipulated or required by the developer documentation.
Application/x-www-form-urlencoded
This body type is to POST data using application/x-www-form-urlencoded.
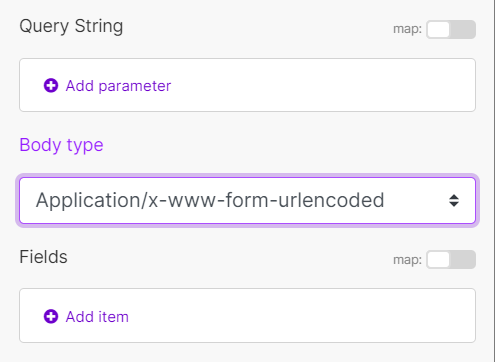
For application/x-www-form-urlencoded, the body of the HTTP message sent to the server is essentially one query string. The keys and values are encoded in key-value pairs separated by & and with a = between the key and the value. Not suitable to use with binary data (use multipart/form-data instead).
Example of the resulting HTTP request format: field1=value1&field2=value2
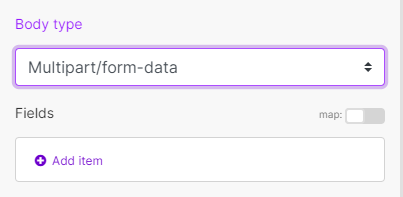
Multipart/form-data
Multipart/form-data is an HTTP multipart request used to send files and data. It is commonly used to upload files to the server.
Add fields to be sent in the request. Each field must contain Key-Value pair.
| Text | Enter the key and value to be sent within the request body. |
| File | Enter the key, and specify the source file you want to send in the request body. Map the file you want to upload from the previous module (e.g., HTTP > Get a File or Google Drive > Download a File), or enter the file name and file data manually. |
Parse response
Enable this option to automatically parse responses and convert JSON and XML responses so you don't need to use JSON > Parse JSON or XML > Parse XML modules.
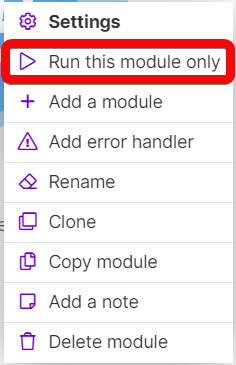
Before you can use parsed JSON or XML content, run the module once manually so that the module can recognize the response content and allow you to map it in subsequent modules.
User name
Enter the user name if you want to send a request using the basic auth.
Password
Enter the password if you want to send a request using the basic auth.
Timeout
Specify the request timeout in seconds (1-300). Default: 40 seconds.
Share cookies with other HTTP modules
Enable this option to share cookies from the server with all HTTP modules in your scenario.
Self-signed certificate
Upload your certificate if you want to use TLS using your self-signed certificate. For more details about inserting the certificate, refer to the Certificates and Keys article.
Reject connections that use unverified (self-signed) certificates
Enable this option to reject connections that use unverified TLS certificates.
Follow redirect
Follows the URL redirections with 3xx responses.
Follow all redirect
Follows the URL redirections with all response codes.
Disable serialization of multiple same query string keys as arrays
By default, Ibexa Connect handles multiple values for the same URL query string parameter key as arrays (e.g., www.test.com?foo=bar&foo=baz will be converted to www.test.com?foo[0]=bar&foo[1]=baz). To disable this feature, activate this option.
Request compressed content
Enable this option to request a compressed version of the website.
Adds an Accept-Encoding header to request compressed content.
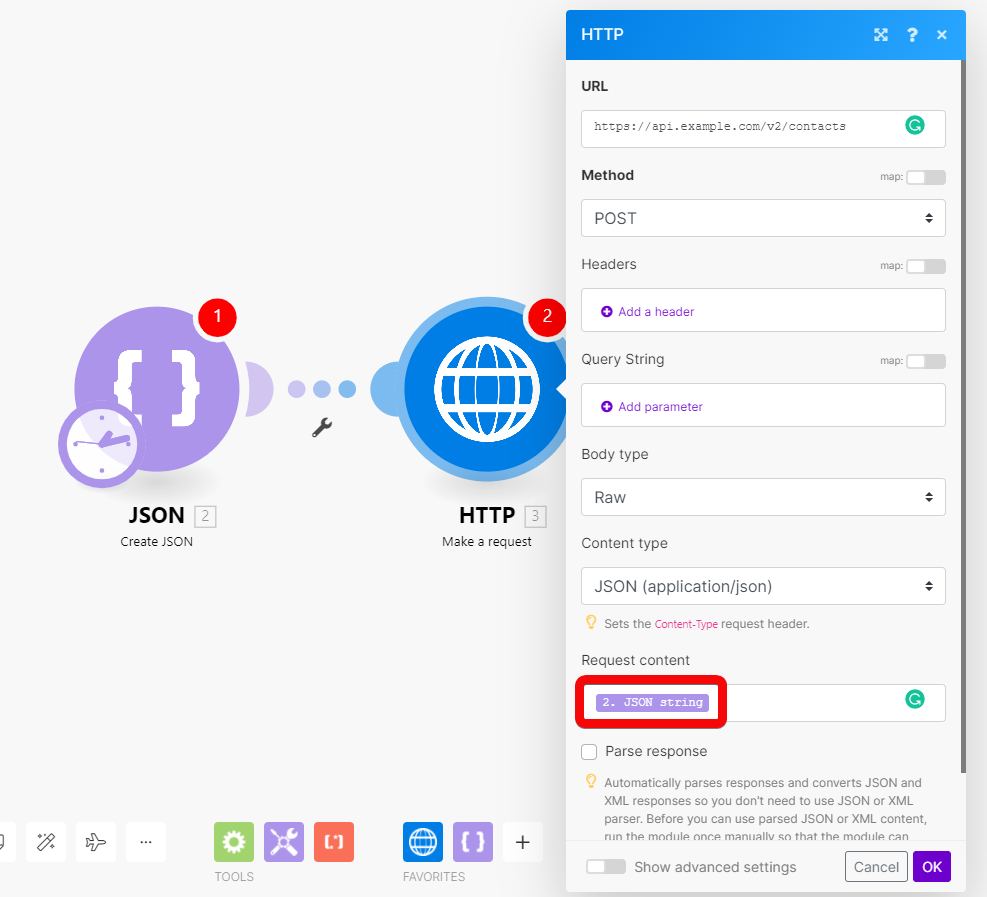
Example
Shows how to set up the module to submit a POST request with JSON payload:
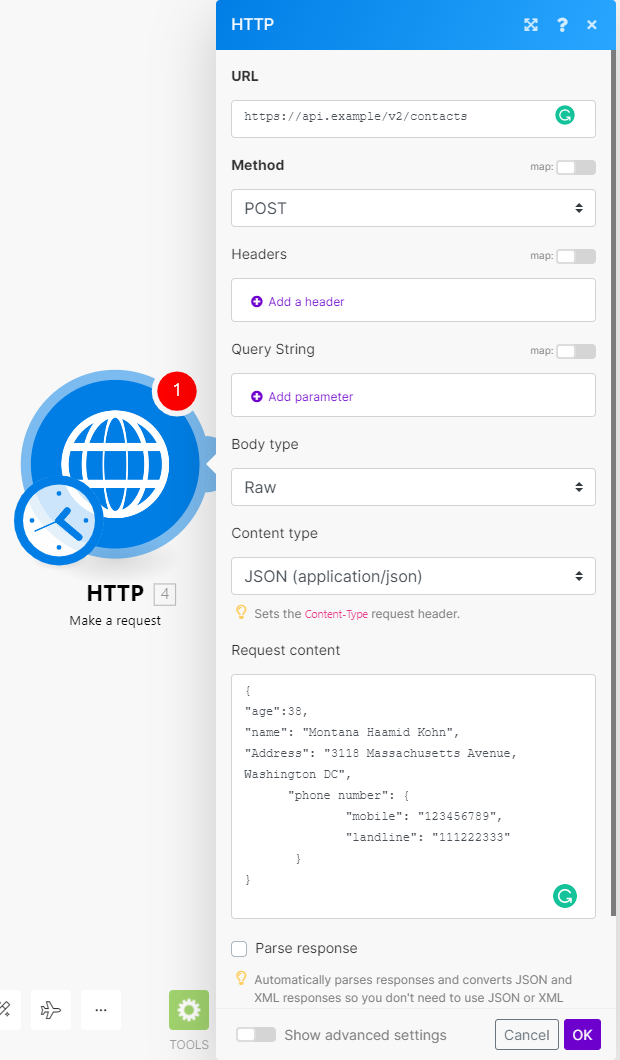
To make sure your JSON is valid, you may use one of the available online services (e.g., https://jsonlint.com/) or employ the JSON > Create JSON module to create the JSON dynamically and take care of all the necessary escaping. Mixing JSON pieces with expressions and items directly in the Request content field is not recommended, as it can result in an invalid JSON.
Make a Basic Auth request
A module that enables you to configure an HTTP request with HTTP Basic authentication and submit it to a server. The received HTTP response is then contained in the output bundle.
Credentials
Click Add to add your credentials (user name and password) for basic authentication.
Note
You can add more credentials to easily switch between each connection.
Evaluate all states as errors (except for 2xx and 3xx )
Use this option to set up error handling.
URL
Enter a URL you want to send a request to, e.g., API endpoint, website, etc.
Method
Select the HTTP method you want to use:
-
GET to retrieve information for an entry.
-
POST to create a new entry.
-
PUT to update/replace an existing entry.
-
PATCH to make a partial entry update.
-
DELETE to delete an entry.
Headers
Enter the desired request headers. For example, an authorization.
By default, the request does not contain the Accept header. If an unexpected response is returned, try adding the Accept: */* header.
Query String
Enter the desired query key-value pairs.
Body type
HTTP Body is the data bytes transmitted in an HTTP transaction message immediately following the headers if there are any to be used.
Raw
The Raw body type is generally suitable for most HTTP body requests, even in situations where developer documentation does not specify data to send.
Application/x-www-form-urlencoded
This body type is to POST data using application/x-www-form-urlencoded.
For application/x-www-form-urlencoded, the body of the HTTP message sent to the server is essentially one query string. The keys and values are encoded in key-value pairs separated by & and with a = between the key and the value. Not suitable to use with binary data (use multipart/form-data instead).
Example of the resulting HTTP request format: field1=value1&field2=value2
Multipart/form-data
Multipart/form-data is an HTTP multipart request used to send files and data. It is commonly used to upload files to the server.
Add fields to be sent in the request. Each field must contain Key-Value pair.
| Text | Enter the key and value to be sent within the request body. |
| File | Enter the key and specify the source file you want to send in the request body. Map the file you want to upload from the previous module (e.g., HTTP >; Get a File or Google Drive > Download a File), or enter the file name and file data manually. |
Parse response
Enable this option to automatically parse responses and convert JSON and XML responses so you don't need to use JSON > Parse JSON or XML > Parse XML modules.
Before you can use parsed JSON or XML content, run the module once manually so that the module can recognize the response content and allow you to map it in subsequent modules.
Timeout
Specify the request timeout in seconds (1-300). Default: 40 seconds.
Share cookies with other HTTP modules
Enable this option to share cookies from the server with all HTTP modules in your scenario.
Self-signed certificate
Upload your certificate if you want to use TLS using your self-signed certificate. For more details about inserting the certificate, refer to the Certificates and Keys article.
Reject connections that are using unverified (self-signed) certificates
Enable this option to reject connections that are using unverified TLS certificates.
Follow redirect
Follows the URL redirections with 3xx responses.
Follow all redirect
Follows the URL redirections with all response codes.
Disable serialization of multiple same query string keys as arrays
Disable serialization of multiple same query string keys as arrays (e.g., www.test.com?foo=bar&foo=baz will be converted to www.test.com?foo[0]=bar&foo[1]=baz ). To disable this feature, activate this option.
Request compressed content
Enable this option to request a compressed version of the website.
Adds an Accept-Encoding header to request compressed content.
Make an OAuth 2.0 request
In order to make an HTTP(S) request to servers that require an OAuth 2.0 authorization, you need to create an OAuth connection first.
Creating a Connection
-
Create an OAuth client in the target service with which you want Ibexa Connect to communicate. This option is most likely to be found in the Developer section of the given service. When creating the client, you will be asked to specify a so-called
Redirect URL(sometimes called aCallback URL).-
Use the following Redirect URL:
https://www.integromat.com/oauth/cb/oauth2.Note
Notice that the redirect URI starts with
https://www.integromat.cominstead ofhttps://www.make.com. This is currently a known issue in Ibexa Connect.You can trust this URL as much as any Ibexa Connect URL.
Please make sure all your OAuth redirect URIs point to
https://www.integromat.com/oauth/cb/app-
Once you have created the client in the 3rd party service, the given service will display two keys:
-
Client ID -
Client SecretNote
Some services call these
App KeyandApp Secret. -
Make sure you save these keys. You will be asked to provide them when creating the connection in Ibexa Connect.
-
-
-
Find the
Authorize URIandToken URIin the API documentation of the given service (if the service uses implicit flow, you will need onlyAuthorize URI). These are URL addresses through which Ibexa Connect communicates with the target service. The addresses serve for OAuth authorization.-
Examples of Yahoo addresses:
-
Authorize URI:
https://api.login.yahoo.com/oauth2/request_auth -
Token URI:
https://api.login.yahoo.com/oauth2/get_token
-
-
-
If the target service uses scopes (access rights), check how the service separates individual scopes, and make sure you set the Scope separator in the connection advanced settings (see below) accordingly.
-
Once you have completed the steps above, you can proceed with setting up the module:
Connection
Click the Add button to set up the OAuth 2.0 connection for the request.
Connection name
Enter the name of the connection.
Flow type
Select the flow for obtaining tokens.
| Authorization Code | Enter Authorize URI and Token URI you have retrieved from the service's API documentation. |
| Implicit | Enter Authorize URI you have retrieved from the service's API documentation. |
Scope
Add the individual scopes you will need to use. You will find this information in the given service's developer (API) documentation.
Scope separator
Select what the scopes entered above should be separated by. You will find this information in the given service's developer (API) documentation.
If the separator is not set correctly, Ibexa Connect will be unable to create the connection, and you will receive an invalid scope error.
Client ID
Enter the Client ID. The Client ID is provided when you create an OAuth client in the service you want to connect.
Client Secret
Enter the Client Secret. The Client Secret is provided when you create an OAuth client in the service you want to connect.
Authorize parameters
Enter the additional authorization request parameters as a key-value pair.
Standard parameters:
-
response_type:
codefor Authorization Code flow andtokenfor Implicit flow -
redirect_uri:
https://www.integromat.com/oauth/cb/oauth2 -
client_id: The Client ID you entered when creating the account
Access token parameters
Enter the additional access token request parameters as a key-value pair.
Standard parameters:
-
grant_type:
authorization_code -
redirect_uri:
https://www.integromat.com/oauth/cb/oauth2 -
client_id: The Client ID you entered when creating the account
-
client_secret: The Client Secret you entered when creating the account
-
code: The code returned by the authorization request
Refresh token parameters
Enter the additional refresh token request parameters as a key-value pair.
Standard parameters:
-
grant_type:
refresh_token -
refresh_token: The Refresh token obtained together with the Access token
-
client_id: The Client ID you entered when creating the account
-
client_secret: The Client Secret you entered when creating the account
Custom Headers
Specify the custom headers to be sent with the request, if needed.
Token placement
Select whether to send the token in the header, query string, or in both.
Header token name
Enter the name of the authorization token in the header. Default: Bearer.
Query string parameter name
Enter the name of the authorization token in the query string. Default: access_token.
Evaluate all states as errors (except for 2xx and 3xx )
Use this option to set up error handling.
URL
Enter a URL you want to send the request to, e.g., API endpoint, website, etc.
Method
Select the HTTP method you want to use:
-
GET - to retrieve information for an entry.
-
POST - to create a new entry.
-
PUT - to update/replace an existing entry.
-
PATCH - to make a partial entry update.
-
DELETE - to delete an entry.
Headers
Enter the desired request headers. For example, an authorization.
By default, the request does not contain the Accept header. If an unexpected response is returned, try adding the Accept: */* header.
Query String
Enter the desired query key-value pairs.
Body type
HTTP Body is the data bytes transmitted in an HTTP transaction message immediately following the headers if there are any to be used.
Raw
The Raw body type is generally suitable for most HTTP body requests, even in situations where developer documentation does not specify data to send.
Specify a form of parsing the data in the Content type field.
Despite the content type selected, data is entered in any format that is stipulated or required by the developer documentation.
Application/x-www-form-urlencoded
This body type is to POST data using application/x-www-form-urlencoded.
For application/x-www-form-urlencoded, the body of the HTTP message sent to the server is essentially one query string. The keys and values are encoded in key-value pairs separated by & and with a = between the key and the value. Not suitable to use with binary data (use multipart/form-data instead).
Example of the resulting HTTP request format:
field1=value1&field2=value2
Multipart/form-data
Multipart/form-data is an HTTP multipart request used to send files and data. It is commonly used to upload files to the server.
Add fields to be sent in the request. Each field must contain Key-Value pair.
| Text | Enter the key and value to be sent within the request body. |
| File | Enter the key and specify the source file you want to send in the request body. Map the file you want to upload from the previous module (e.g., HTTP > Get a File or Google Drive > Download a File), or enter the file name and file data manually. |
Parse response
Enable this option to automatically parse responses and convert JSON and XML responses so you don't need to use JSON > Parse JSON or XML > Parse XML modules.
Before you can use parsed JSON or XML content, run the module once manually so that the module can recognize the response content and allow you to map it in subsequent modules.
Timeout
Specify the request timeout in seconds (1-300). Default: 40 seconds.
Share cookies with other HTTP modules
Enable this option to share cookies from the server with all HTTP modules in your scenario.
Self-signed certificate
Upload your certificate if you want to use TLS using your self-signed certificate. For more details about inserting the certificate, refer to the Certificates and Keys article.
Reject connections that use unverified (self-signed) certificates
Enable this option to reject connections that use unverified TLS certificates.
Follow redirect
Follows the URL redirections with 3xx responses.
Follow all redirect
Follows the URL redirections with all response codes.
Disable serialization of multiple same query string keys as arrays
By default, Ibexa Connect handles multiple values for the same URL query string parameter key as arrays (e.g., www.test.com?foo=bar&foo=bazwill be converted to www.test.com?foo[0]=bar&foo[1]=baz). To disable this feature, activate this option.
Request compressed content
Enable this option to request a compressed version of the website. Adds an Accept-Encoding header to request compressed content.
Make a client certificate authentication request
Makes an HTTP(S) request to servers that require a client certificate authorization.
Credentials
Click the Add button to add your credentials (certificate) for client certificate authorization.
Provide the certificate you want to use for authorization. For more details about inserting a certificate, refer to the Certificates and Keys article.
Evaluate all states as errors (except for 2xx and 3xx )
Use this option to set up error handling.
URL
Enter a URL you want to send a request to, e.g., API endpoint, website, etc.
Method
Select the HTTP method you want to use:
-
GET - to retrieve information for an entry.
-
POST - to create a new entry.
-
PUT - to update/replace an existing entry.
-
PATCH - to make a partial entry update.
-
DELETE - to delete an entry.
Headers
Enter the desired request headers. For example, an authorization.
By default, the request does not contain the Accept header. If an unexpected response is returned, try adding the Accept: */* header.
Query String
Enter the desired query key-value pairs.
Body type
HTTP Body is the data bytes transmitted in an HTTP transaction message immediately following the headers if there are any to be used.
Raw
The Raw body type is generally suitable for most HTTP body requests, even in situations where developer documentation does not specify data to send.
Specify a form of parsing the data in the Content type field.
Despite the content type selected, data is entered in any format that is stipulated or required by the developer documentation.
Application/x-www-form-urlencoded
This body type is to POST data using application/x-www-form-urlencoded.
For application/x-www-form-urlencoded, the body of the HTTP message sent to the server is essentially one query string. The keys and values are encoded in key-value pairs separated by & and with a = between the key and the value. Not suitable to use with binary data (use multipart/form-data instead).
Example of the resulting HTTP request format:
field1=value1&field2=value2
Multipart/form-data
Multipart/form-data is an HTTP multipart request used to send files and data. It is commonly used to upload files to the server.
Add fields to be sent in the request. Each field must contain Key-Value pair.
| Text | Enter the key and value to be sent within the request body. |
| File | Enter the key and specify the source file you want to send in the request body. Map the file you want to upload from the previous module (e.g., HTTP > Get a File or Google Drive > Download a File), or enter the file name and file data manually. |
Parse response
Enable this option to automatically parse responses and convert JSON and XML responses so you don't need to use JSON > Parse JSON or XML > Parse XML modules.
Before you can use parsed JSON or XML content, run the module once manually so that the module can recognize the response content and allow you to map it in subsequent modules.
Timeout
Specify the request timeout in seconds (1-300). Default: 40 seconds.
Share cookies with other HTTP modules
Enable this option to share cookies from the server with all HTTP modules in your scenario.
Self-signed certificate
Upload your certificate if you want to use TLS using your self-signed certificate. For more details about inserting the certificate, refer to the Certificates and Keys article.
Reject connections that are using unverified (self-signed) certificates
Enable this option to reject connections that are using unverified TLS certificates.
Follow redirect
Follows the URL redirections with 3xx responses.
Follow all redirect
Follows the URL redirections with all response codes.
Disable serialization of multiple same query string keys as arrays
By default, Ibexa Connect handles multiple values for the same URL query string parameter key as arrays (e.g., www.test.com?foo=bar&foo=baz will be converted to www.test.com?foo[0]=bar&foo[1]=baz). To disable this feature, activate this option.
Request compressed content
Enable this option to request a compressed version of the website. Adds an Accept-Encoding header to request compressed content.
Get a file
Downloads a file from the specified URL.
| URL | Enter the URL of the file you want to download. After the file is downloaded, you can further process the file (map the file data) using other modules in the scenario. |
Resolve a target URL
Enter the URL of the file you want to download. After the file is downloaded, you can further process the file (map the file data) using other modules in the
| URL | Enter the URL you want to resolve, e.g., https://bit.ly/2FbUoRt |
| Method | Select the method you want to use. |
Retrieve Headers
Returns each header (name and value) from the specified HTTP module in the separate bundle.
| Source Module | Select the module you want to retrieve headers from. |
Generating JSON Web Tokens (JWT)
It is possible to generate a JWT token using the HS256 algorithm with the help of built-in functions:
Header:

Code for copy & paste:
1 | |
Payload:

Code for copy & paste:
1 | |
Token:

Code for copy & paste:
1 | |