Variables
Variables are containers for storing data. You can think of a variable as a “box” for data, with a uniquely-named sticker on it.
Imagine you are moving to a new home and you need to pack up all the things in your house into boxes. You might want a box for clothes, one for books, and one for the dishes. When you pack the boxes, it would be good to add a label to each box - that way, you know what is inside the specific box.
A variable is like a box - it is just a way to store your data.
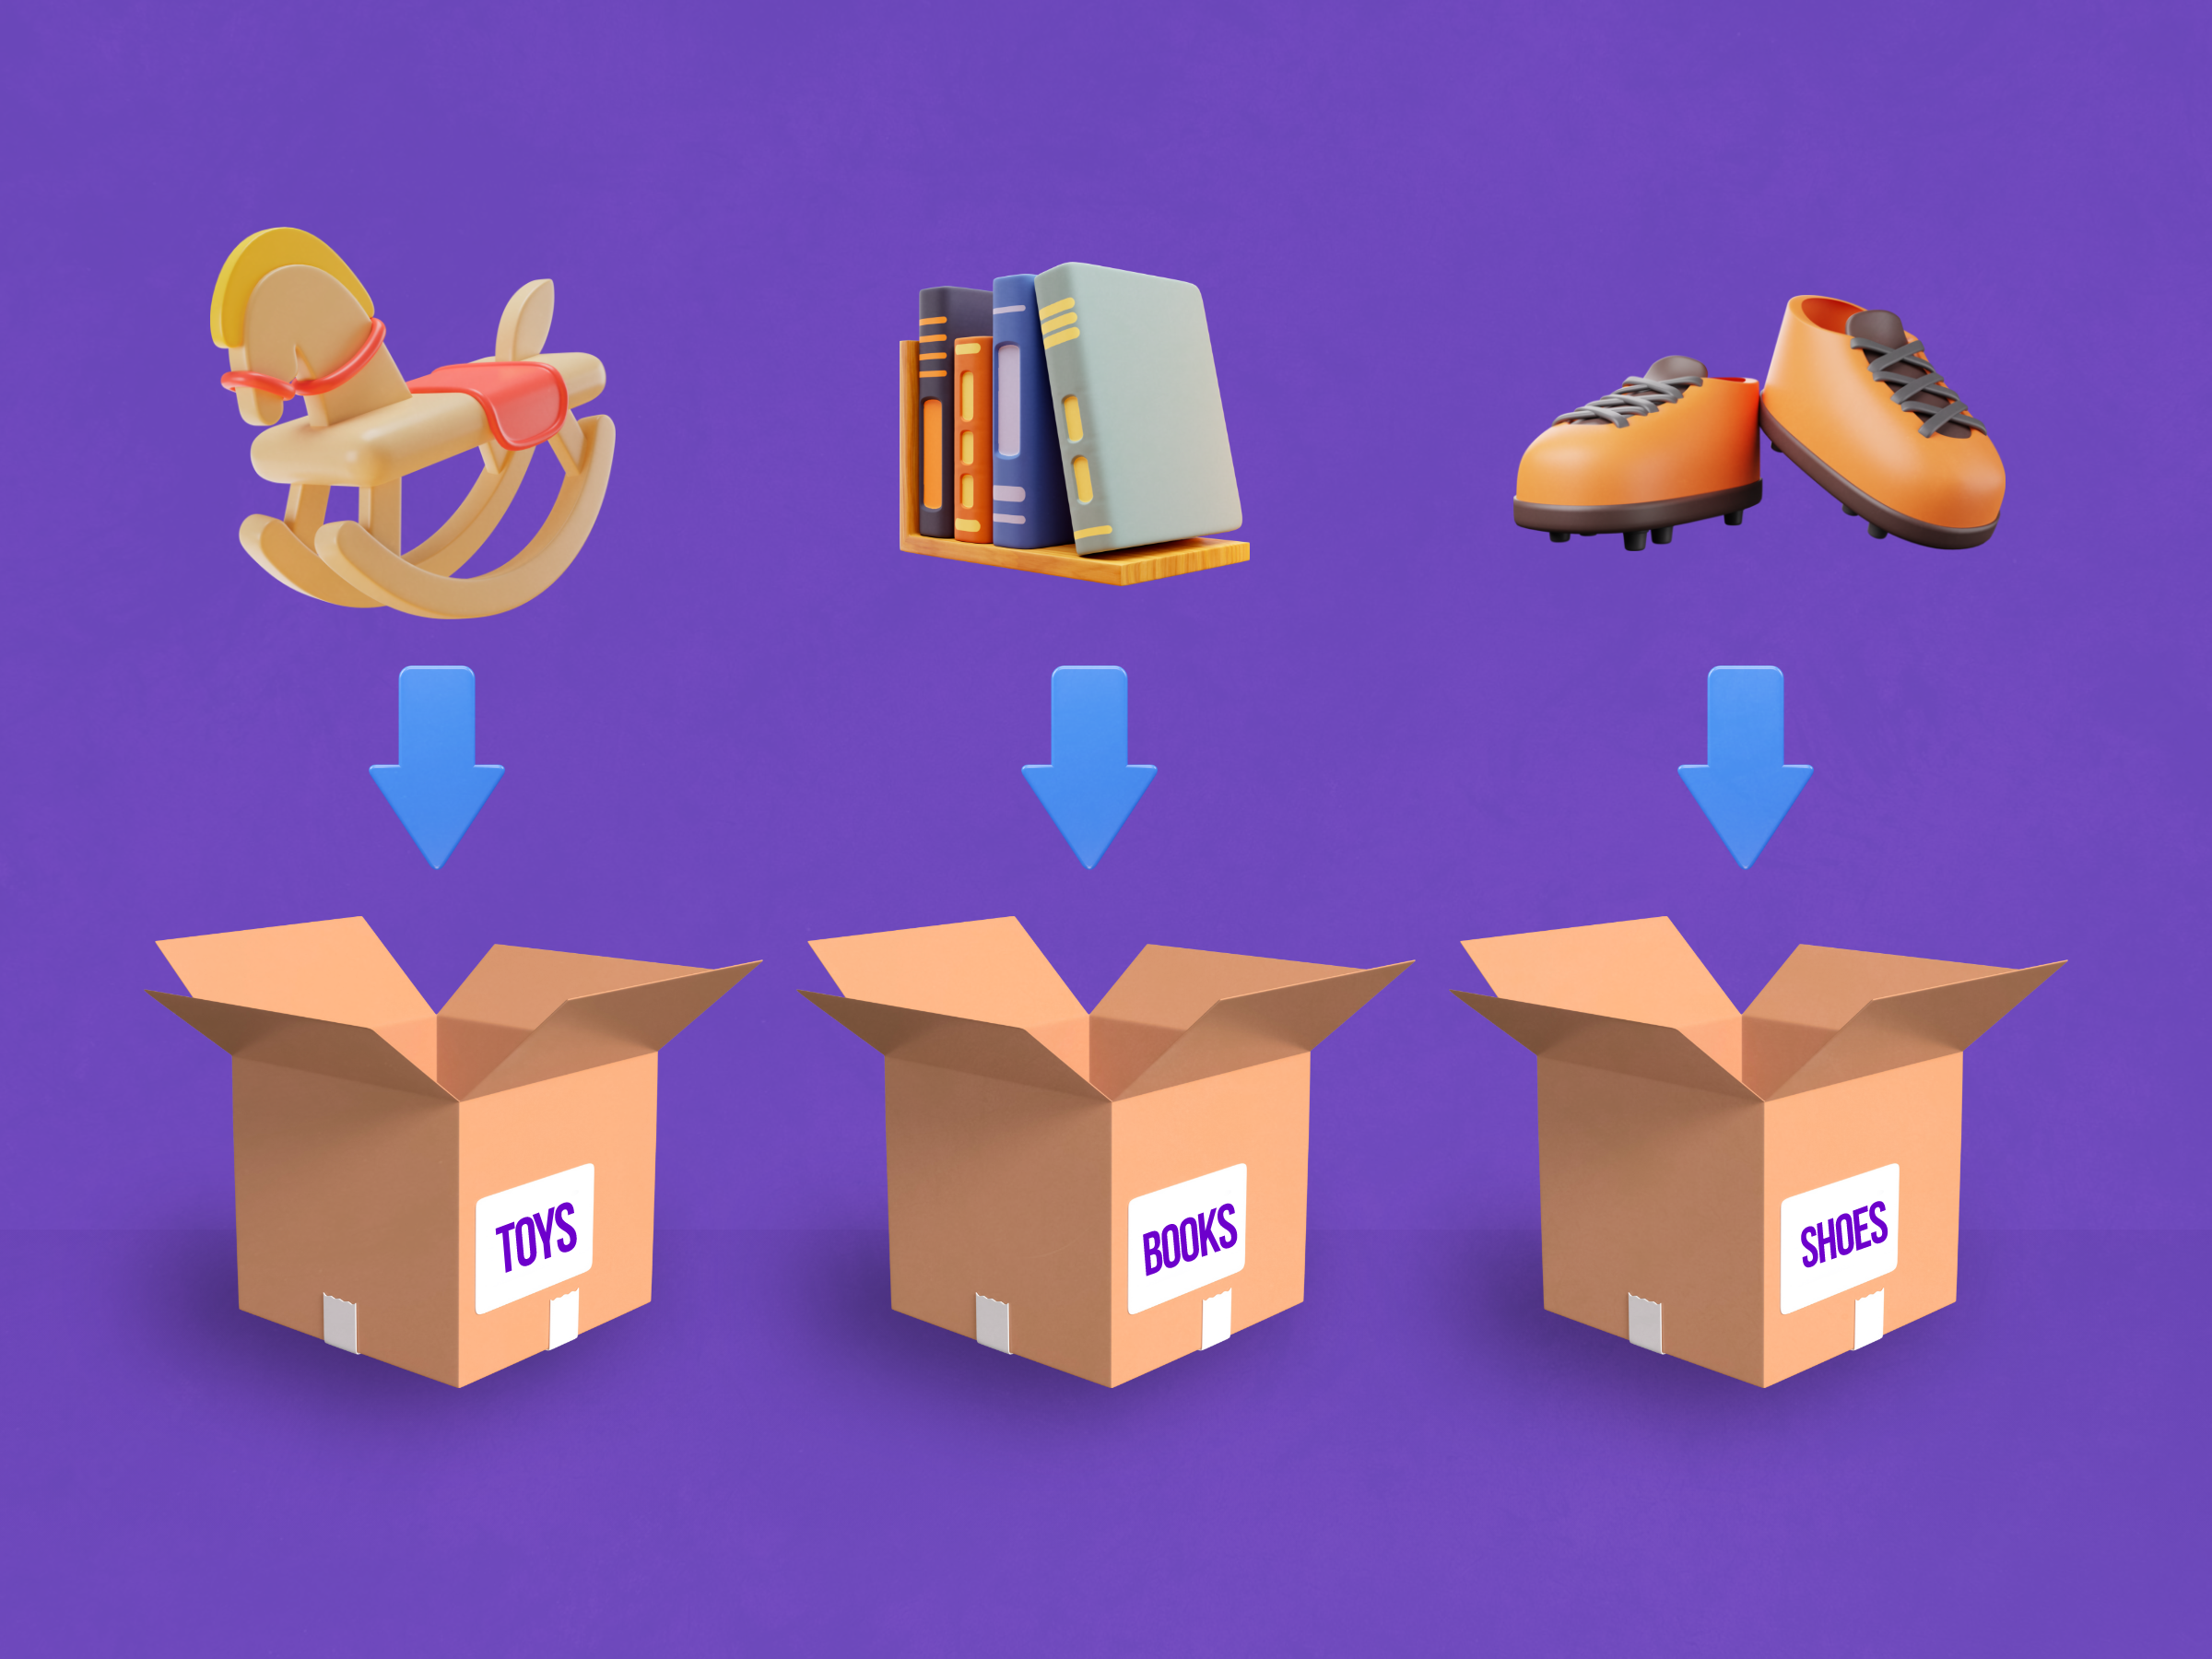
Variables store data as boxes store items.
Unlike a box, you can store exactly one thing in a variable. Variables have a fixed name and a value that can change. You can reference the name in your scenarios. The name is then replaced by the current value of your variable.
When using Ibexa Connect, you might need to save certain bits of information and assign a label to the information so that you can retrieve that information later. A user name, the day of the week, or available inventory left in your e-shop - these are just some examples of data that can be stored in variables.
Variables are reusable elements that can be mapped to any module in the module's input fields.
Types of variables
Ibexa Connect offers two types of variables:
-
System variables
-
Custom variables
Both system and custom variables can be used in scenarios. System variables are available to all Ibexa Connect users.
You can define custom variables for your organization and for your team.
System variables
Watch the video
System variables are default options provided by Ibexa Connect. You cannot modify or delete system variables. You can use system variables in
-
Modules with input fields
-
Filters within the scenario editor
-
Templates
System variables are available to all Ibexa Connect users and on all pricing plans.
System variables include information about:
-
the scenario itself (scenario ID, scenario name, scenario URL)
-
the specific scenario execution (execution ID, operations consumed, data consumed, execution start date/time)
-
the team the scenarios is in (team ID, team name)
-
the organization the scenario is in (organization ID, organization name, operations left, data left, domain)
With system variables, you can see more information about your scenario, current execution, team, and organization. Variables can be useful with error handling and scenario activity tracking. For example, when there is an error in your scenario, you can use scenario ID or organization name variables to pinpoint the exact scenario execution and organization in which the error occurred.
Some other cases in which you might use system variables:
-
Create a slack message, email, or support ticket that contains a link to the scenario that created the message
-
Set email notifications to notify you once the operations left value reaches a certain number
You can also reuse variables and map them to any module in the module's input fields.
The screenshot below shows the organization, team, and scenario information got as the module output in bundle 1 using system variables. You can use this output in the subsequent module.
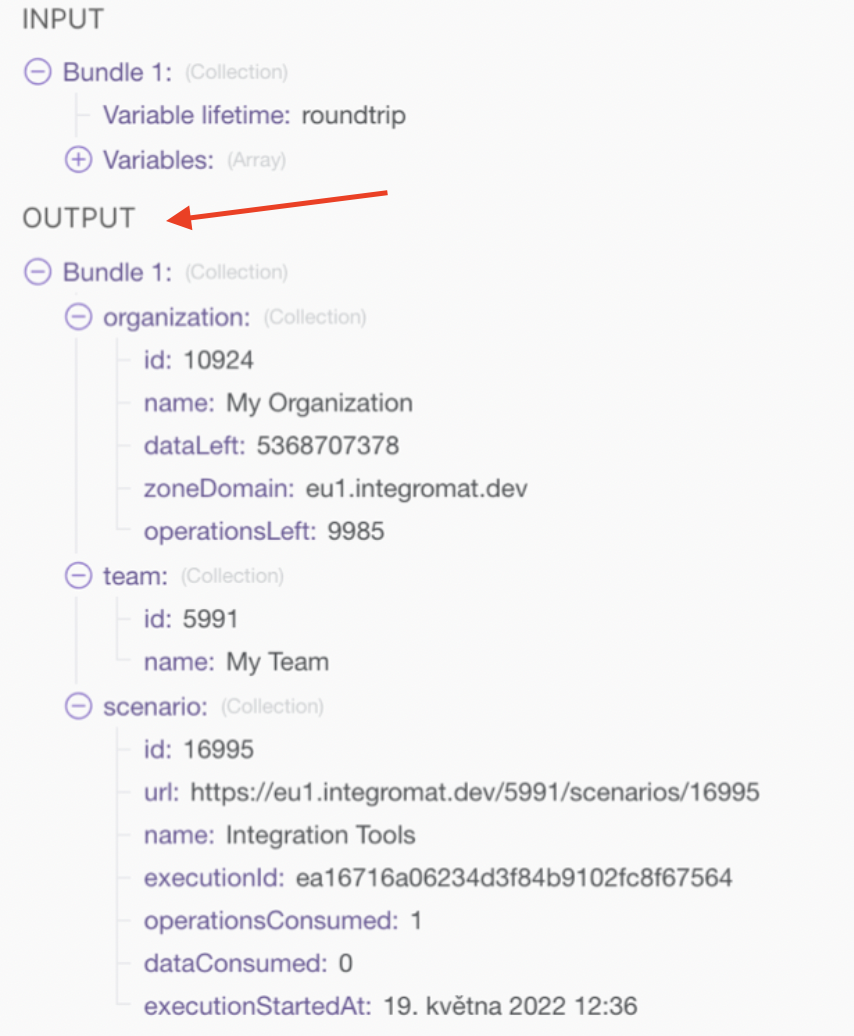
Example, Bundle 1 output using system variables
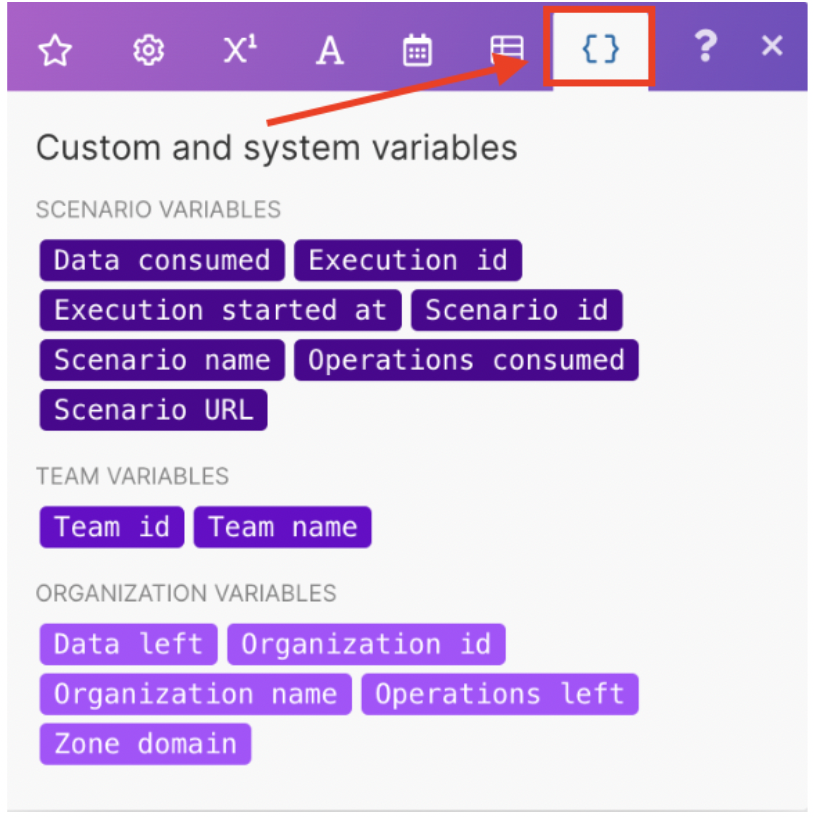
You can find System variables under the Variables tab in the mapping dialog.
Custom variables
Watch the video
You can create, edit and delete custom variables.
Custom variables are useful when you need to reuse the same information multiple times. Instead of writing it all over again from scratch every time, just use a custom variable instead.
Some cases where you might want to use custom variables:
-
Sending emails with a consistent email signature
-
Set a number of outreach attempts before you stop contacting a potential customer
-
Email addresses
-
Company name or address
Benefits of using custom variables include:
-
Saving time - You don’t have to make manual changes in many different scenarios when the key information changes.
-
Accuracy - You don’t have to double-check every time whether the information is incorrect due to a human error.
-
Standardization – More people can use the same variables so your business can be more consistent.
Custom variables make scenarios easier to manage and maintain.
You can define custom variables at the organization level and the team level. For each variable, you need to identify the following:
-
Name (permanent variable name)
-
Data type (text, number, Boolean, or date)
-
Value (the actual value of the variable)
Create a custom variable
You can create custom variables at the organization level and at the team level.
-
Decide if you want to create an organization variable or a team variable.
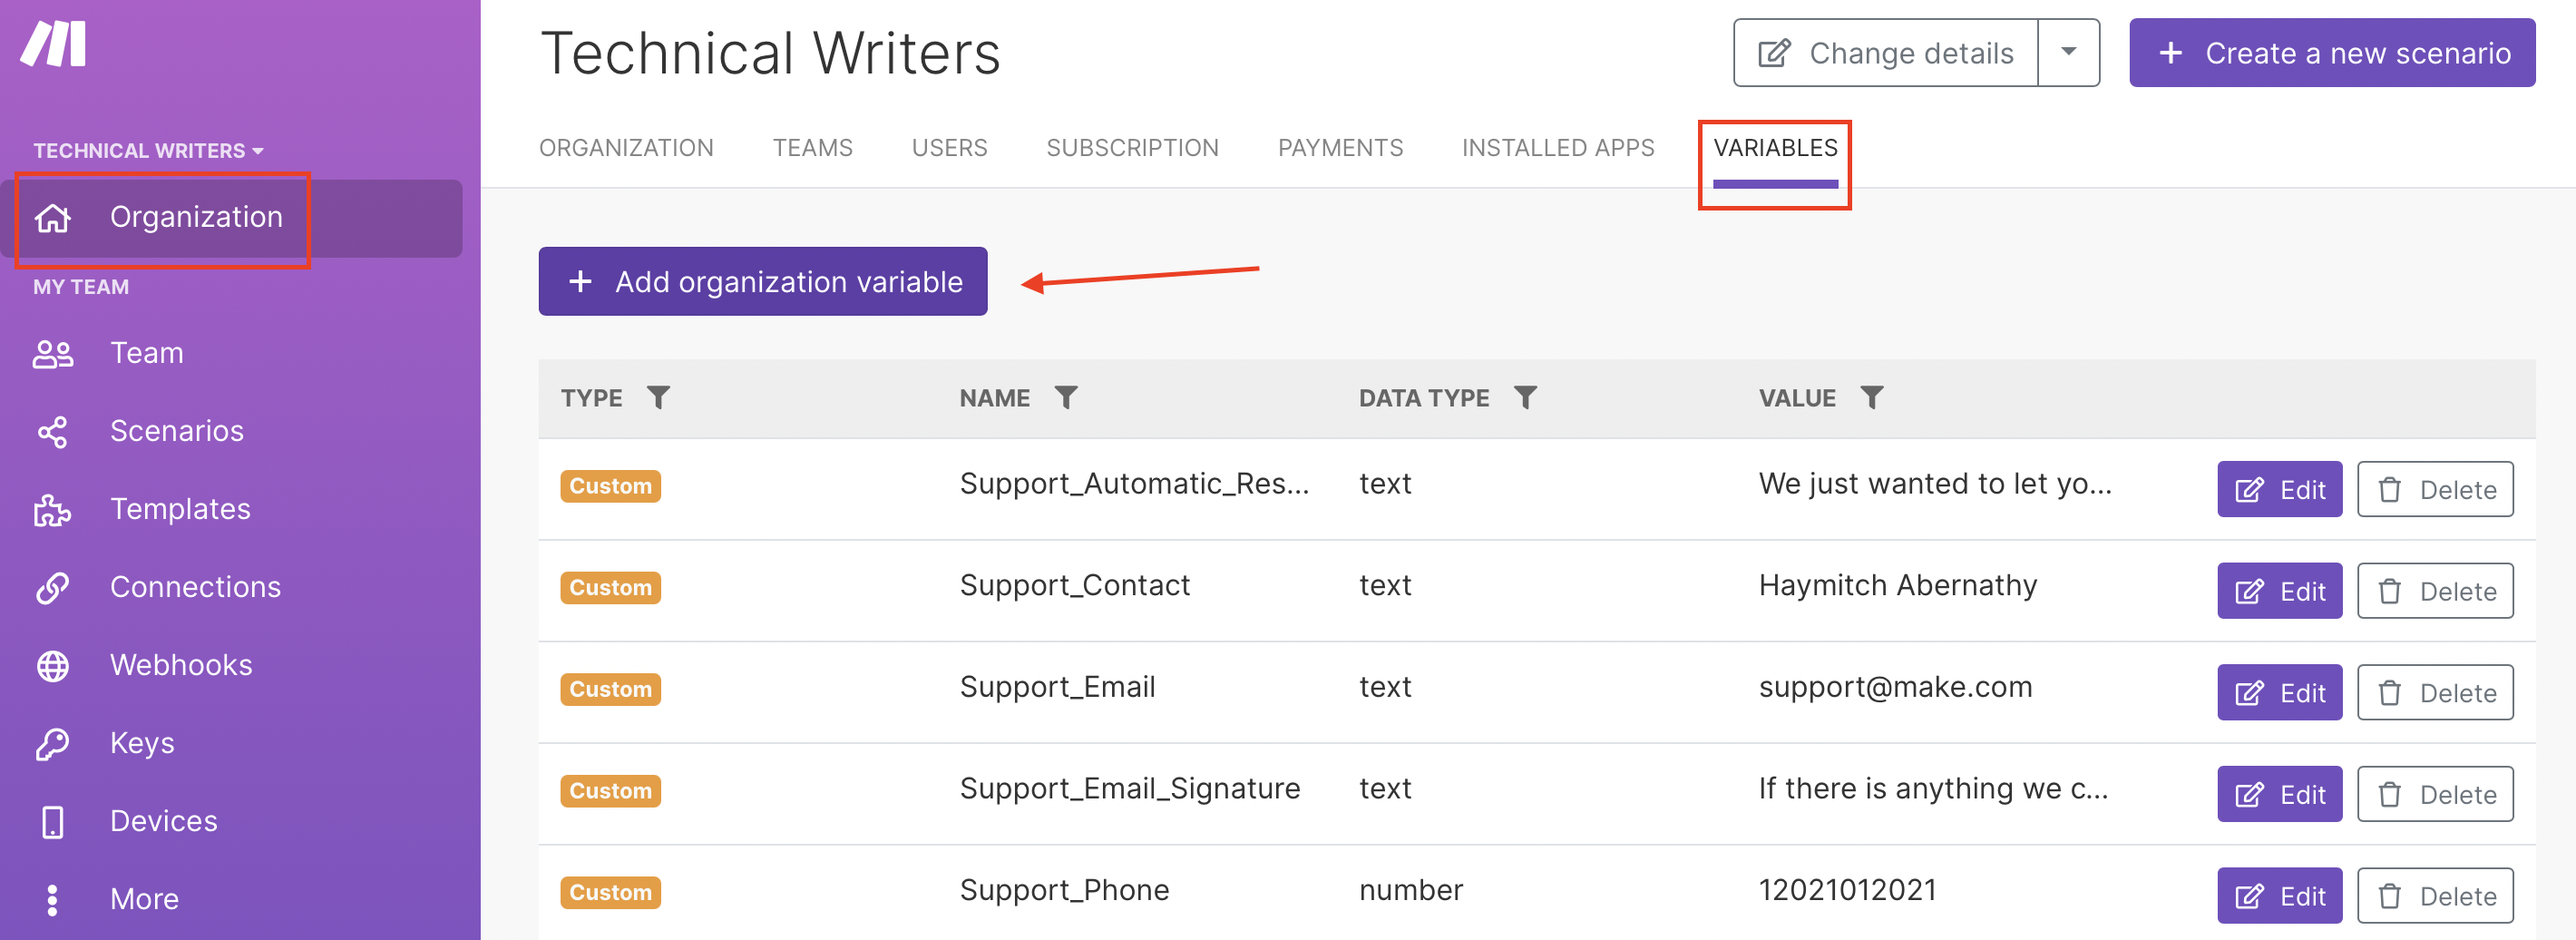
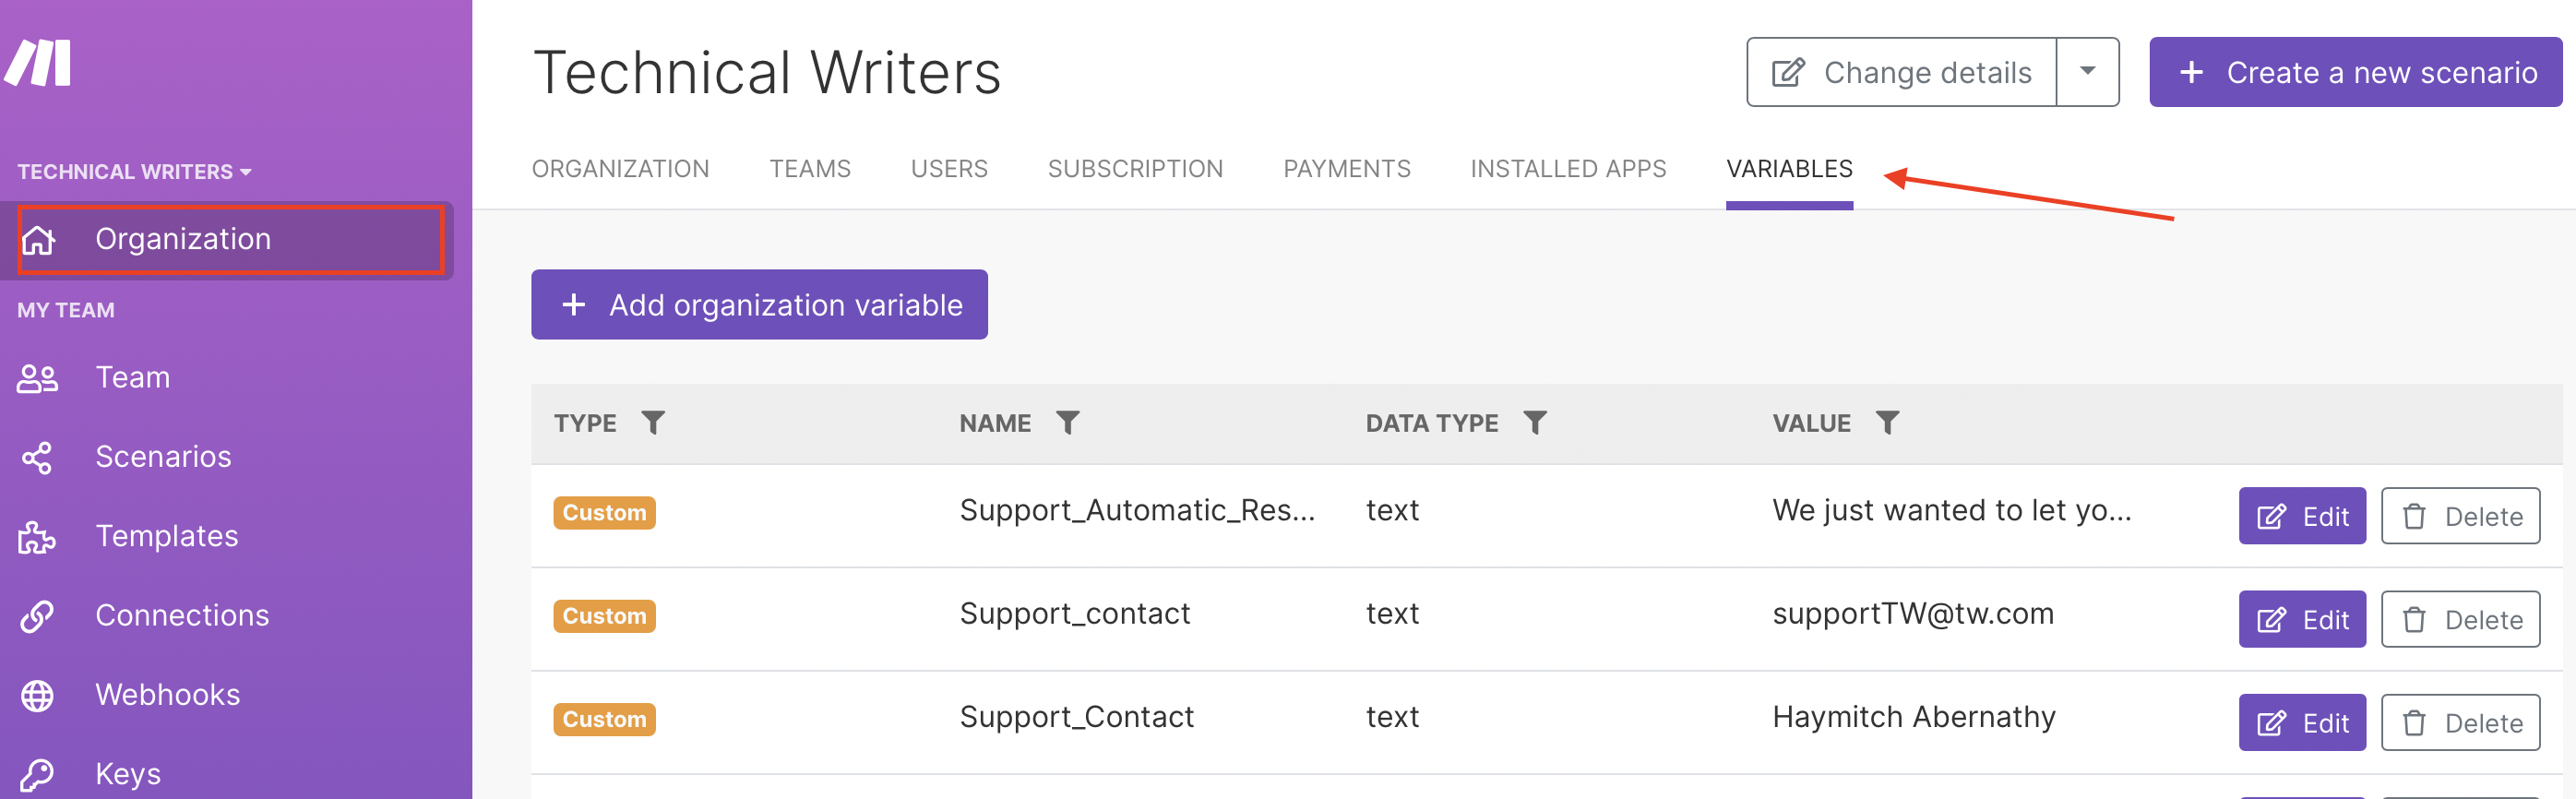
-
For organization variables, go to the organization dashboard and click Variables > Add organization variable.
-
For team variables, go to the team dashboard and click Variables > Add team variable.
-
-
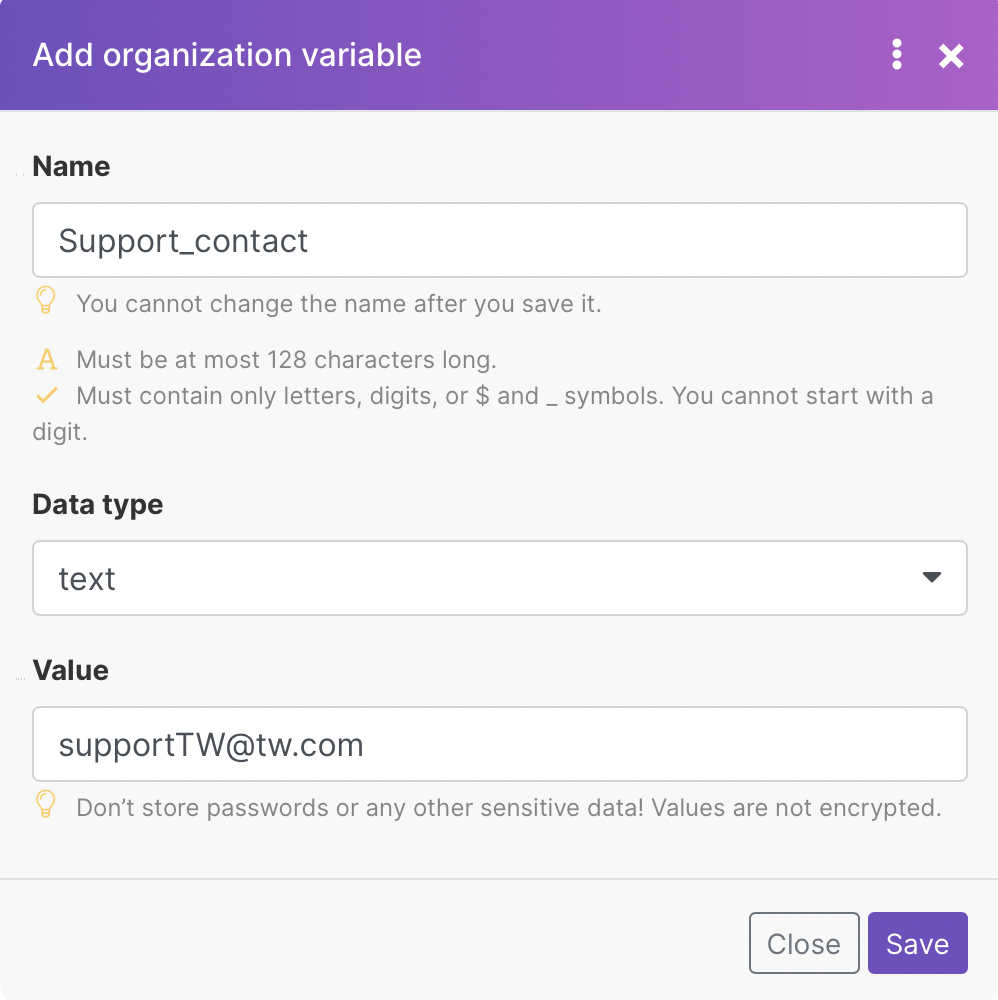
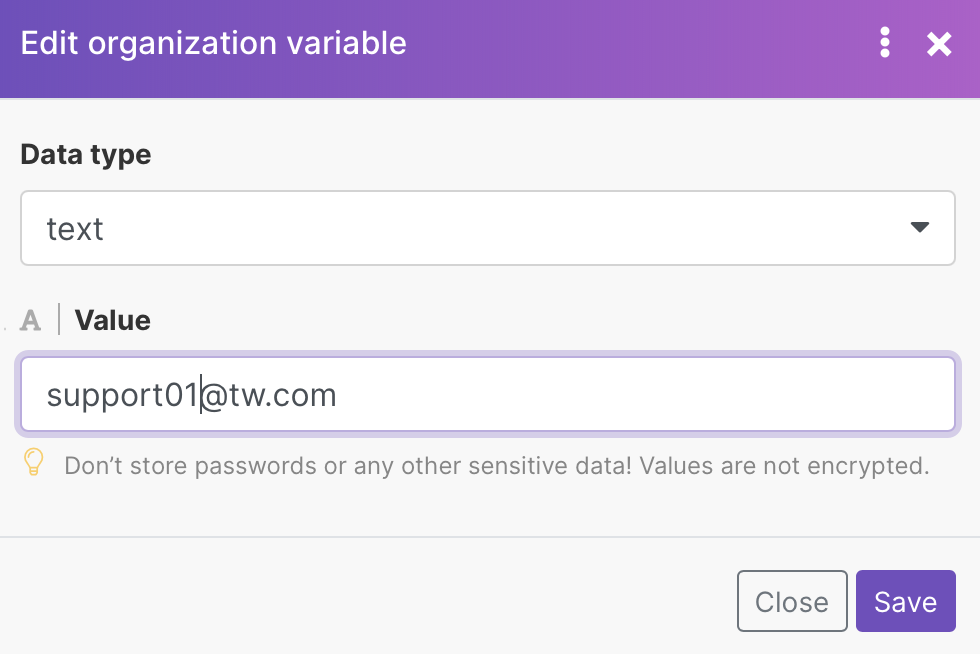
Fill in the information.
Name
-
This field is mandatory and you cannot change it after you save it.
-
The name is the identifier of the variable.
-
The name must contain only letters, digits, or the symbols $ and _.
-
The name cannot start with a digit.
-
The name must contain a maximum of 128 characters.
Data type
Choose the variable data type from the dropdown menu
-
Number
-
Text
-
Boolean
-
Date
Value
-
Enter the value for your variable.
-
You can use letters, digits, spaces, and special characters.
-
Value cannot be empty.
Caution
Variables are not meant to store secrets. Don't use them for anything sensitive!
Variable values are not encrypted as they are stored in plain text. Don't use variables to store passwords or any other sensitive data. Beware that other team members and organization admins can access variables.
-
- Click Save to save your custom variable.
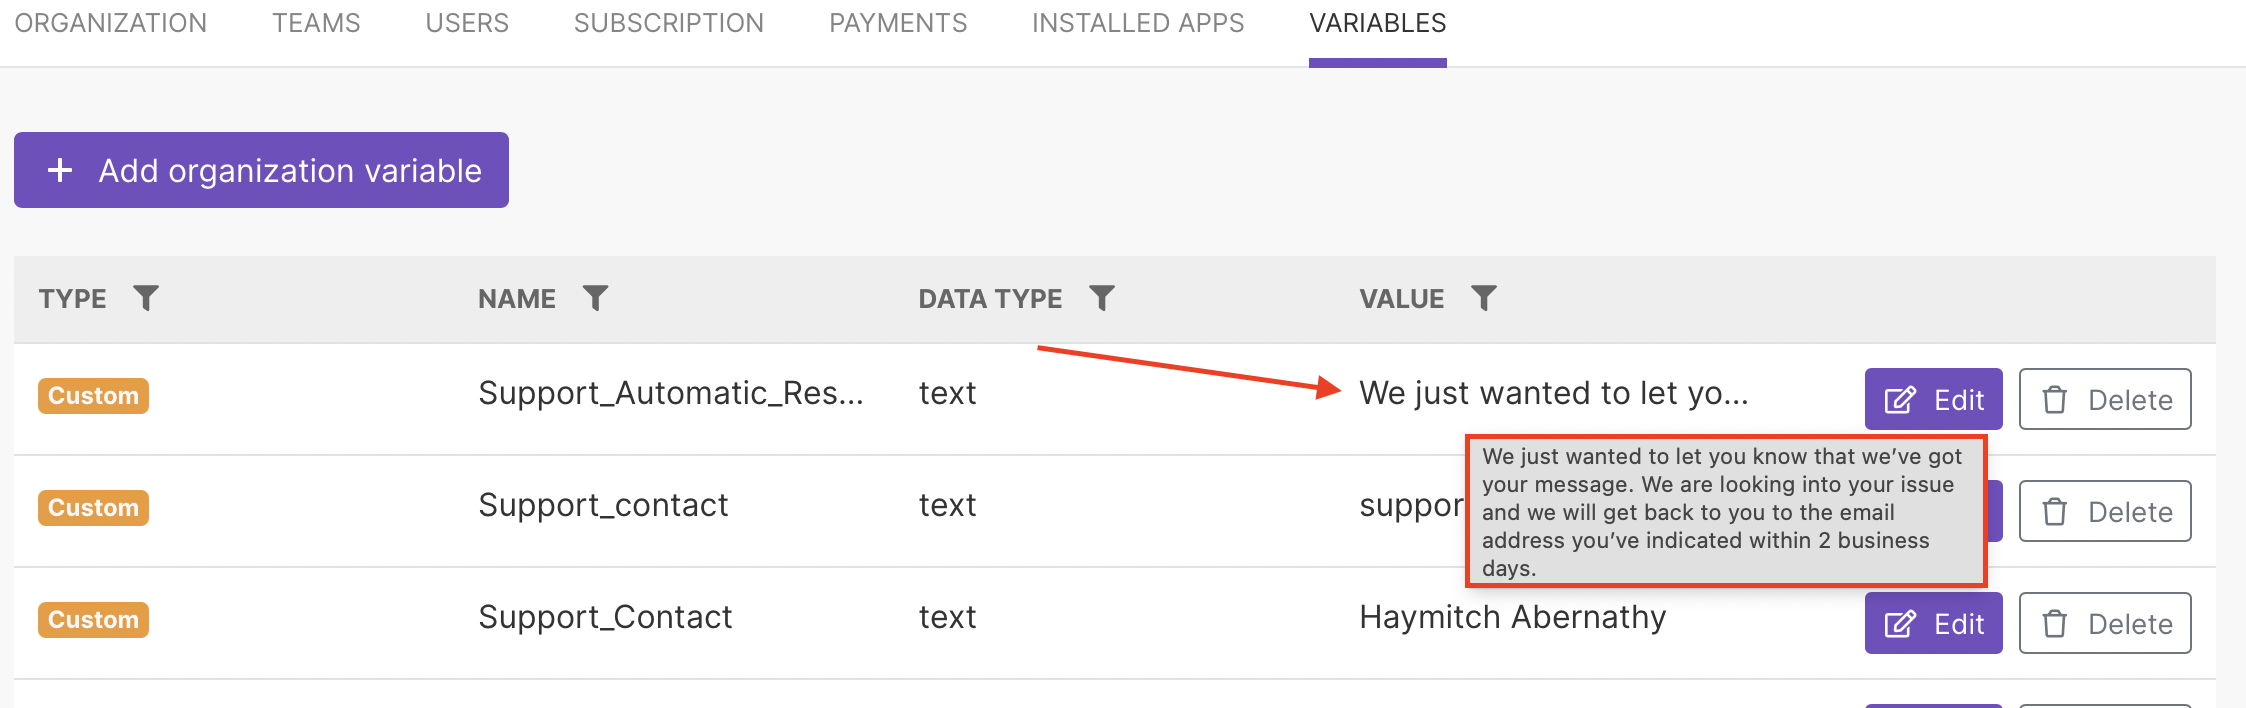
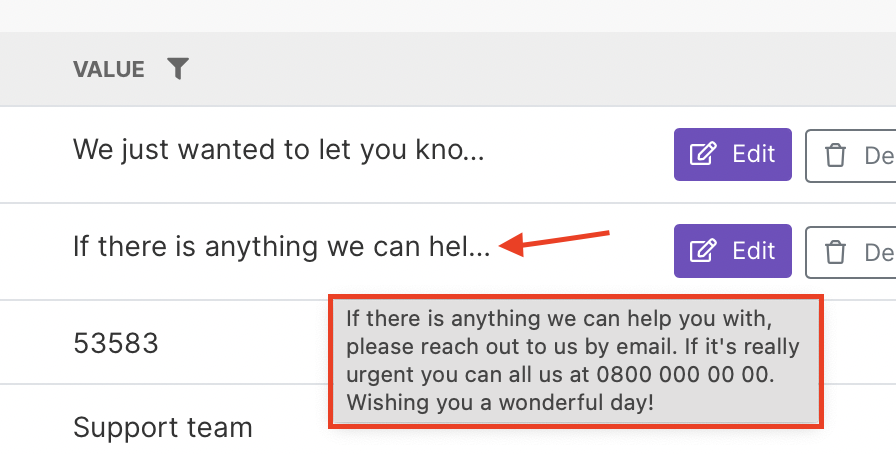
Your new variable will appear on the list of variables.
To preview the variable value, hover over the individual value field.
Edit a custom variable
Caution
If your other team members or organization admins use the same variable in their scenarios, the changes will affect them too.
-
Go to the variable you want to edit.
-
For organization variables, go to the organization dashboard and click Variables.
-
For team variables, go to the team dashboard and click Variables.
-
-
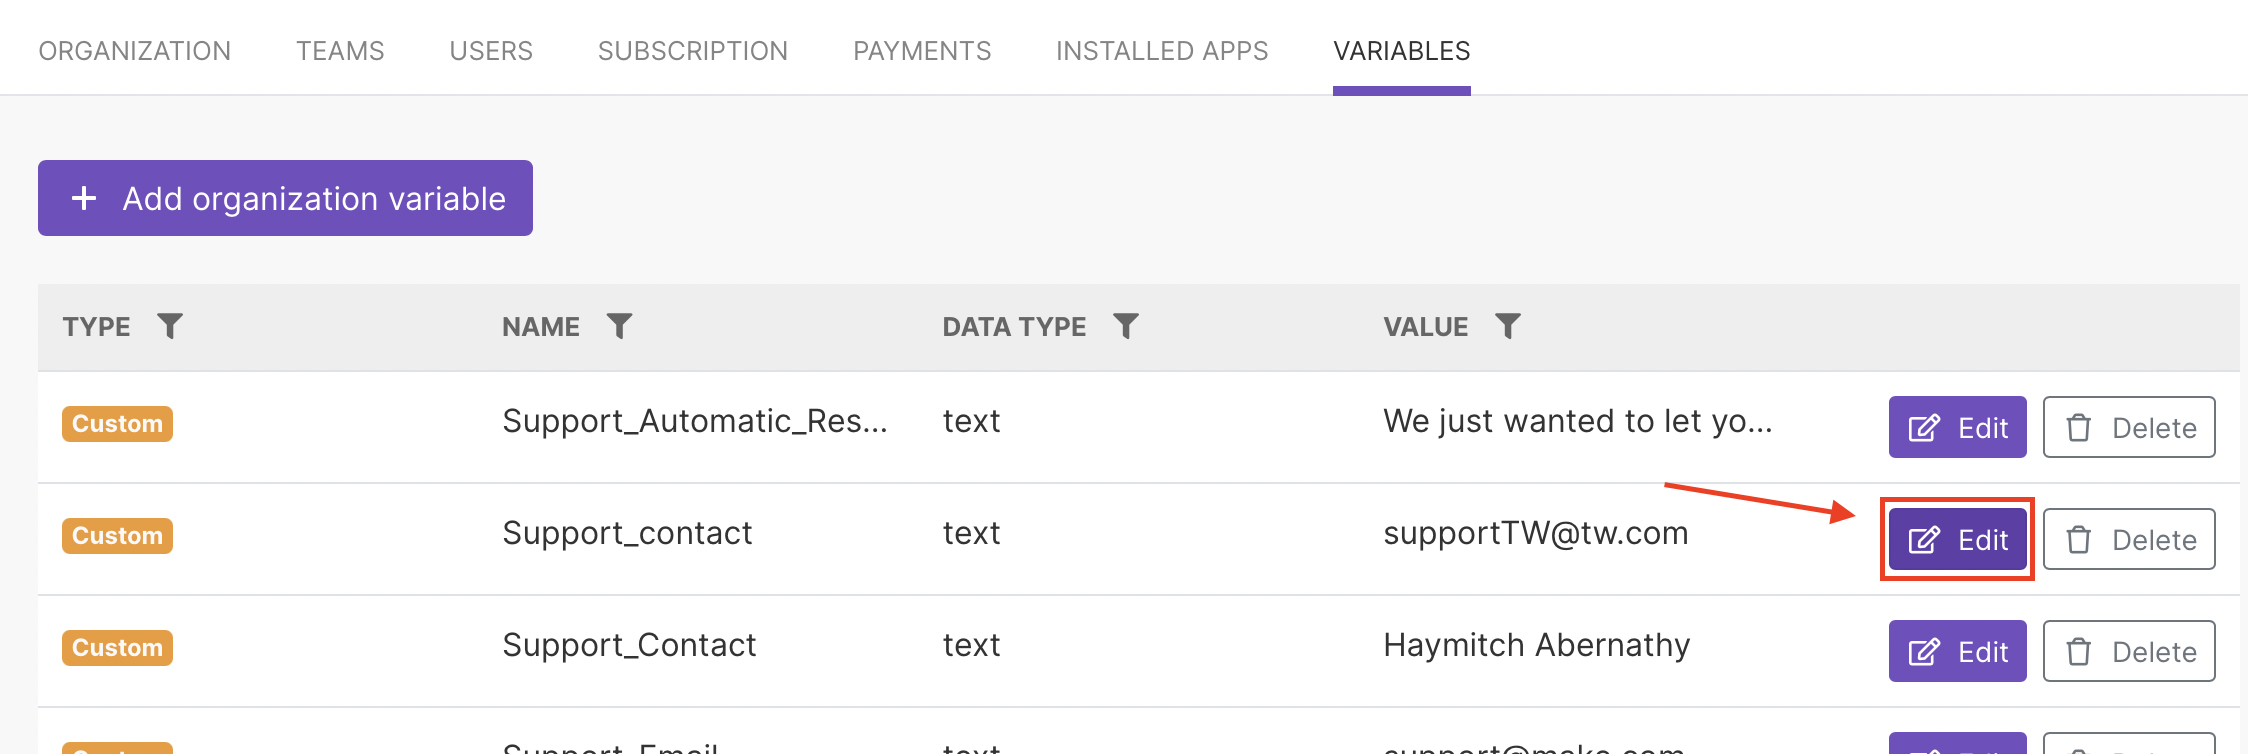
In the list of your custom variables find the one you want to edit and click Edit next to it.
-
Edit the variable as you see fit. You can edit the variable data type and value.
-
Click Save to save your changes.
Your changes are saved and your updated variable will appear on the list of variables. Hover over the individual value field to preview the variable value.
The changes automatically update in the scenarios that already use the variable.
Delete a custom variable
Caution
Deleting a variable that you already use in one or more scenarios can affect other users who use the same variable in their scenarios. After you delete a variable, the variable becomes inactive in all scenarios where it is used and it stops returning expected values.
-
Decide if you want to edit an organization variable or a team variable.
-
For organization variables, go to the organization dashboard and click Variables.
-
For team variables, go to the team dashboard and click Variables.
-
-
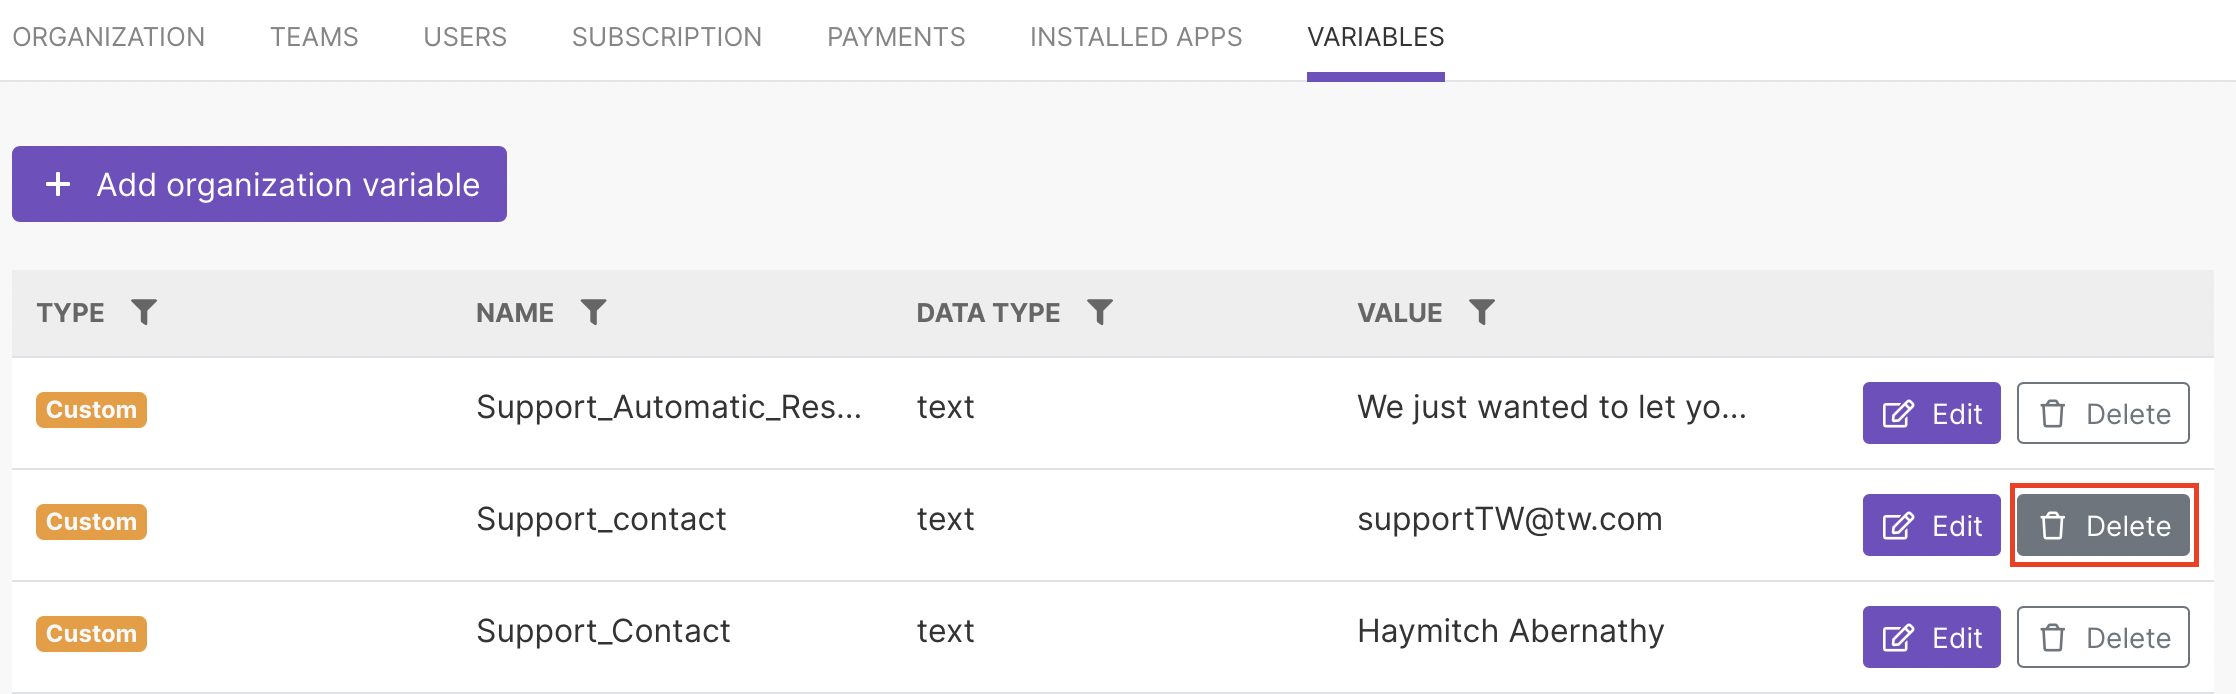
In the list of your custom variables find the one you want to delete and click Delete next to it.
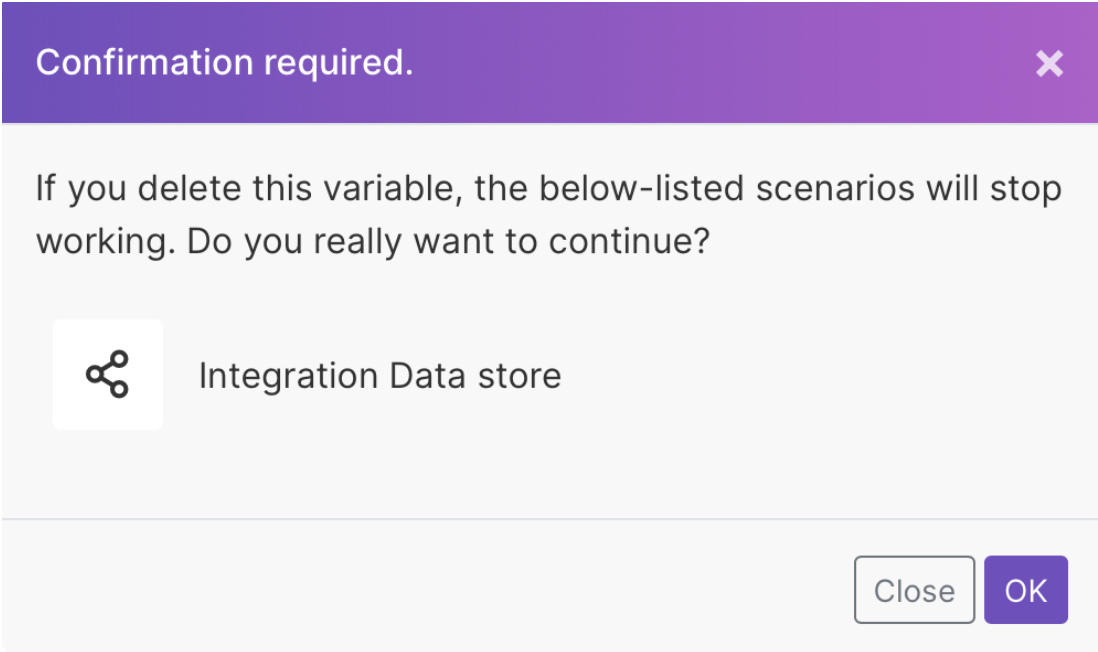
If the variable you want to delete is already used in a scenario, a modal pops up asking for your confirmation to delete the variable. Click OK to delete the variable.
The variable is deleted and disappears from your list of custom variables.
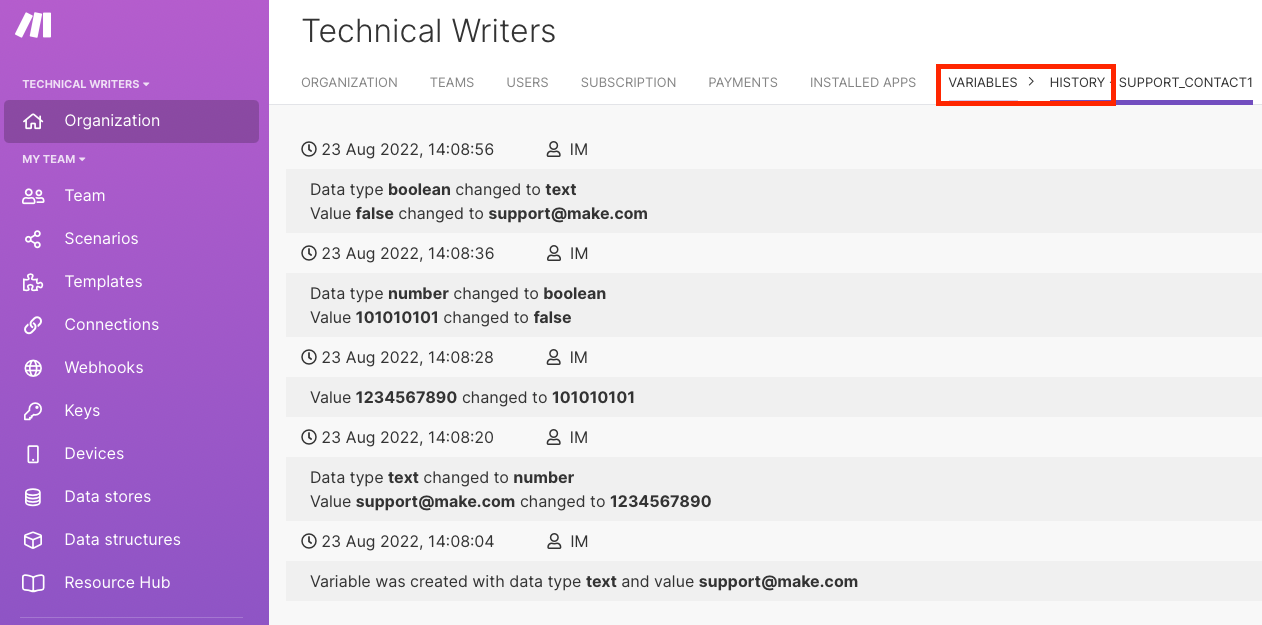
Check custom variable history
You can see who changed the custom variable, when, and what the changes are.
-
Go to the custom variable whose history you want to check.
-
For organization variables, go to the organization dashboard and click Variables.
-
For team variables, go to the team dashboard and click Variables.
-
-
Click the dropdown menu next to Edit. Select Show history.
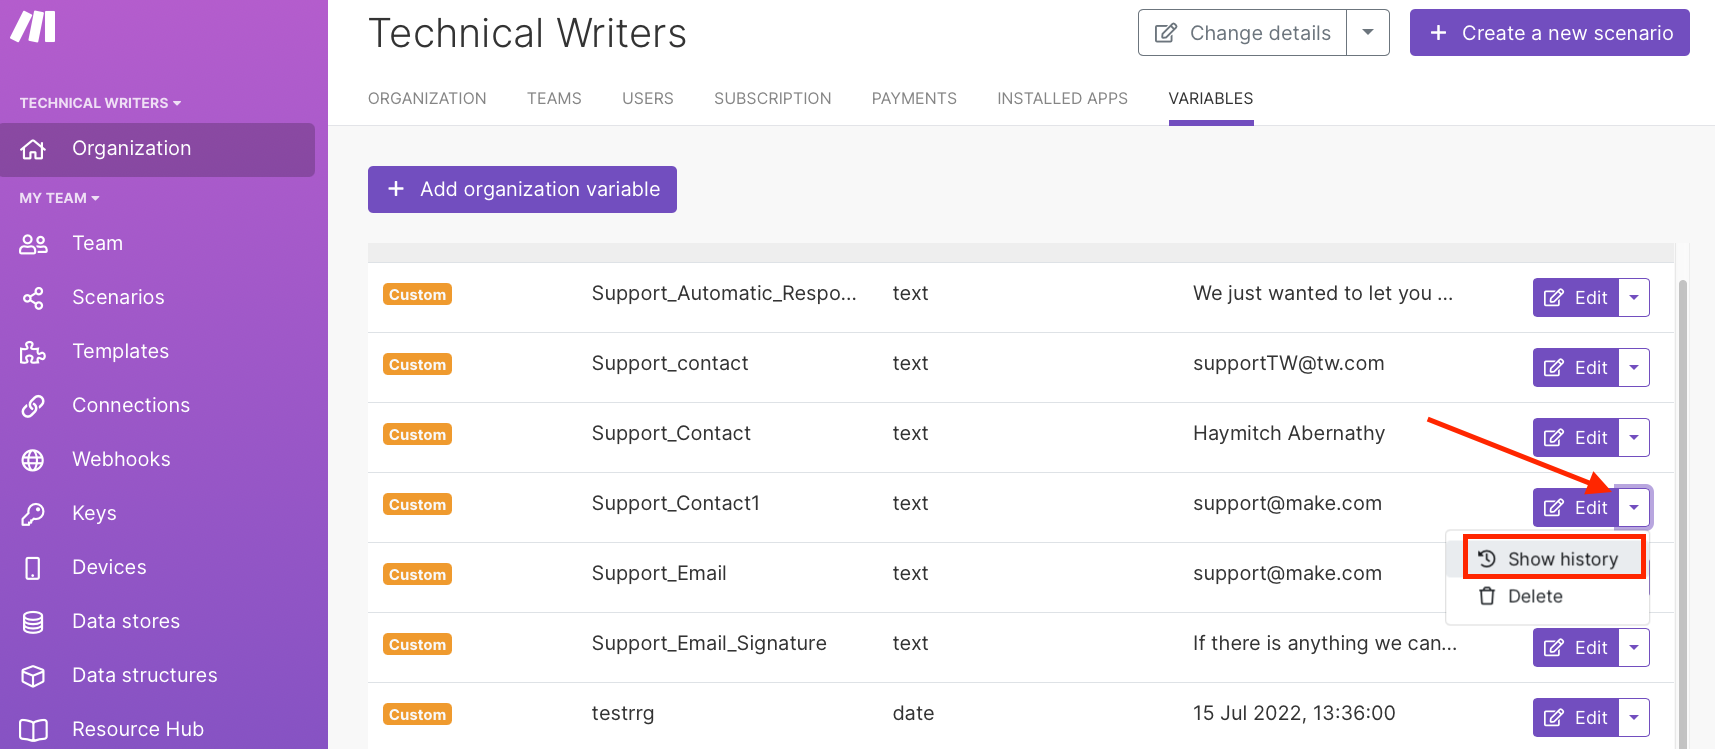
A new window opens where you can see the variable history. The last change appears on the top.
User permissions for custom variables
Organization variables
Table 3. Organization custom variables user permissions
| Owner | Admin | Member | Accountant | App Developer | |
|---|---|---|---|---|---|
| Can access organization variables | ✔ | ✔ | ✔ | ✔ | |
| Can edit organization variables | ✔ | ✔ | |||
| Can add organization variables | ✔ | ✔ | |||
| Can delete organization variables | ✔ | ✔ |
Team variables
Table 4. Team custom variables user permissions
| Team Admin | Team Member | Team Monitoring | Team Operator | Team Restricted Member | |
|---|---|---|---|---|---|
| Can access organization variables | ✔ | ✔ | ✔ | ✔ | |
| Can add organization variables | ✔ | ✔ | ✔ | ||
| Can edit organization variables | ✔ | ✔ | ✔ | ||
| Can delete organization variables | ✔ | ✔ | ✔ |
Using variables in a scenario
You can use variables in all scenarios within your Ibexa Connect account.
We prepared two simple examples which show how you can use system and custom variables in your scenarios. Click the plus icon to see the examples.
Example with system variables
Get notified before you reach your operations limit
Use this scenario if you want to get notified once you reach a certain number of operations close to your operations limit. You can set the exact number after which you want Ibexa Connect to notify you.
In our example, we are sending notifications via Email, but you can use Slack, Skype, or any other messaging program.
Add Tools module
-
In Ibexa Connect, navigate to Scenarios > Create a new scenario.
-
Add Tools > Set variable module.
-
Enter variable name, lifetime, and value.
Our variable's name is Operations left, it is valid for one execution and the value is Ops limit.
-
Click OK to save.
 |
Add Email module
-
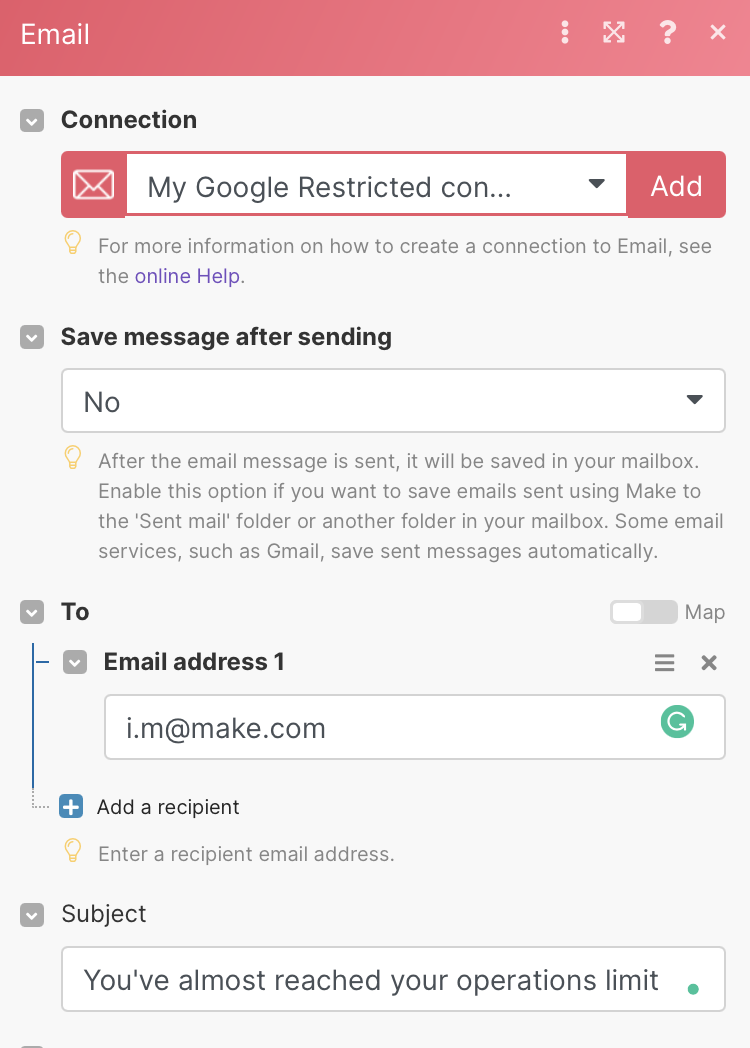
Add Email > Send an email module.
-
Create a connection to your email.
-
Select if you want to save your message after sending it. We don't want to save emails after sending them.
-
Enter the email address you want to send the email to. You can add multiple email addresses by clicking Add a recipient.
-
Enter email subject.
Choose something relevant for your context. Our subject is You've almost reached your operations limit.
-
Select the content type from the dropdown menu (HTML or Plaintext).
-
In the content field, enter the message.
To insert system variables, select the system variables from the variables tab.
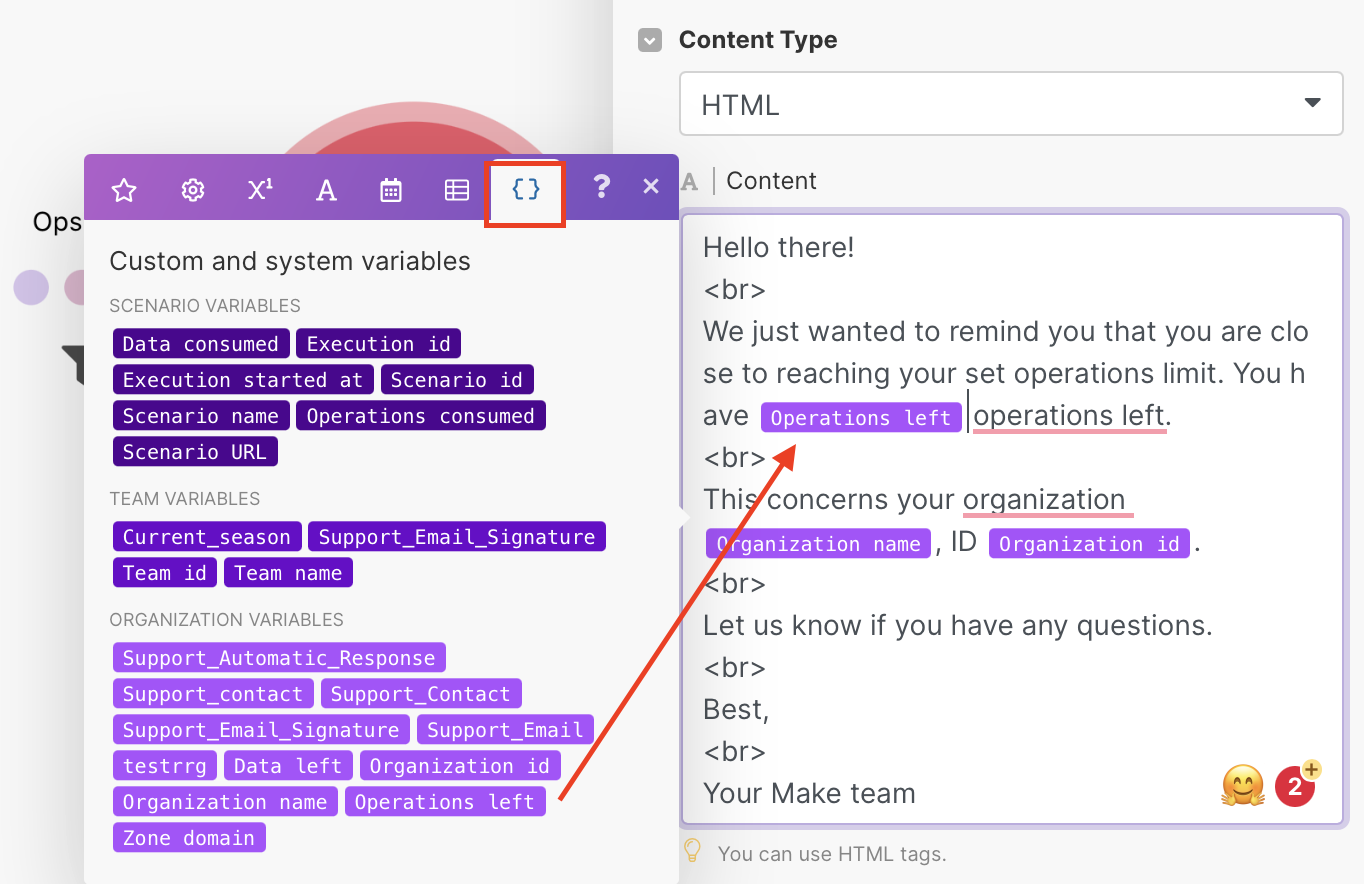
We use
Operations left,Organization name, andOrganization IDsystem variables to get the information about how many operations we have left in our specific organization.Note: If you choose HTML as your content type, make sure to use HTML tags to format your text.
-
(optional)
Add attachments if you wish.
Use advanced settings to add the copy and blind copy recipient, set up a custom sender email address, etc. We didn't use advanced options for this example.
Learn more about advanced settings in Send an email module.
-
Click OK to save.
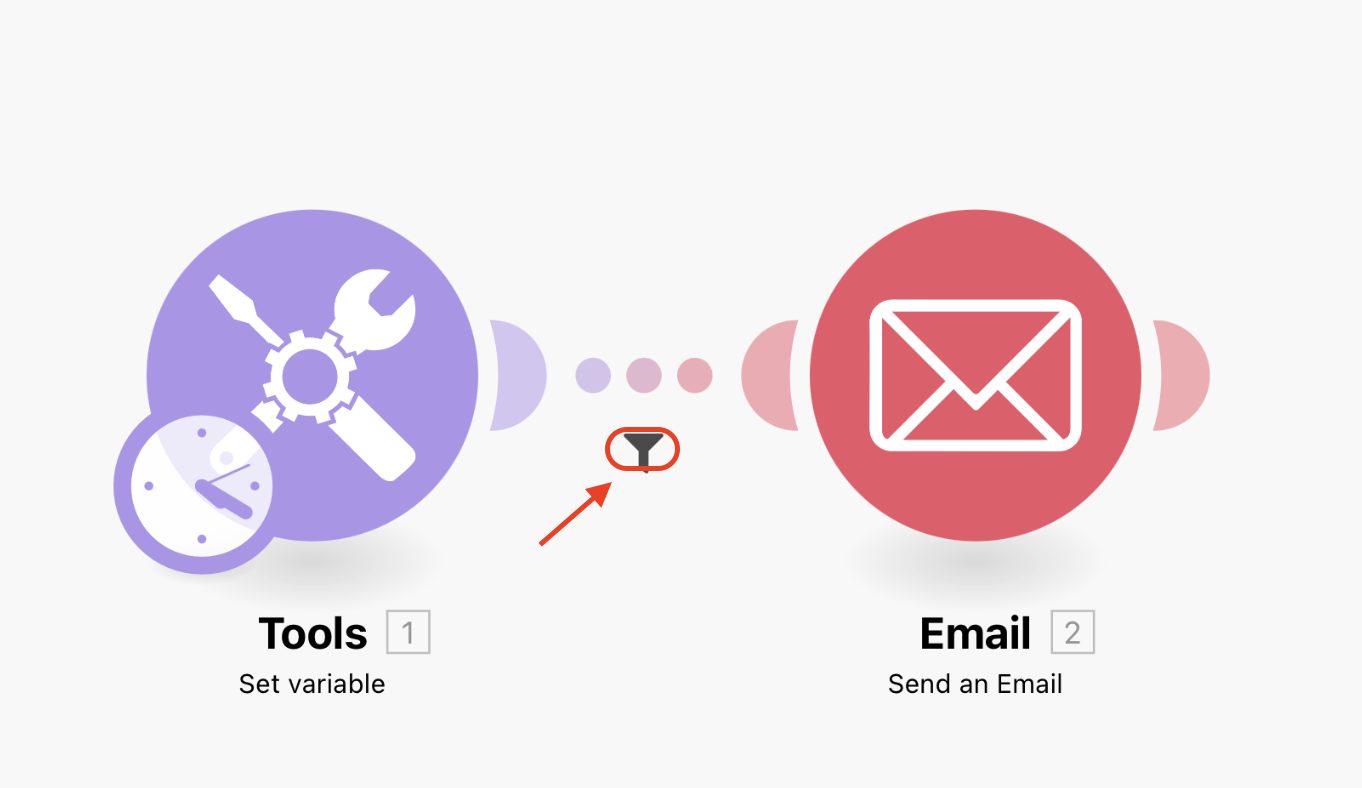
Add a filter
-
To add a filter between two modules, click on the filter icon under the line connecting two modules.
-
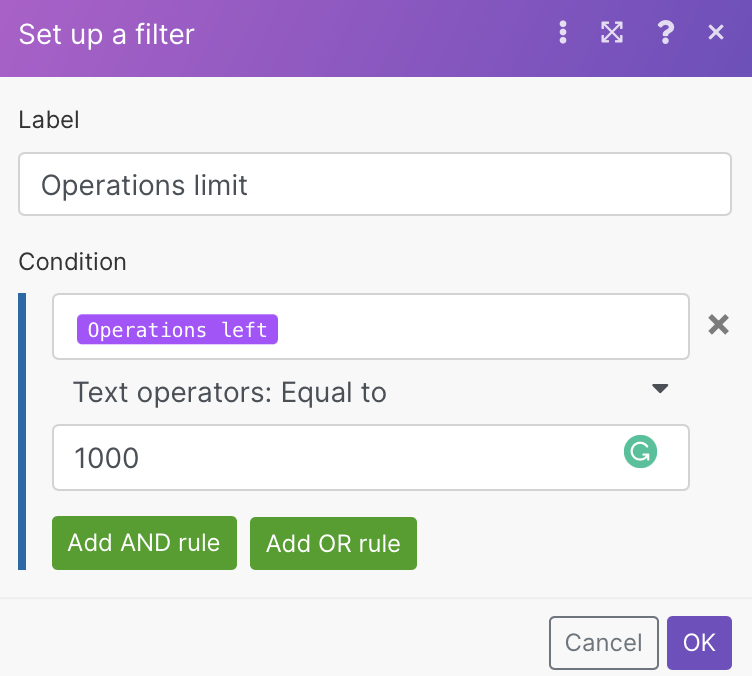
In the Label field, enter the name of your filter. You can also leave the label field empty.
-
In the Condition field, choose Operations left variable from the variable tab.
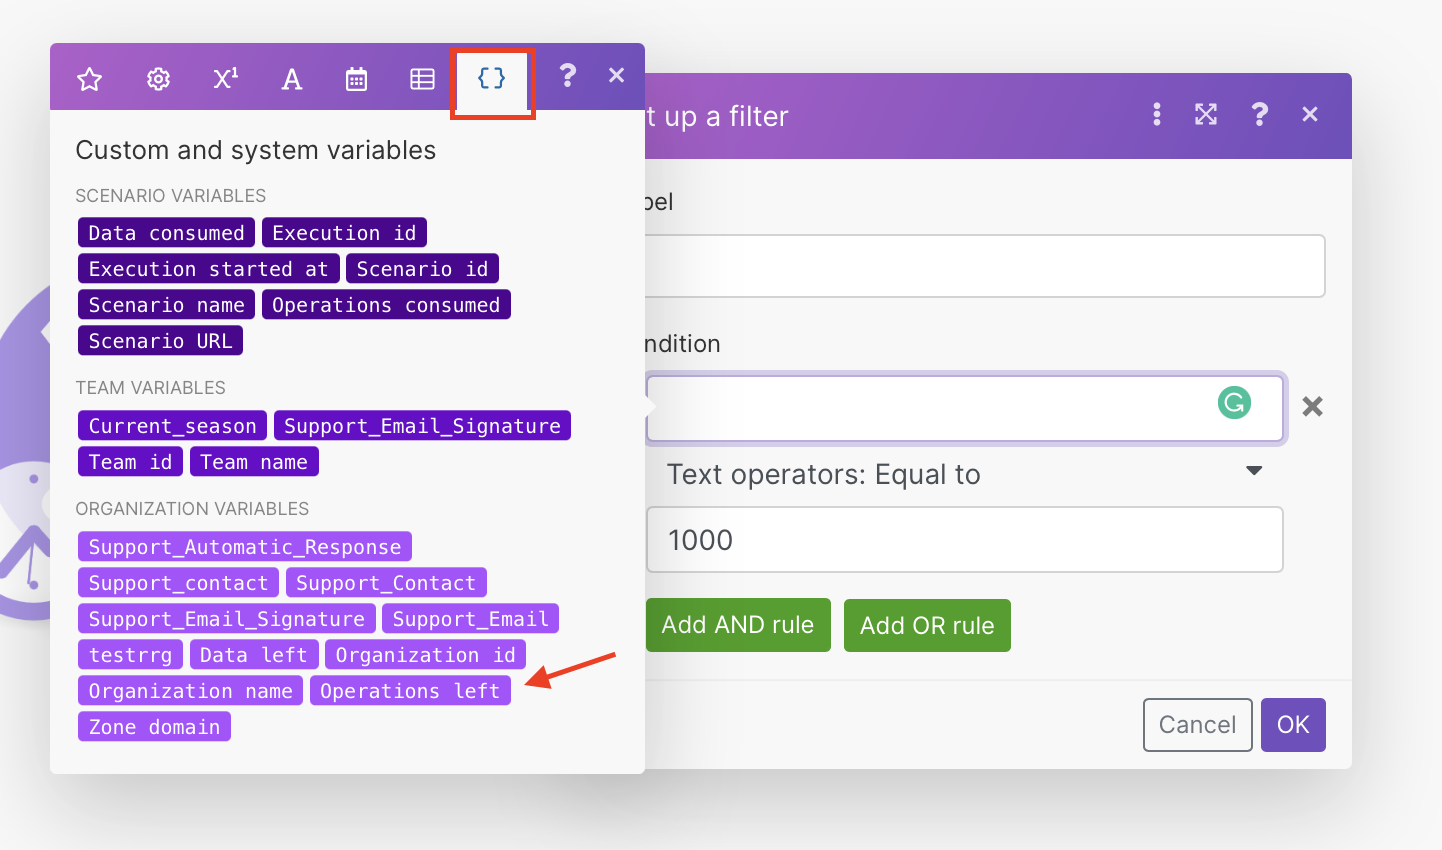
-
On the field under Text operators:Equal to enter the number of operations after which you want us to notify you.
-
Click OK to save.
If you enter a label, it appears above the line connecting two modules once you save your filter.
In our example, we set up a filter which will notify us once we have only 1000 operations left in our organization (see screenshot below).
Test your scenario
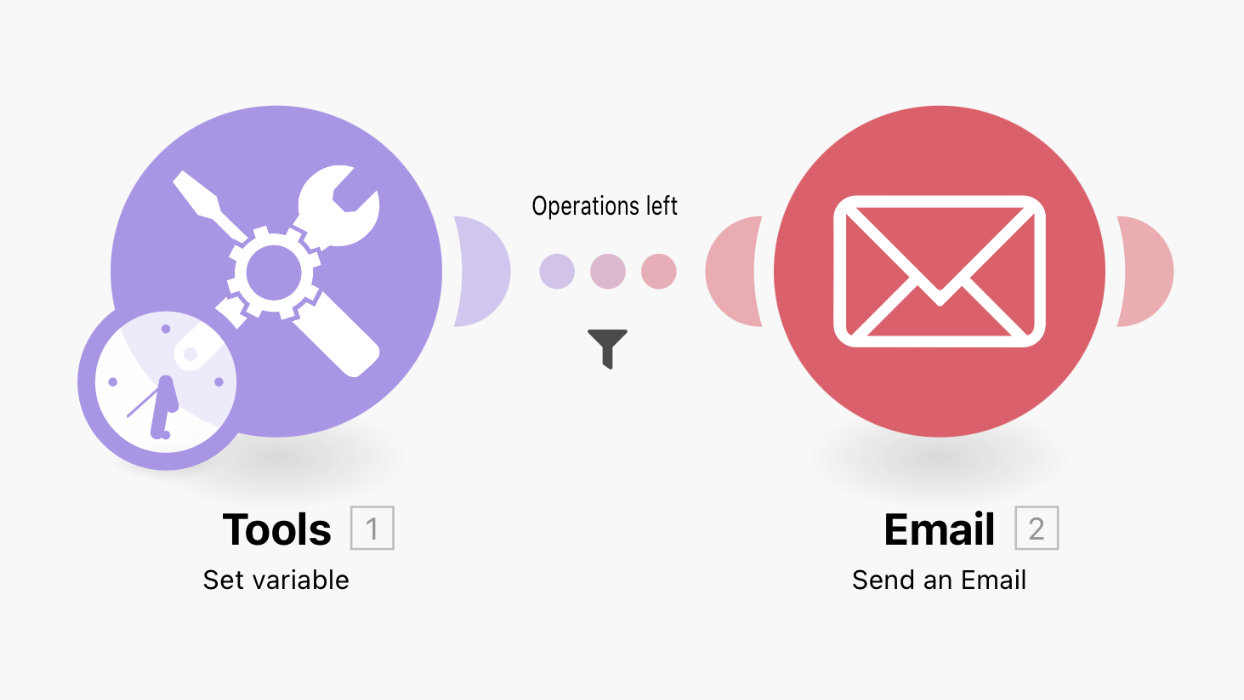
Your scenario should look similar to the screenshot below.
Click Run once to test your scenario.
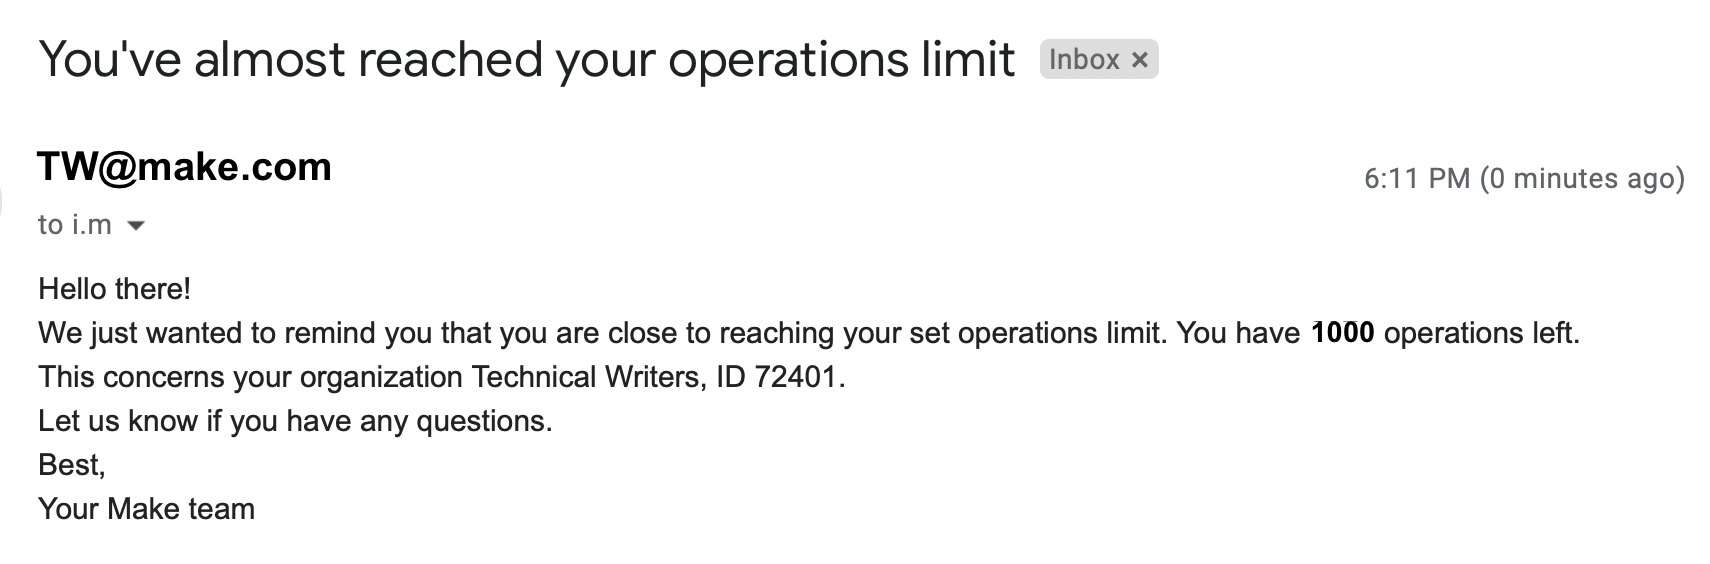
If you set up everything correctly, you should get an email in your inbox similar to the one below once you reach your set operations limit.
Example with custom variables
Emails with consistent email signature
Create a scenario which sends automatic email responses when someone sends you an email. For example, if you get a lot of support tickets, use this scenario to automatically respond to a ticket.
Prepare custom variables
Prepare the custom variables that you want to use in your emails. In our example that would be the automatic email response and the signature.
-
Decide if you want to create an organization variable or a team variable.
-
For organization variables, go to the organization dashboard and click Variables > Add organization variable.
-
For team variables, go to the team dashboard and click Variables > Add team variable.
In our example, we use team variables because we refer to the support team.

-
-
Enter your variable name, data type, and value.

-
Click Save to save your custom variable.
Your new variable will appear on the list of variables.
To preview the variable value, hover over the individual value field.
Add Email module
Select the folder whose emails you want to watch.
-
Go to Scenarios > Create a new scenario
-
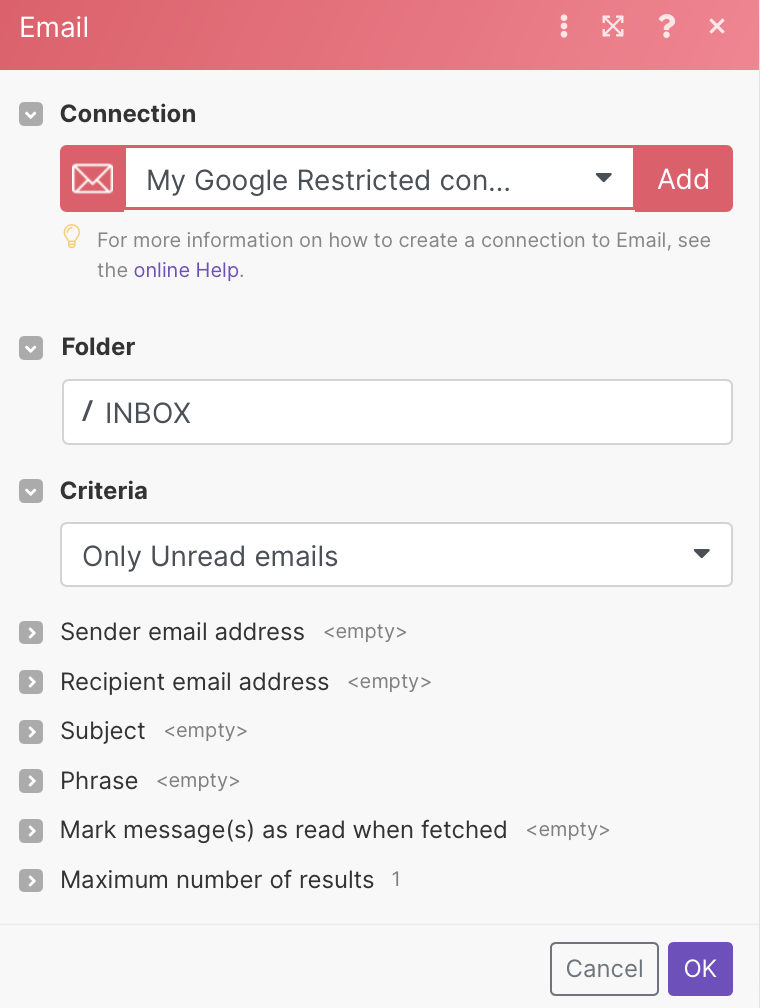
Add Email > Watch email module.
-
Create a connection to your email.
-
Select the folder whose emails you want to watch.
-
Select the criteria of the emails you want to watch from the dropdown menu.
-
(optional)
Specify if you want to watch emails from a specific email address, emails that contain a specific phrase, etc.
-
Click OK to save.
-
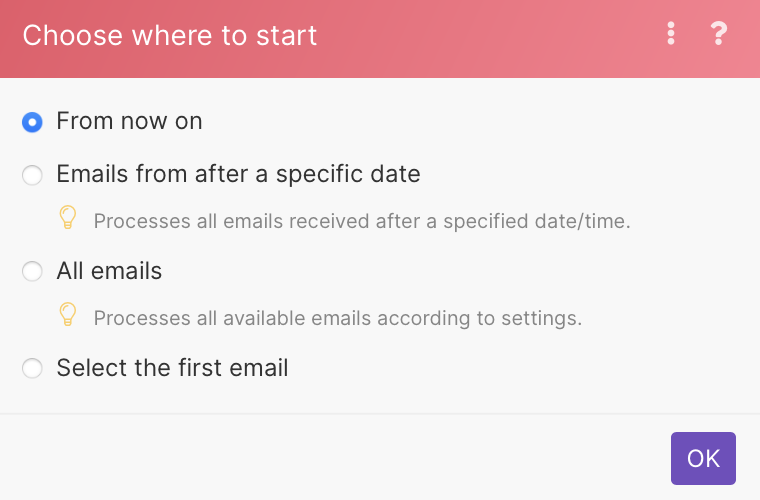
A pop-up appears. Choose from when to want to start watching emails.
-
Click OK to save.
Add Send an email module
-
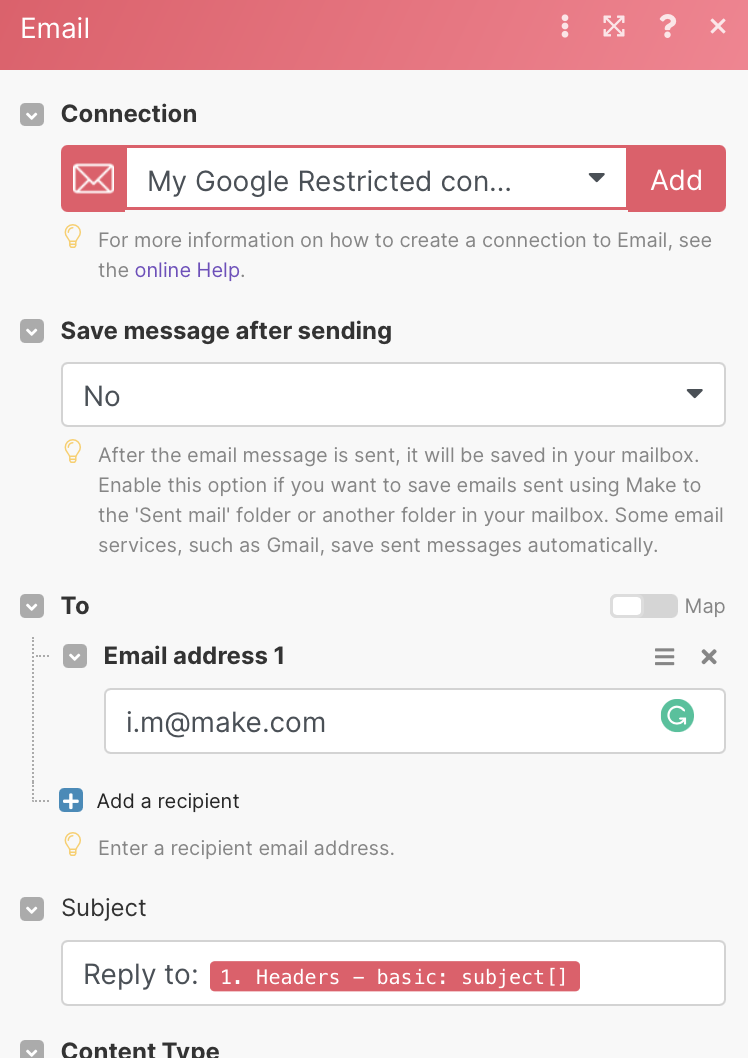
Add Email > Send an email module.
-
Create a connection to your email.
-
Select if you want to save your message after sending it. In this example, we won't save emails after sending them.
-
Enter the email address you want to receive the email to. You can add multiple email addresses by clicking Add a recipient.
-
Enter an email subject.
Choose something relevant to your context. Our subject line is the received email.
-
Select the content type from the dropdown menu (HTML or Plaintext).
-
In the content field, enter the message.
To insert custom variables, select the system variables from the variables tab.
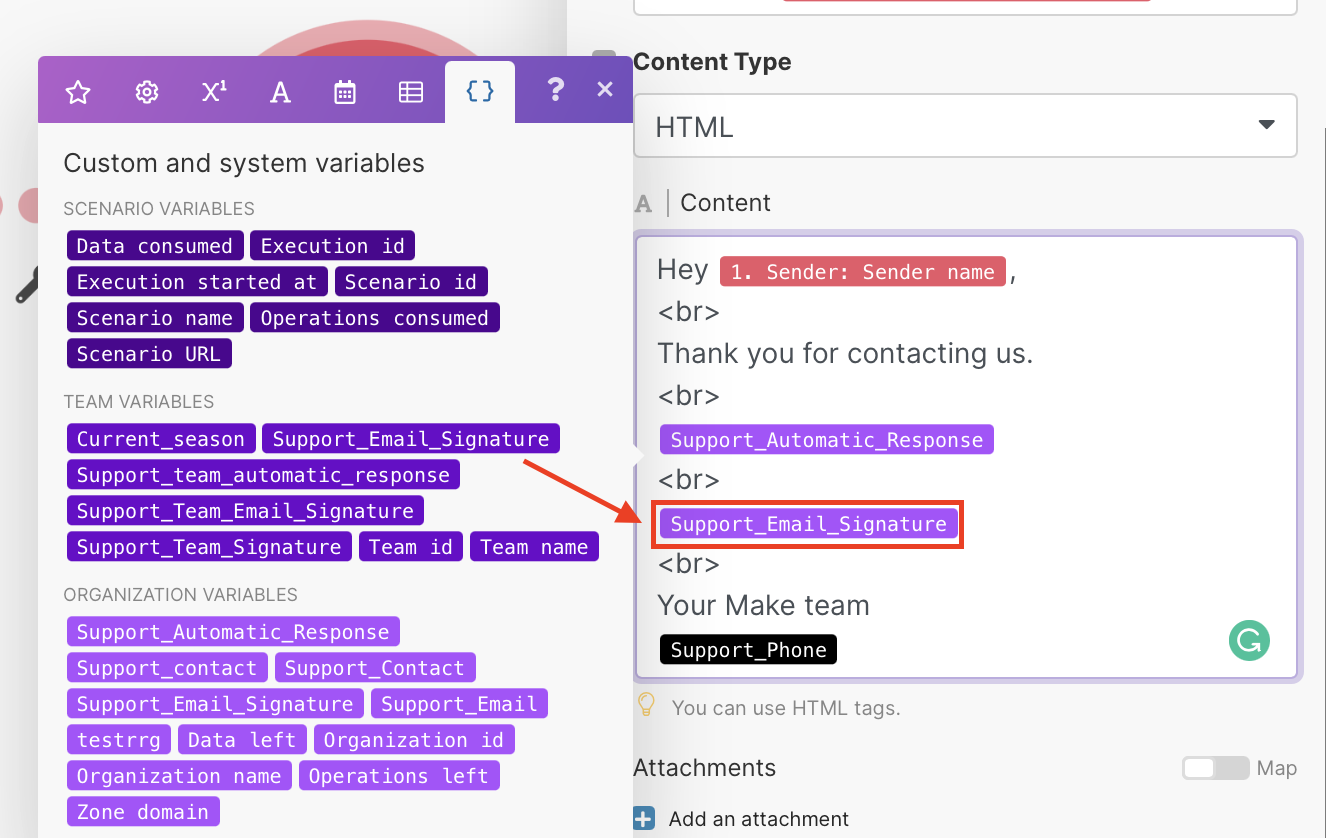
We use our custom variables
Support_Email_SignatureandSupport_Automatic_Responseto have a consistent automatic reply to all emails. -
(optional)
Add attachments if you wish.
Use advanced settings to add the copy and blind copy recipient, set up a custom sender email address, etc. We didn't use advanced options for this example.
Learn more about advanced settings in Send an email module.
-
Click OK to save.
Test your scenario
Click Run once to test your scenario.
You can test the scenario by sending a test email to yourself. If you set up everything correctly, you should get an email in your inbox similar to the one below.
