FireText
The FireText modules allow you to create, update, list, and delete the contacts, and messages in your FireText account.
Getting Started with FireText
Prerequisites
- A FireText account - create an account at app.firetext.co.uk/signup.
Note
The module dialog fields that are displayed in bold (in the Ibexa Connect scenario, not in this documentation article) are mandatory!
Connecting FireText to Ibexa Connect
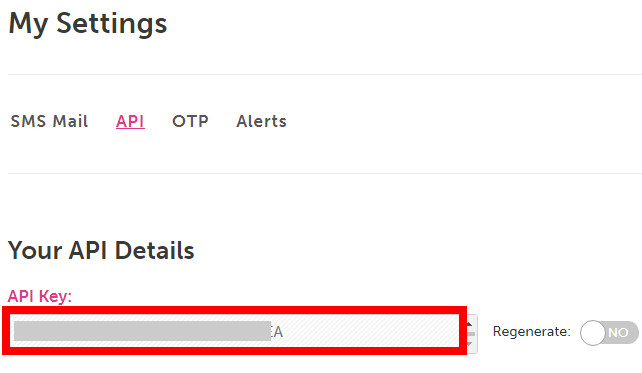
To connect your FireText account to Ibexa Connect you need to obtain the API Key from your FireText account and insert it in the Create a connection dialog in the Ibexa Connect module.
-
Log in to your FireText account.
-
Click Settings (
 ) Icon > API.
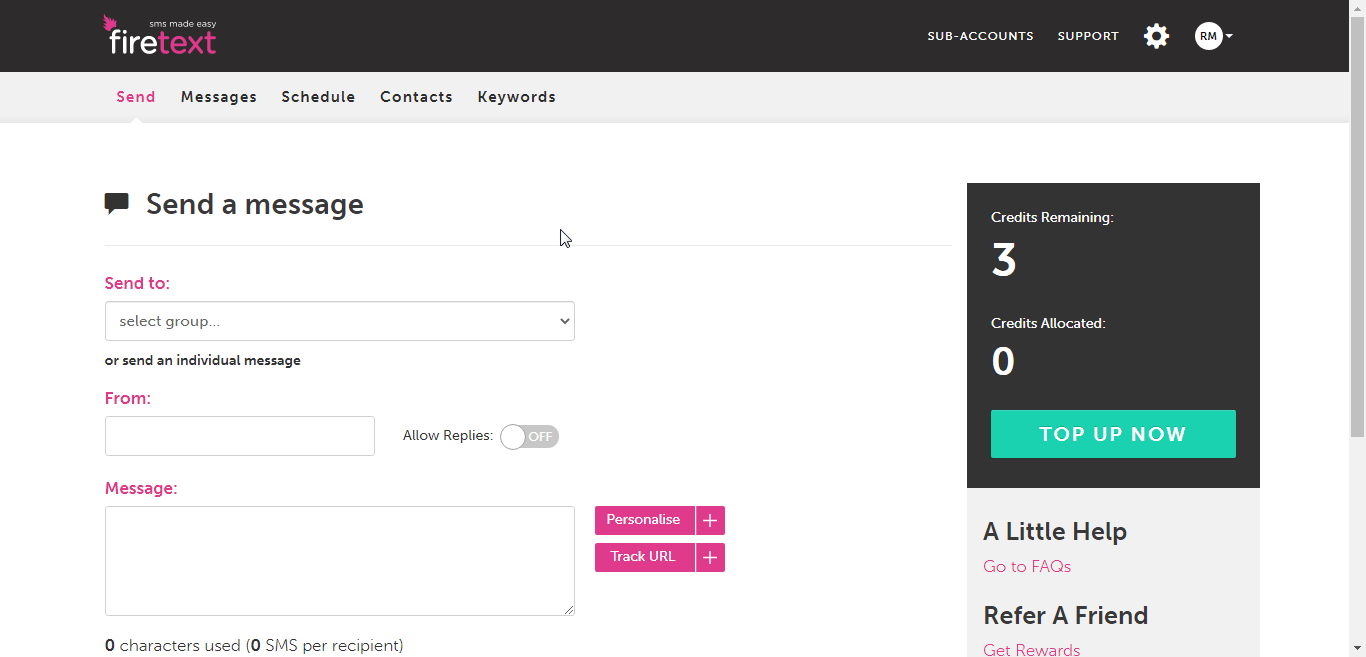
-
Copy the API Key to your clipboard.
-
Go to Ibexa Connect and open the FireText module's Create a connection dialog.
-
In the Connection name field, enter a name for the connection and select the Authorization Type:
-
Email and Password
-
API Key
-
-
If you have selected the Authorization Type as Email and Password, enter your FireText account credentials and click Continue.
(OR)
If you have selected the Authorization Type as API Key, enter the API key copied in step 3, and click Continue.
The connection has been established.
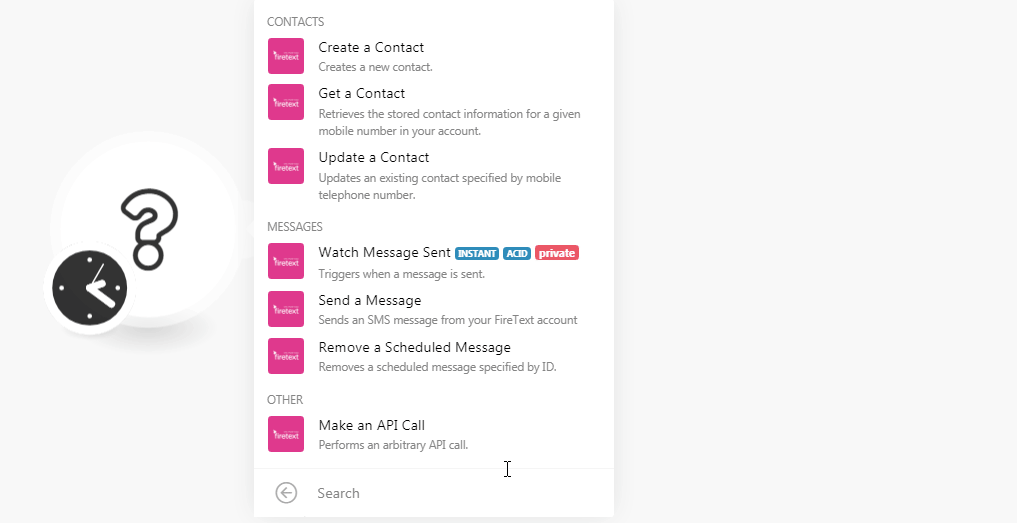
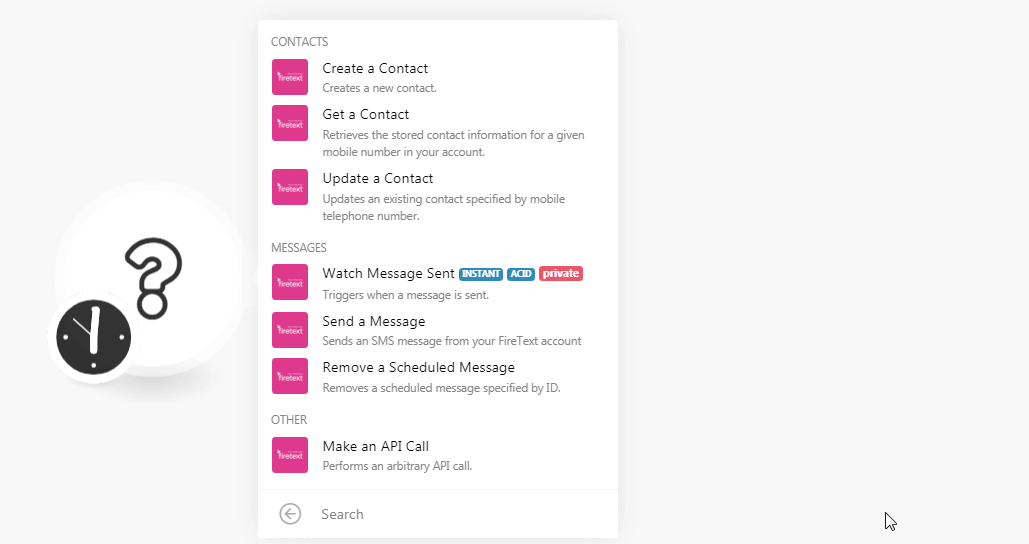
Contacts
Create a Contact
Creates a new contact.
| Mobile Telephone | Enter the contact's phone number. Remove the + sign and any leading zeros when using international codes. A UK number can start 07 or 447. |
| First Name | Enter the contact's first name. |
| Last Name | Enter the contact's last name. |
| Group ID | Enter the Group ID to which you add the contact. You can choose to add this contact to a pre-defined group. Within FireText, click Contacts > Edit on your chosen group. The API ID is set here for your group within the Advanced Options section. |
| Sub-Account ID | Select a sub-account ID for the contact. Add the contact to a specified sub-account.Sub-account is set to UK numbers as default.Contact hello@firetext.co.uk if you need to switch to International numbers. |
| Custom Field (1 - 3) | Add any custom field for the contact. For example, Address. |
Get a Contact
Retrieves the stored contact information for a given mobile number in your account.
| Mobile Telephone | Enter the contact's phone number whose details you want to retrieve. Remove the + sign and any leading zeros when using international codes. A UK number can start 07 or 447. |
| Sub-Account ID | Select a sub-account ID for the contact. Add the contact to a specified sub-account.Sub-account is set to UK numbers as default.Contact hello@firetext.co.uk if you need to switch to International numbers. |
Update a Contact
Updates an existing contact specified by mobile telephone number.
| Mobile Telephone | Enter the contact's phone number whose details you want to update. Remove the + sign and any leading zeros when using international codes. A UK number can start 07 or 447. |
| First Name | Enter the contact's first name. |
| Last Name | Enter the contact's last name. |
| Group ID | Enter the Group ID to which you add the contact. You can choose to add this contact to a pre-defined group. Within FireText, click Contacts > Edit on your chosen group. The API ID is set here for your group within the Advanced Options section. |
| Sub-Account ID | Select a sub-account ID for the contact. Add the contact to a specified sub-account.Sub-account is set to UK numbers as default.Contact hello@firetext.co.uk if you need to switch to International numbers. |
| Custom Field (1 - 3) | Add any custom field for the contact. For example, Address. |
Messages
Watch Message Sent
Triggers when a message is sent.
| Webhook Name | Enter a name for the webhook. |
See the Connecting to FireText Webhook using Ibexa Connect to add the webhook to your FireText account.
Send a Message
Sends an SMS message from your FireText account.
Message |
Enter the message text you want to send. For GSM, a single message is 160 characters, longer messages are 153 each (2=306,3=459,4=612). Unicode is 70 characters or 66 per part for longer messages. Must be at most 612 characters long. |
From |
Enter the Sender ID that is displayed when the message arrives on the handset. This can be your company name or reply number. This field can only be alpha-numeric. |
To |
Enter the recipient's telephone number. Remove the + sign and any leading zeros when using international codes. A UK number can start 07 or 447. |
Group |
This allows you to easily send a message to a pre-defined group within your FireText.co.uk account. Simply include the API ID specified for the group. Any duplicates or opt-outs will be ignored. |
Sub-Account ID |
Your sub-account ID. Add the contact to a specified sub-account.Sub-account is set to UK numbers as default.Contact |
Template ID |
This allows you to choose a pre-defined template for your message content. |
Schedule |
Enter the date when the message is scheduled to send. See the list of supported date and time formats. |
Expires |
Enter the date on which the message expires. See the list of supported date and time formats. |
Interval |
If you want to specify the messages specifies the repeat interval between messages in days. |
Reference |
If set, you can record a custom ID against the message batch, which will be passed back in the delivery receipt. |
Receipt |
Enter the alternate receipt URL. Instead of using the receipt URL as defined within your FireText.co.uk account, receipts will be sent to this URL. |
Unicode |
Select the message Unicode type:
|
Remove a Scheduled Message
Removes a scheduled message specified by ID.
| Message ID | Enter the Message-ID whose schedule you want to remove. |
| Sub-Account ID | Your sub-account ID. Add the contact to a specified sub-account.Sub-account is set to UK numbers as default.Contact hello@firetext.co.uk if you need to switch to International numbers. |
Other
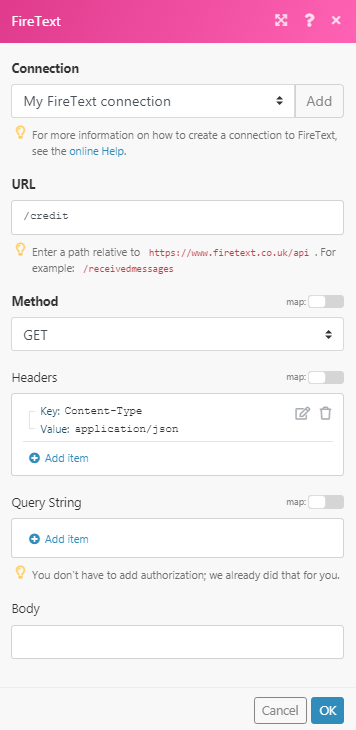
Make an API Call
Performs an arbitrary API call.
URL |
Enter a path relative to For the list of available endpoints, refer to the FireText API Documentation. |
Method |
Select the HTTP method you want to use: GET to retrieve information for an entry. POST to create a new entry. PUT to update/replace an existing entry. PATCH to make a partial entry update. DELETE to delete an entry. |
Headers |
Enter the desired request headers. You don't have to add authorization headers; we already did that for you. |
Query String |
Enter the request query string. |
Body |
Enter the body content for your API call. |
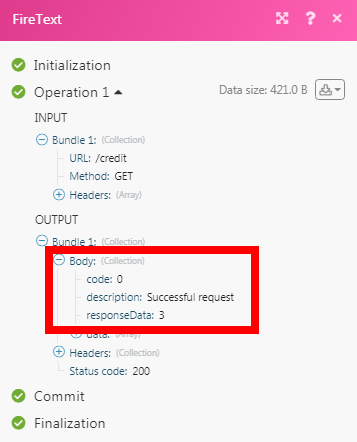
Example of Use - Check Credit
The following API call returns the credit balance from your FireText account:
URL:
/credit
Method:
GET
Matches of the search can be found in the module's Output under Bundle > Body.
In our example, the module returns the credit balance.
Connecting to FireText Webhook using Ibexa Connect
-
Open any Watch module, establish a connection as mentioned in the respective modules, Click Save, and copy the URL address to your clipboard.
-
Log in to your FireText account. Click Settings > API.

-
Based on the messages you want to watch, in the Delivery Receipts, and/or Receiving SMS field(s), enter the webhook URL address you have copied in step 1.
-
Click UPDATE DETAILS.
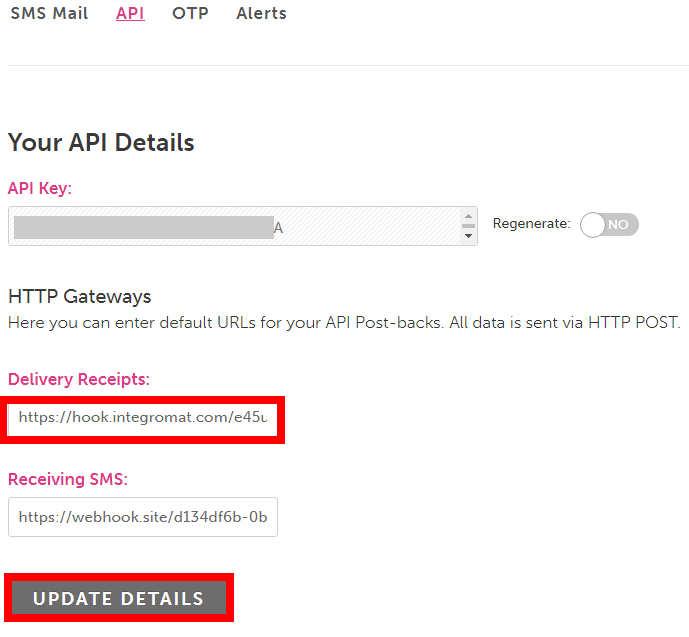
The webhook is added successfully. the URL address to your clipboard.
1 | |
-
Log in to your FireText account. Click Settings > API.
-
Based on the messages you want to watch, in the Delivery Receipts, and/or Receiving SMS field(s), enter the webhook URL address you have copied in step 1.
-
Click UPDATE DETAILS.
The webhook is added successfully.