Work with forms
You can use forms to increase the functionality of the website by adding, for example, a survey, questionnaire, or sign-up form. You can then review the results gathered from website users, for example, to improve user experience.
For more information about building and styling forms, see Developer Documentation.
You can create a form with a visual drag-and-drop editor, the Form Builder.
Create forms
Editors can use the created form anywhere on the website. Forms can be used in page blocks, embedded in the online editor or even used as a field relation. The same form can be placed at multiple locations on the website.
To create a form:
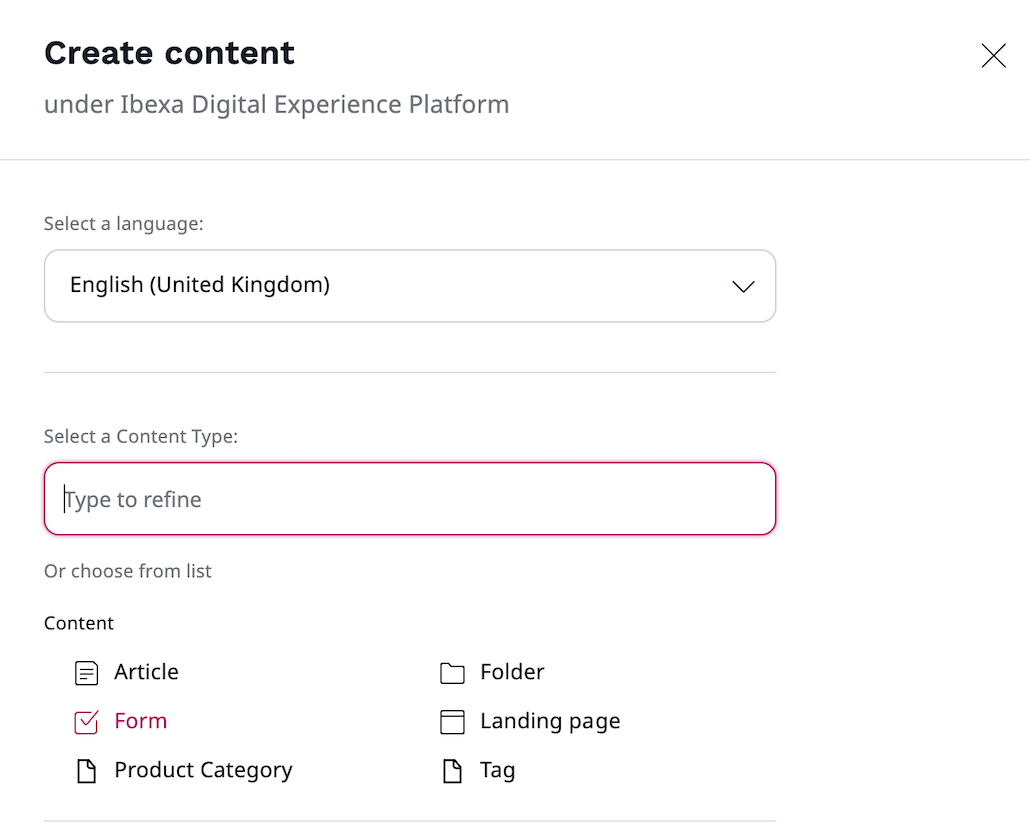
1. In the left panel, go to Content -> Form and click Create content.
2. In a slide-out pane, make initial choices in the following fields, and click Create:
- Select a language - from a drop-down list, select the base language for the content item.
- Select a content type - use this field to narrow down the list of content type choices displayed below. Then select Form, and click the Create button.
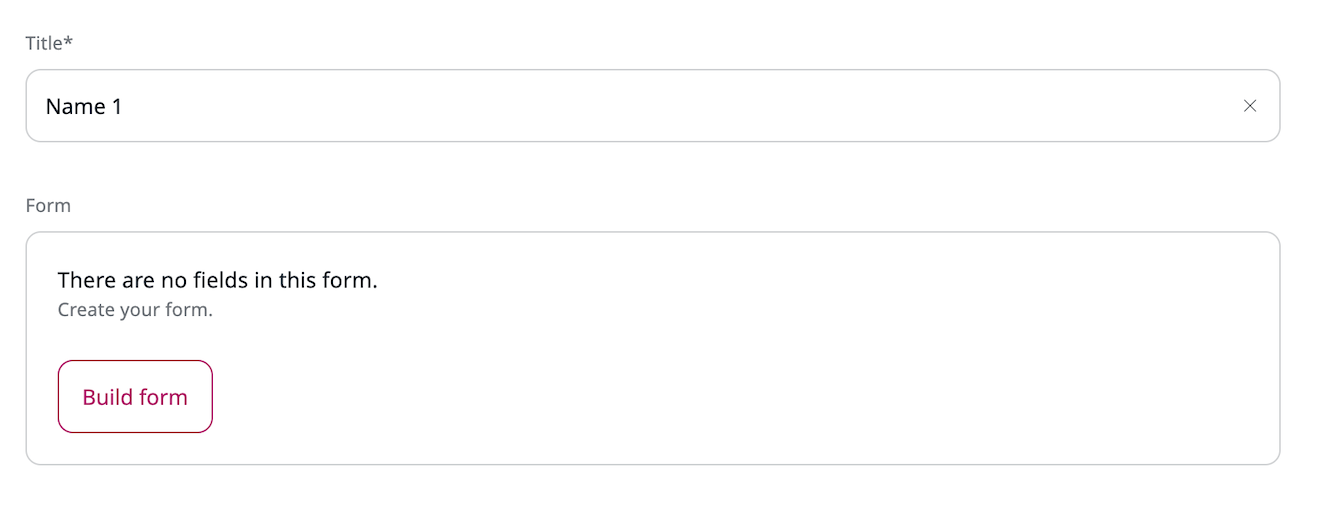
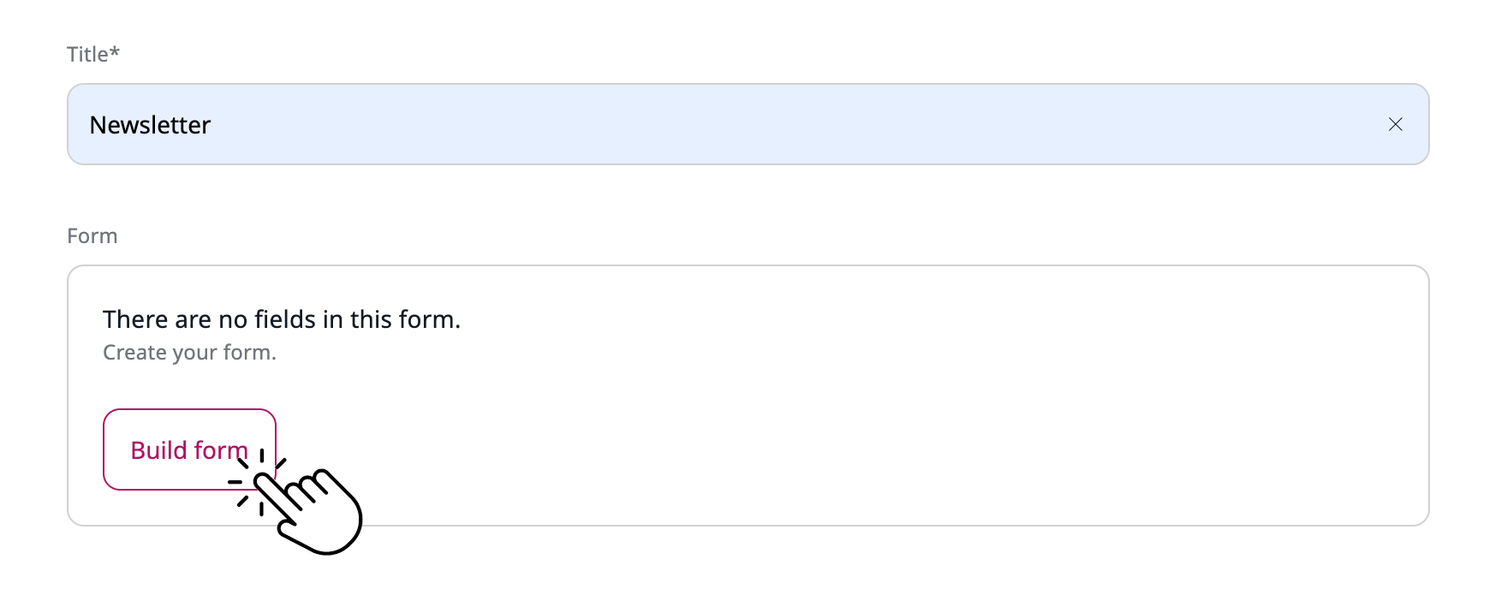
3. Provide the title and click Build form.
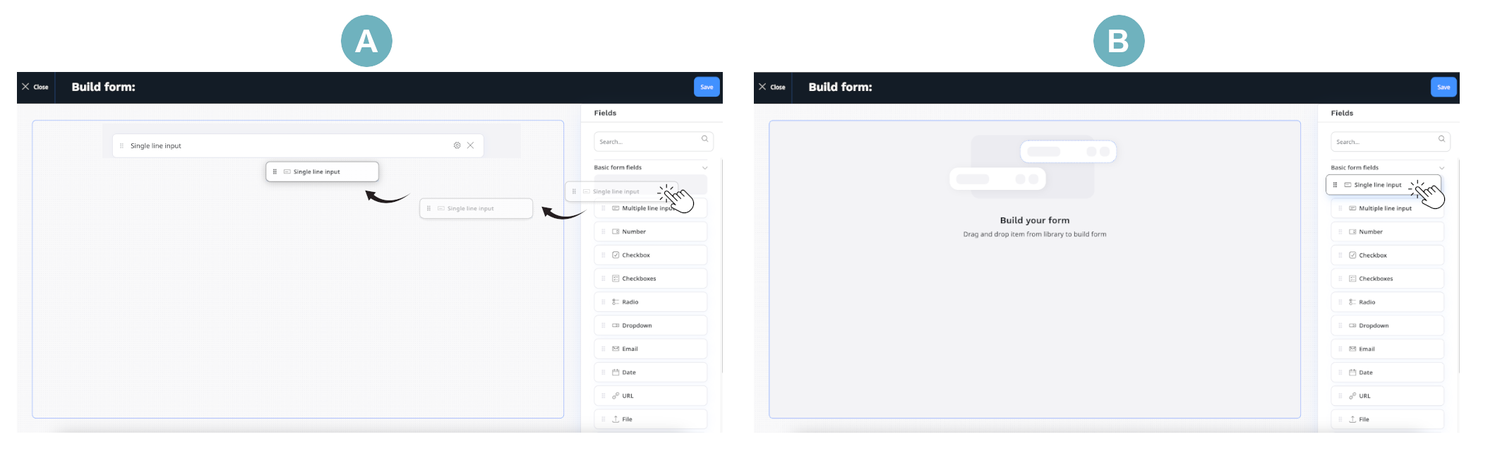
4. Drag (A) or click (B) on the type from the form fields toolbar. To create more complicated and detailed form, you can use more than one form field type.
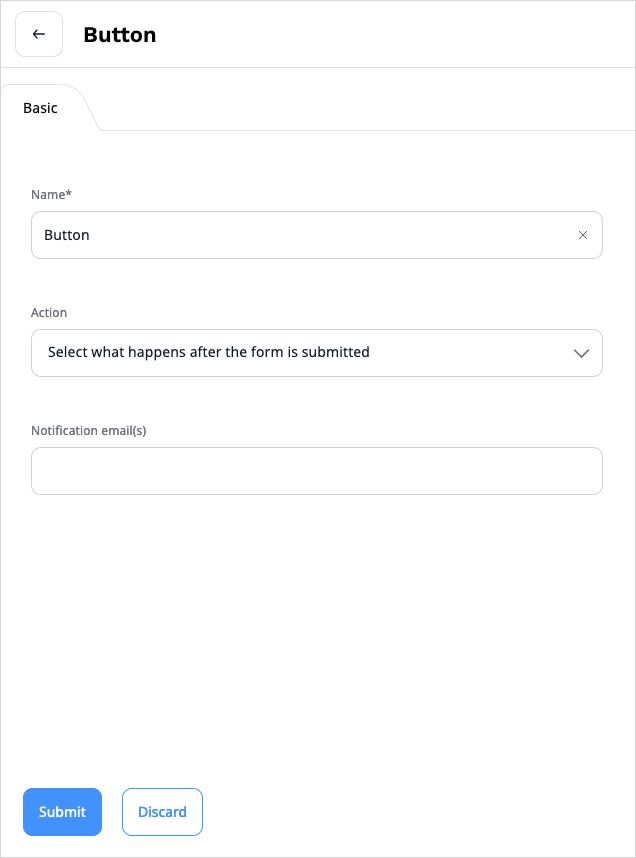
5. Click on the Settings icon to access form field settings. The settings differ depending on the type of field.

Button is a special kind of field. You use it for submitting the form. You can choose one of a few options of what is shown to the user after filling in and submitting the form.
6. Fill in necessary information and click Submit.
7. Click Save or Close to exit the Form Builder.
8. To discard your changes and close the window, click Delete draft.
9. To save your changes:
- Click Save to continue editing.
- Click Save and close to close the window.
10. To send your changes to another editor for review, click Send to review.
11. When the form is ready for publication:
- Click Publish to publish it immediately.
-
Click Publish later to set a specific publication date.
For more information, see Publish content.
View results
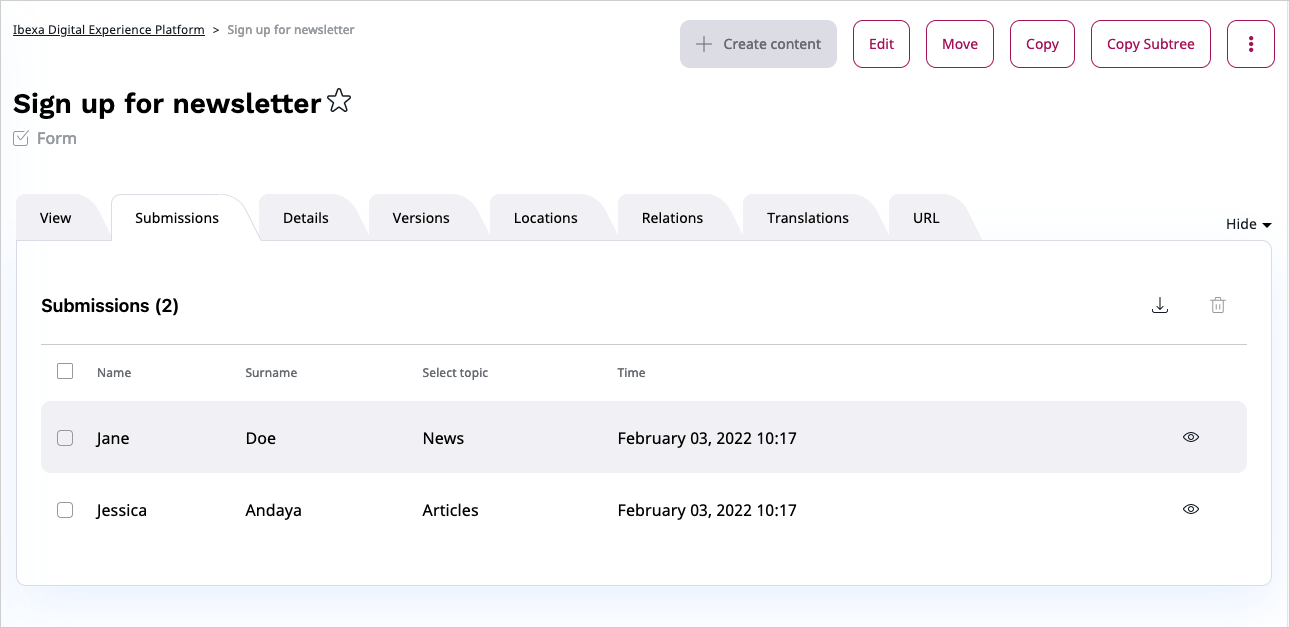
Once you publish a form and users start filling it in, you can preview the results in the Submissions tab in the content item view.
Here you can view the details of each submission. You can also delete any submissions (for example if they were made while testing or contain spam).
Click Download submissions icon to download all the submissions in a .CSV (comma-separated value) file.
Use case - create newsletter
In the following example, you can learn how to create a Newsletter form and use it with Page Builder.
1. Create a new content item in the chosen localization in the content tree and choose Form type.
2. Enter Newsletter as a title and click Build form.
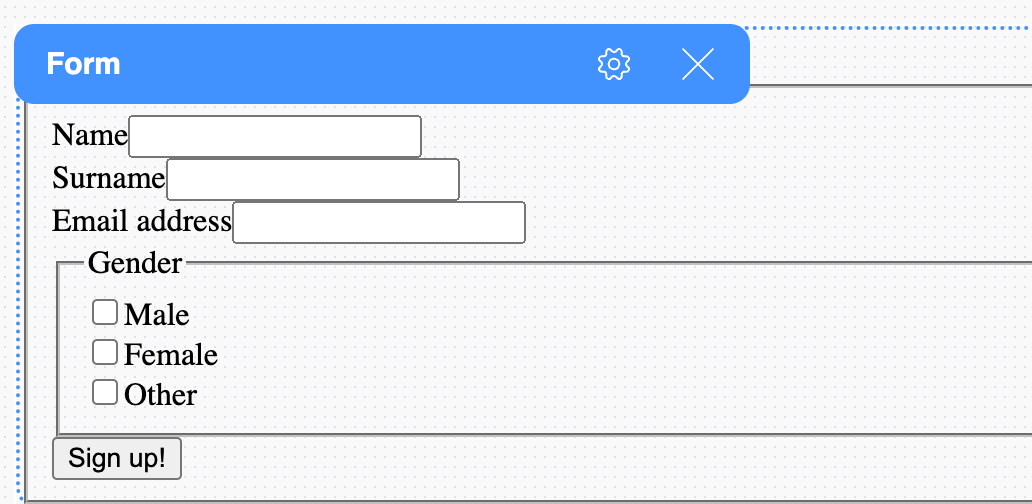
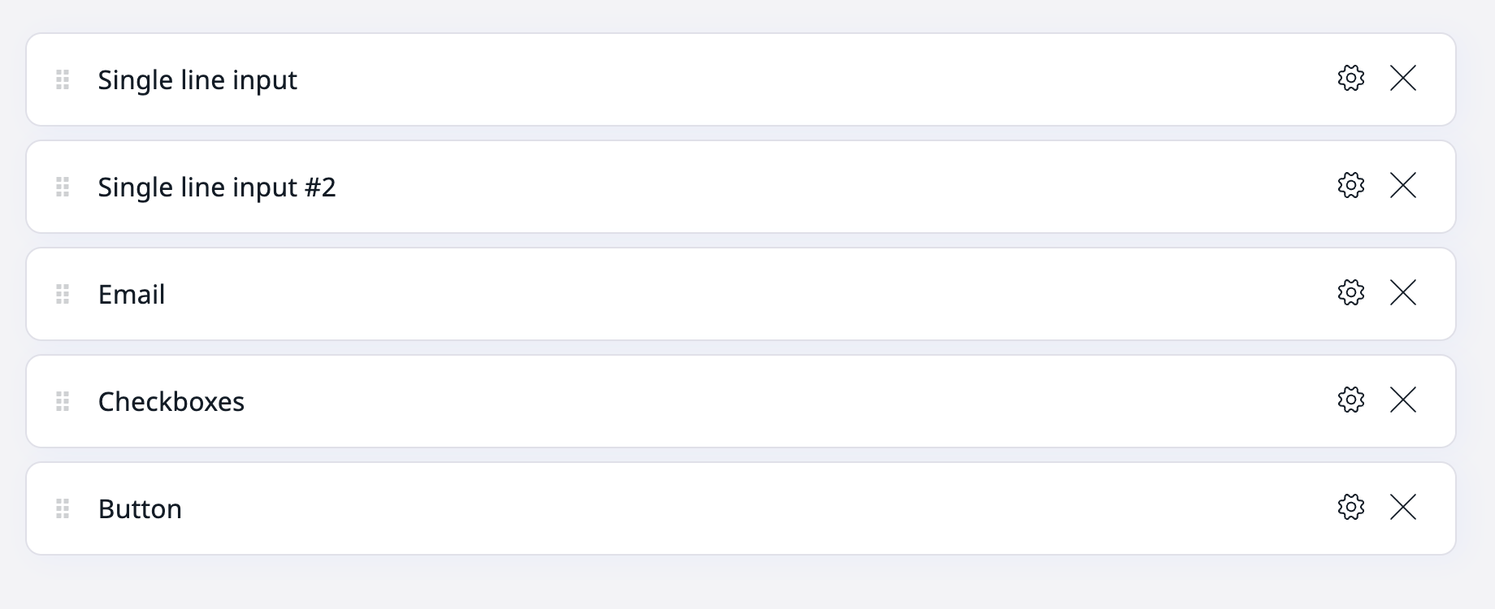
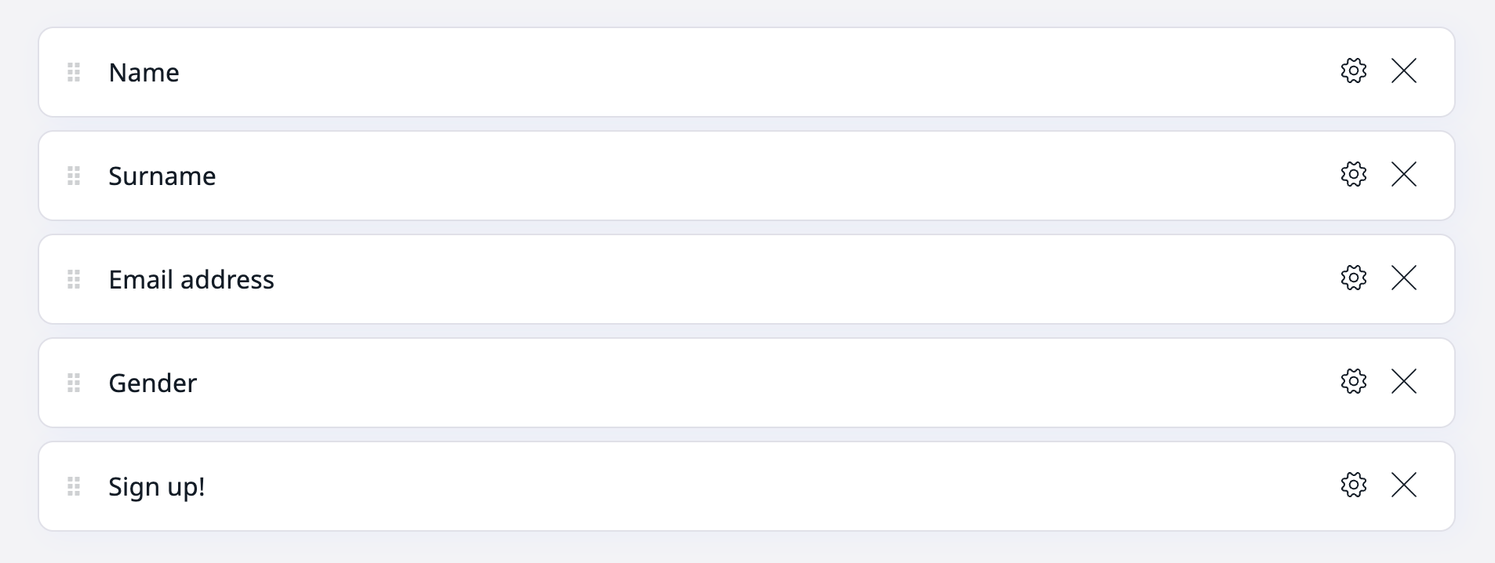
3. From the Basic form fields toolbar choose: Single line input (two times), Email, Checkboxes and Button.
4. Click on Settings icon and modify chosen form fields:
- Single line input: Name: Name
- Single line input #2: Name: Surname
- Email: Name: Email address
- Checkboxes: Name: Gender, Options: click Add button and add three values: Male, Female, Other.
- Button: Name: Sign up!, Action: choose Show a message and in the Message to display field enter: Thank you!
5. Click Save button and then Confirm.
6. Now, you can use a Newsletter form on your page. Open your site with Page Builder and from the Page blocks toolbox choose Form. Drag it and drop on the zone.
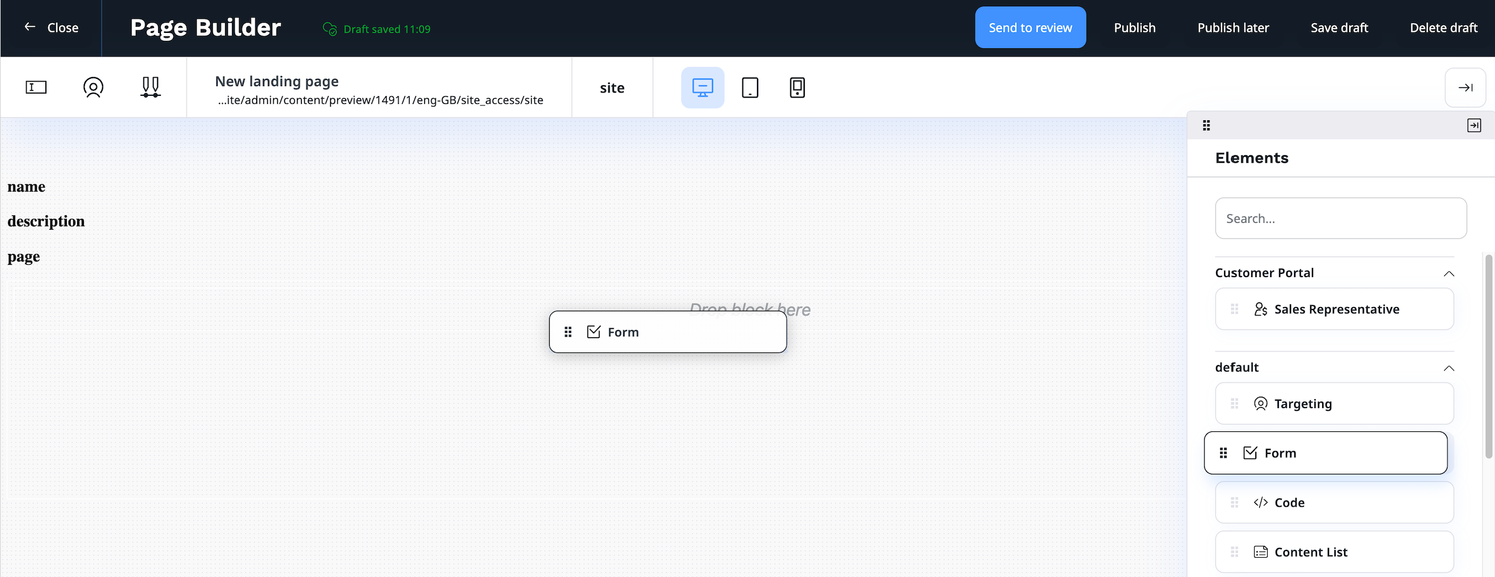
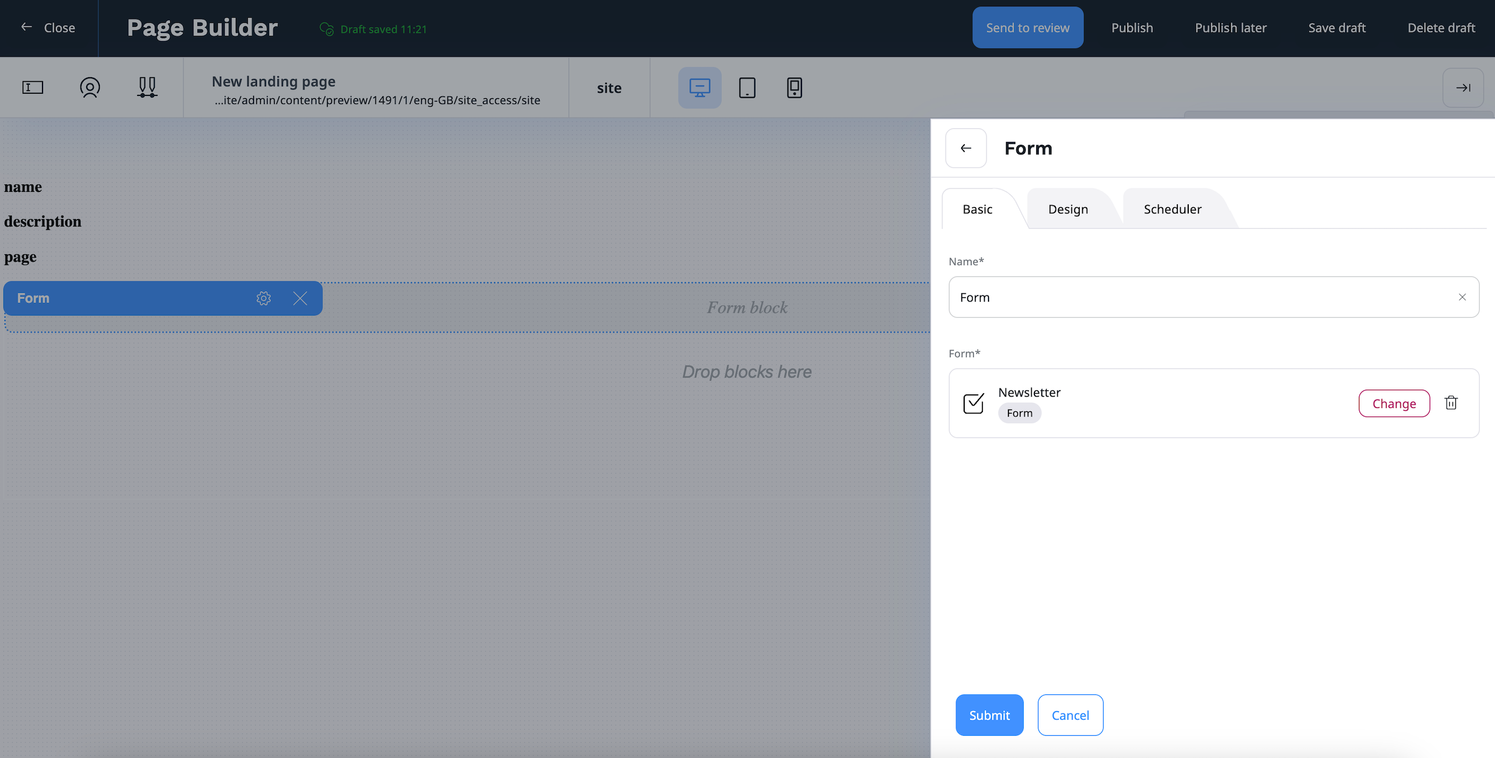
7. Click Block settings icon and then, in the Form window click Select content button. Find your form in the content tree and choose it, then click Confirm and Submit buttons.
8. Now, you can see a Newsletter form on your page.