Get started
Ibexa DXP consists of the technical platform for creating and managing online experiences, designed for developers and end-users alike. It includes a web framework, APIs and a content repository. It features a customizable user interface where you can work with the content, products, media, manage other functionalities, and administer the platform.
Depending on the product edition, Ibexa DXP can provide advanced capabilities in such areas as:
Installation
Only administrators can install Ibexa DXP. They should provide you with the address of the installation.
Access the back office
To access the back office (or the user/editor interface), add /admin to the address provided by the administrator.
For example, if your website's URL is www.my-site.com, you enter the editing interface through www.my-site.com/admin.
If you're the administrator, use the login credentials that were set during the installation process.
Otherwise, to log in, you must get your user credentials from the administrator, and enter them on the login screen.

Onboarding
When you log in to Ibexa DXP for the first time, interactive product tours may appear if the Integrated help LTS update is configured in your installation. This in-app walkthroughs guide you through key features and help you get started quickly.
You can complete each step of the onboarding tutorials, skip them entirely if you prefer to explore on your own, or restart them anytime from your user settings under the Browsing section.
View and edit user profile
If you're an editor, depending on the system configuration, you may be able to view and edit the user profile, which can contain the following information:
- Avatar image
- First and last name
- Department
- Position
- Location
- Signature
- Roles the user is assigned to
- Recent activity
Note
To display the recent activity log, your user role must have the Activity Log / Read permission.

To access your user profile, in the upper-right corner of the screen, click your avatar icon. Then, from the drop-down menu, select Profile.
To edit your user profile, in the User profile screen, in the Summary section, click Edit.
You can now modify the following entries:
- Avatar image
- First and last name
- Signature
- Department
Note
The fields may differ depending on your system configuration.
To edit your avatar, in the Image area, click Upload file or drag and drop your photo. If necessary, you can edit the photo with the Image Editor. After you finish, the avatar is uploaded and is visible in the back office.
![]()
Note
If you don't set your own image, a default avatar with your initials is displayed.
To save changes to the user profile, click Update.
User settings
You can access your user settings on the right side of the top bar:
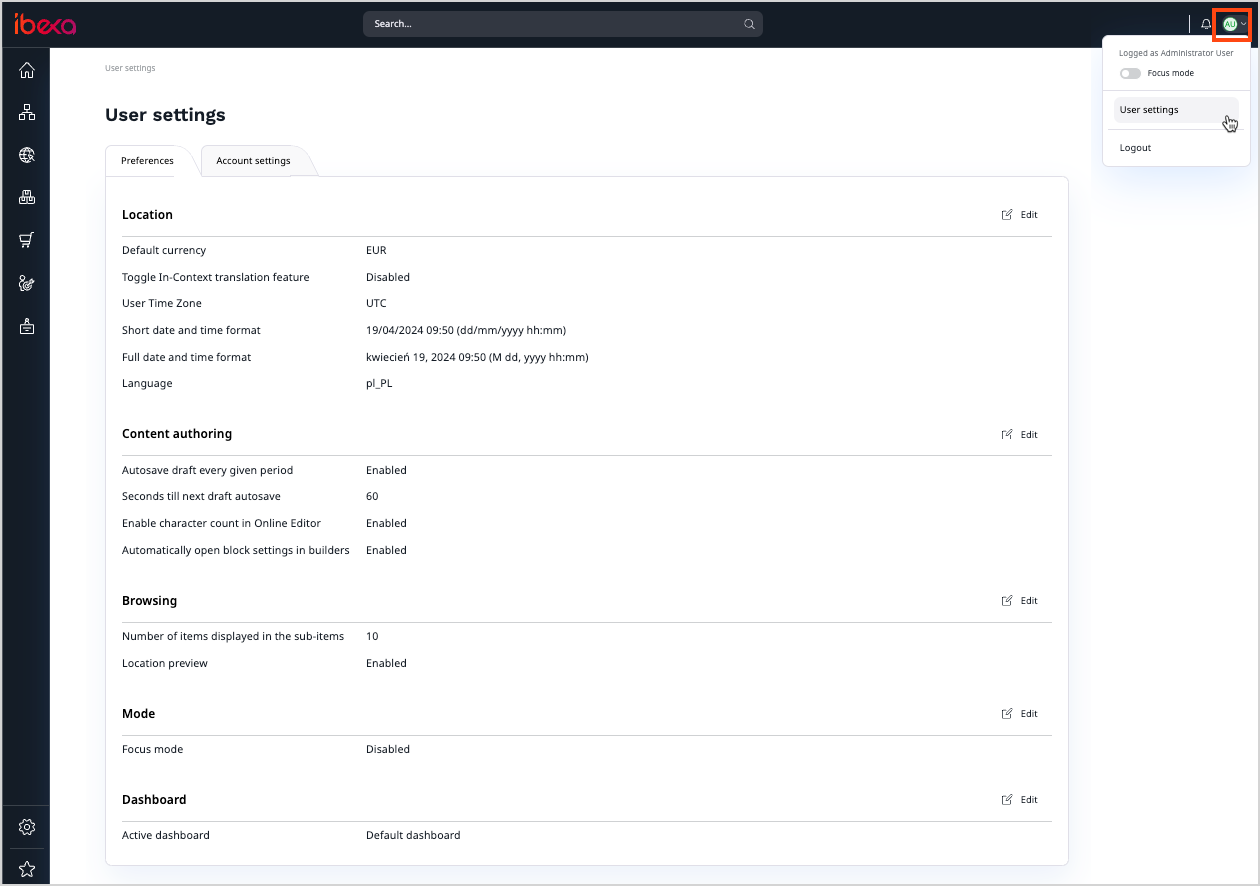
Here you can change your user password and define your user preferences, such as preferred timezone, short and full date, and time format, or back office language.
Location
| Setting | Description |
|---|---|
| Default currency | Sets the default currency used in the back office. |
| Toggle In-Context translation feature | Enables or disables integration with Crowdin to navigate the interface while translating. |
| User Time Zone | Sets time zone in the back office. |
| Short date and time format | Sets short date and time format used in the back office. |
| Full date and time format | Sets full date and time format used in the back office. |
| Language | Sets the default language used in the back office. |
Content authoring
| Setting | Description |
|---|---|
| Autosave draft every given period | Enables or disables autosaving drafts. |
| Seconds till next draft autosave | Sets time period for next autosave. |
| Enable character count in online editor | Enables or disables character count. |
| Automatically open block settings in builders | Enables or disables the behavior of blocks used in builders. |
Browsing
| Setting | Description |
|---|---|
| Number of items displayed in the table | Sets the number of items displayed in sub-items. |
| Location preview | Enables or disables a thumbnail preview on the content tree. |
| Help center | Enables or disables the help center. |
| Product tour | Enables or disables the product tour onboarding walkthroughs. |
| Product tour scenarios settings | Separate setting for each available product tour scenario. Allows you to mark each scenario as completed or reset its progress. |
Mode
| Setting | Description |
|---|---|
| Focus mode | Enables or disables the focus mode. |
Dashboard
| Setting | Description |
|---|---|
| Active dashboard | Sets which dashboard is displayed after you log in. |
Change the password
You can change your user password at any time. To do it, first, access your user profile, and go to Account settings tab. Then, click Change password.

Fill in all the required fields and click Save and close to save changes. Click Discard to reject your changes and return to the previous screen.
