First steps
This page lists first steps you can take after installing Ibexa DXP. These steps are the most common actions you may need to take in a new installation.
Beginner tutorial
To go through a full tutorial that leads from a clean installation to creating a full site, see Beginner tutorial.
Remove welcome page
To remove the welcome page and get a completely clean installation to start your project with, remove the following files and folders from your installation:
- Delete the file
config/packages/ibexa_welcome_page.yaml - Delete the
templates/themes/standard/full/welcome_page.html.twigfile - Delete the
assets/scssfolder - Delete all
translations/ibexa_platform_welcome_page.*files - In
webpack.config.jsremove theEncore.addEntrysection and uncomment the last line, so that the end of the file looks like this:
1 2 3 4 | |
Add a content type
1. In your browser, go to the back office: <your_domain>/admin, and use the default credentials to log in: admin/publish.
Password change
Make sure that you change the default password before you switch your installation from development to production. For more information about passwords, see Passwords. For more information about production security, see Security checklist.
2. In the upper-right corner, click the avatar icon and in the drop-down menu disable the Focus mode.
3. Select content and go to content types.
4. Enter the content group and create a new content type.
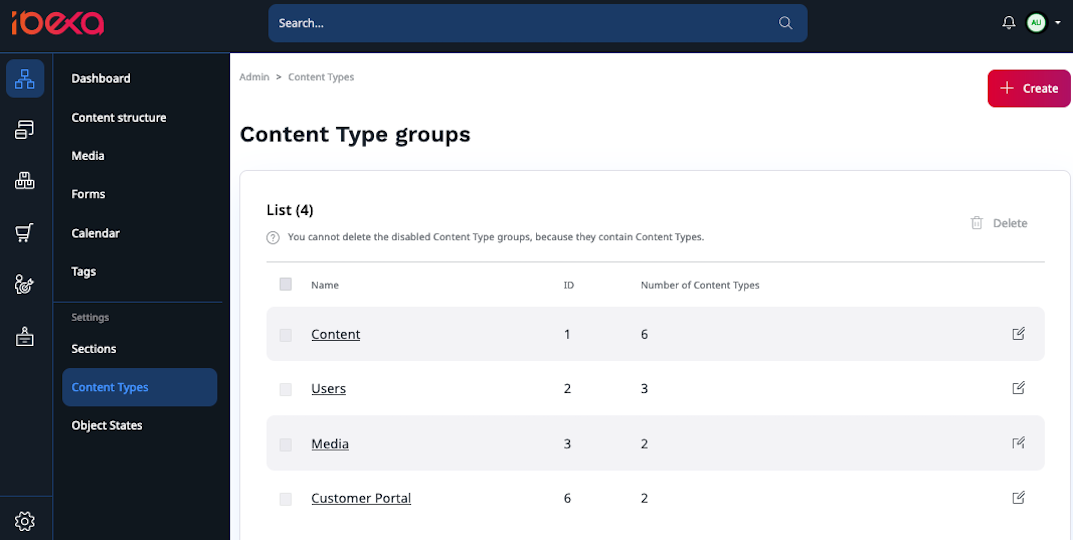
5. Input the content type's name, for example "Blog Post", and identifier: blog_post.
6. Below, add a field definition of the type Text Line. Name it "Title" and give it identifier title.
7. Add another field definition: Text (type Rich text) with identifier text.
8. Save the content type.
For more information, see Content model.
Create Twig templates and match then with view config
To display content in the front page you need to define content views and templates.
Content views decide which templates and controllers are used to display content.
1. In config/packages/ibexa.yaml, under ibexa.system add the following block (pay attention to indentation: site_group should be one level below system):
1 2 3 4 5 6 7 | |
Content view templates use the Twig templating engine.
2. Create a template file templates/full/blog_post.html.twig:
1 2 | |
For more information, see Templates and Twig documentation.
Create content and test view templates
1. Go to the back office, select Content -> Content structure, and create a new content item by clicking Create content.

2. Select a Blog Post content type. Fill in the content item and publish it.
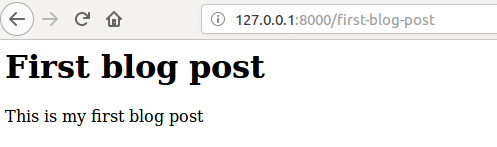
3. To preview the new content item on the front page, go to <yourdomain>/<Content-item-name>.
For example, if the title of the Blog post is "First blog post", the address is <yourdomain>/first-blog-post.
Add SiteAccesses
You can use SiteAccesses to serve different versions of the website.
SiteAccesses are used depending on matching rules.
They're set up in YAML configuration under the ibexa.siteaccess.list key.
1. In config/packages/ibexa.yaml add a new SiteAccess called de for the German version of the website:
1 2 3 4 5 6 | |
The SiteAccess is automatically matched based on the last part of the URI.
2. You can now access the front page through the new SiteAccess: <yourdomain>/de.
Log in
At this point you need to log in to preview the new SiteAccess, because an anonymous visitor doesn't have permissions to view it. See section about permissions below.
For now the new SiteAccess doesn't differ from the main site.
For more information, see Multisite and SiteAccess matchers.
Add a language and translate Content
One of the most common use cases for SiteAccesses is having different language versions of a site.
1. To set up the de SiteAccess to use a different language, add its configuration under ibexa.system, below site.languages:
1 2 3 4 5 6 | |
This means that German is used as the main language for this SiteAccess, and English as a fallback.
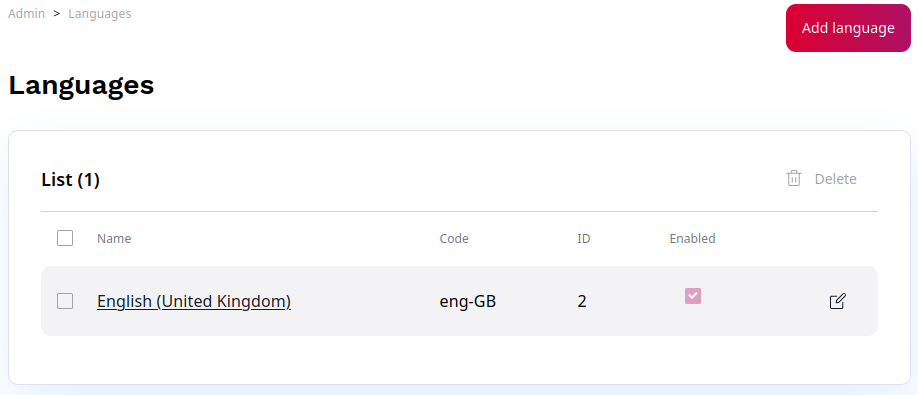
2. Go to the back office and select Admin > Languages. Add a new language called "German", with the language code ger-DE.
Make sure it's enabled.
3. Next, go to the Content structure and open the blog post you had created earlier. Switch to the Translations tab and add a new translation.
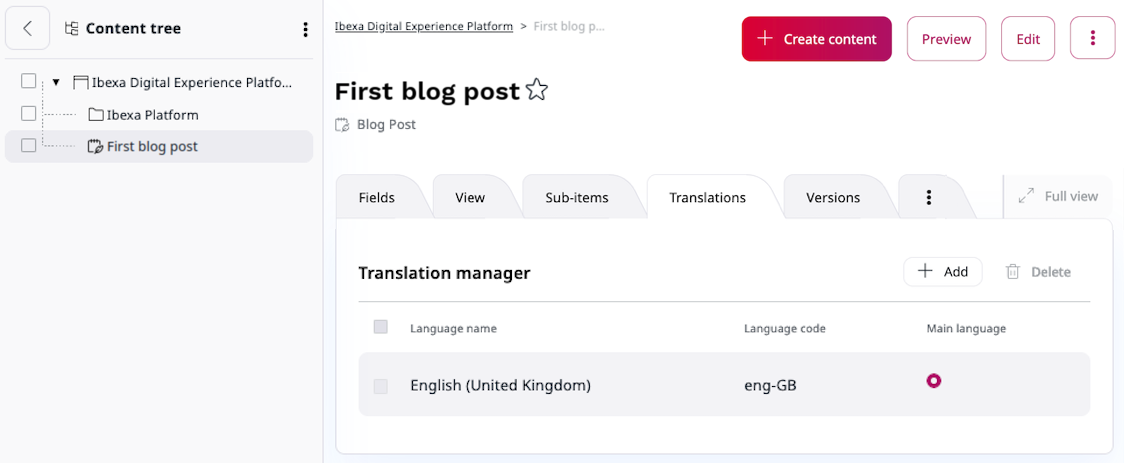
4. Select German and base the new translation on the English version. Edit the content item and publish it.
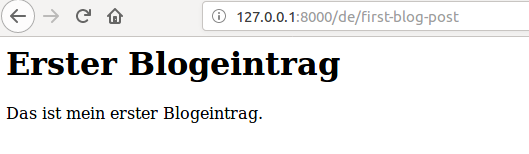
5. Go to the front page.
The blog post now displays different content, depending on which SiteAccess you enter it from:
<yourdomain>/<content-name> or <yourdomain>/de/<content-name>.
For more information, see Languages and Set up translation SiteAccess.
Add a design
The design engine enables you to use different themes consisting of templates and assets. Each theme is stored in a separate folder and assigned to a SiteAccess.
To create a new theme:
1. Add the following configuration at the bottom of config/packages/ibexa.yaml (at the same level as ibexa):
1 2 3 4 | |
2. In configuration of the de SiteAccess (under ibexa.system.de) add: design: de_design
3. Under site, add design: site_design
4. Go back to the content_view configuration for the blog post.
Change the path to the template so that it points to the folder for the correct design: template: '@ibexadesign\full\blog_post.html.twig'
This means that the app looks for the blog_post.html.twig file in a folder relevant for the SiteAccess: de_design for the de SiteAccess, or site_design for other SiteAccesses in site_group.
5. Create a themes folder under templates, and two folders under it: de_design and site_design.
6. Move the existing full\blog_post.html.twig file under site_design.
7. Copy it also under de_design.
Modify the second one in any way (for example, add some html), so you can preview the effect.
8. To see the difference between the different themes, compare what is displayed at <yourdomain>/<content-name> and <yourdomain>/de/<content-name>
Set up permissions
To allow a group of users to edit only a specific content type (in this example, blog posts), you need to set up permissions for them.
Users and user groups are assigned roles. A role can contain a number of policies, which are rules that permit the user to perform a specific function. Policies can be additionally restricted by limitations.
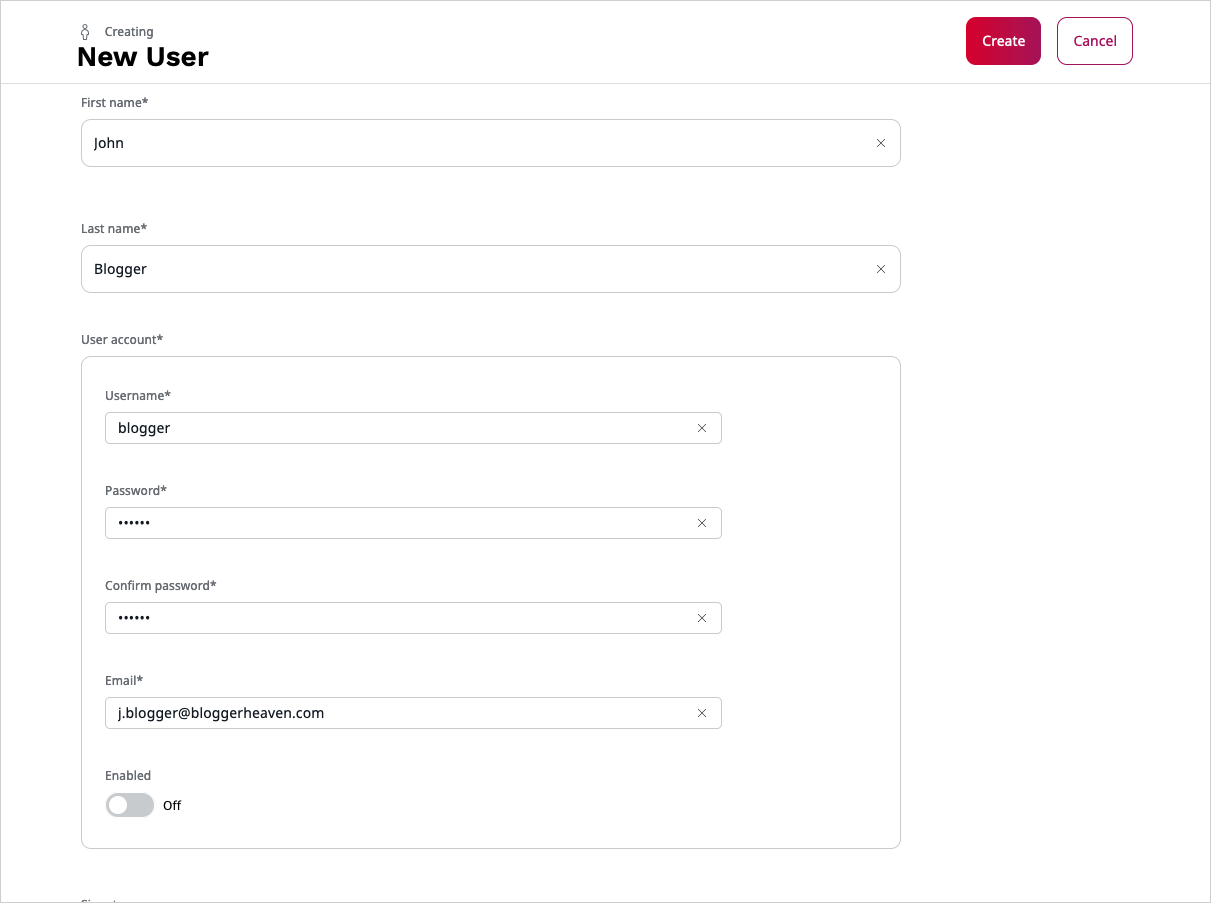
1. Go to Admin -> Users. Create a new user group (the same way you create regular content). Call the group "Bloggers".
2. In the new group create a user. Remember their username and password. Mark the user as "Enabled".
3. Go to Admin -> Roles. Create a new role called "Blogger".
4. Add policies that allow the user to log in:
User/LoginContent/ReadContent/VersionreadSection/ViewContent/Reverserelatedlist
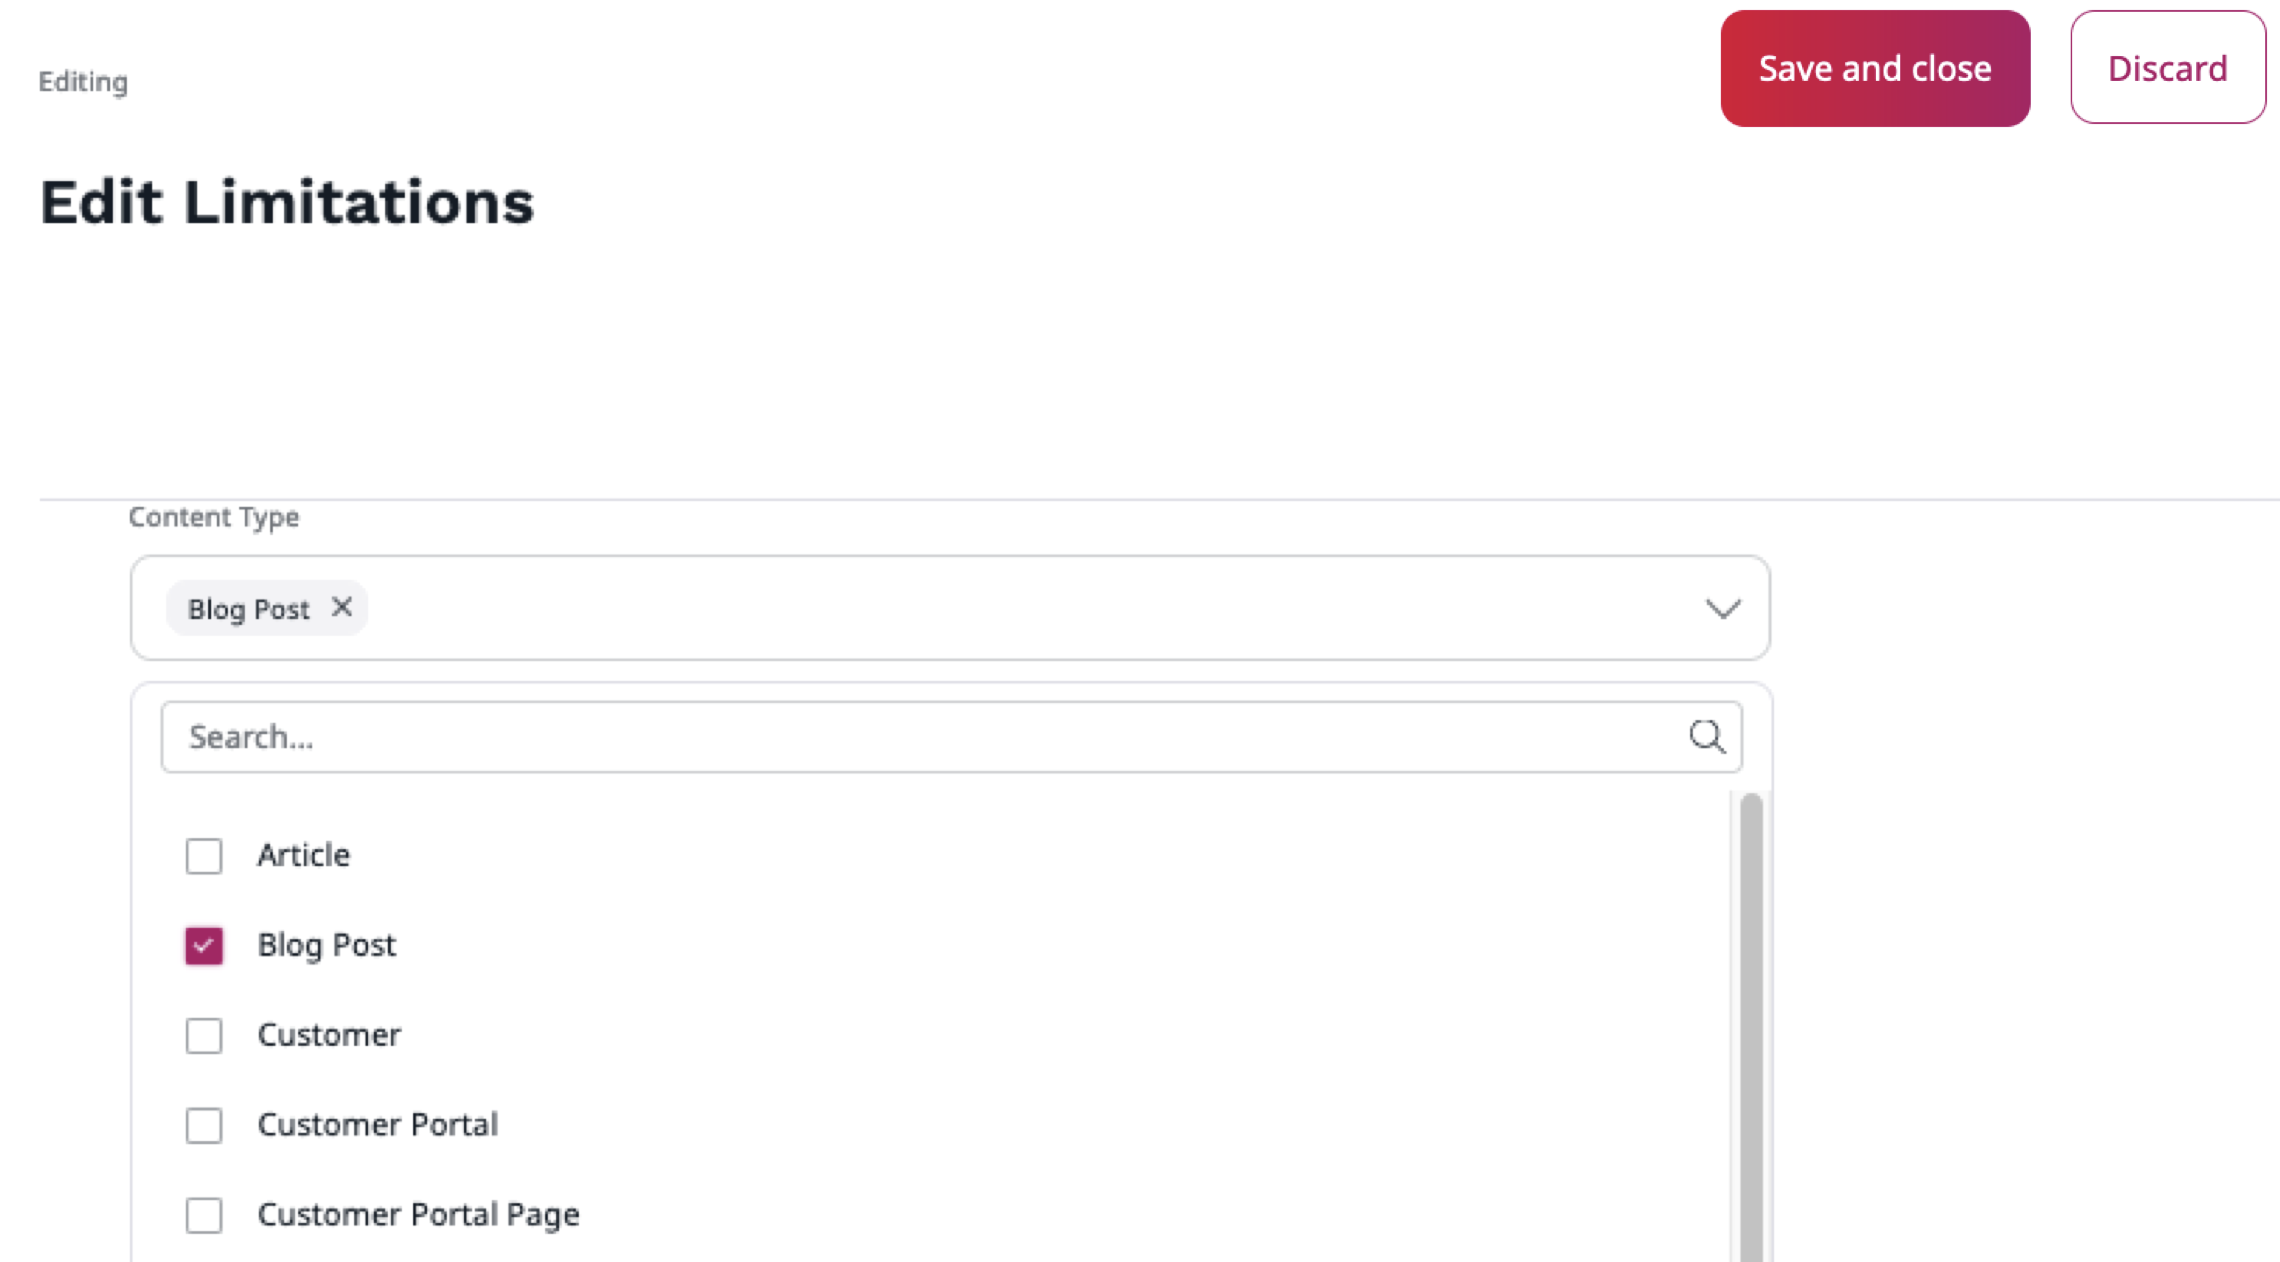
5. Now add policies that allow the user to create and publish content, limited to Blog Posts:
Content/Createwith limitation for content type Blog PostContent/Editwith limitation for content type Blog PostContent/Publishwith limitation for content type Blog Post
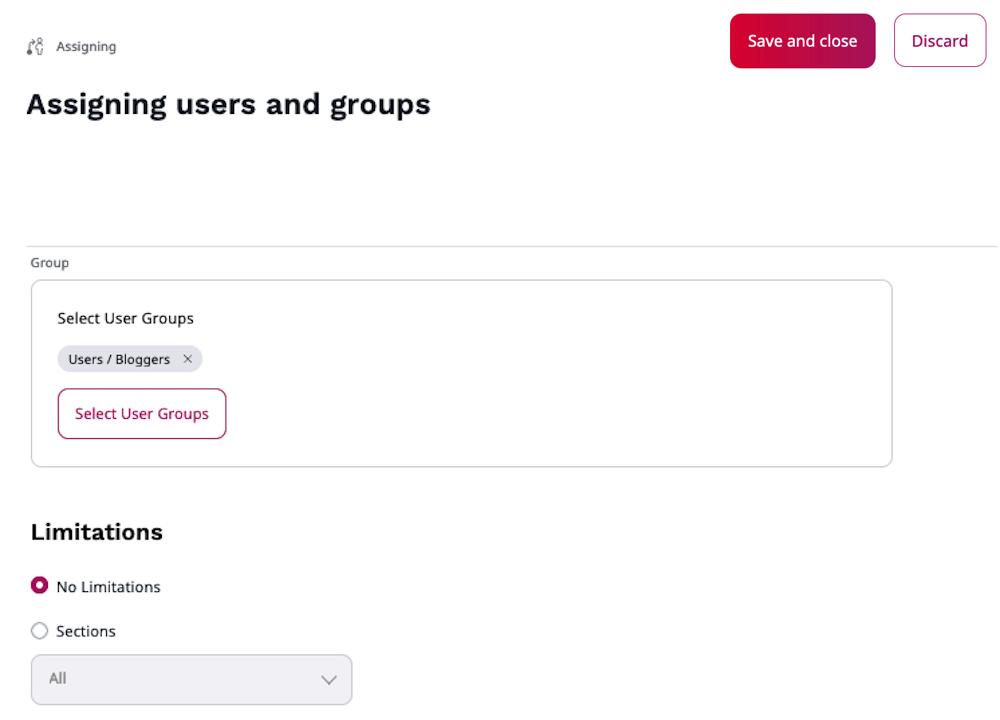
6. In the Assignments tab assign the "Blogger" role to the "Bloggers" group.
You can now log out and log in again as the new user. You're able to create Blog Posts only.
For more information, see Permissions.