Step 1 — Get a starter website
Tip
You can find all files used and modified in this step on GitHub.
To set up the starter website, you need to follow these steps:
Get a clean eZ Enterprise installation
To begin the tutorial, you need a clean installation of eZ Platform Enterprise Edition.
Get it by following the Install eZ Platform and Install eZ Enterprise guides.
Create Content Types
Log in to the Back Office – add /admin to your installation's address (<yourdomain>/admin) and log in using admin as the login and publish as the password. In Admin go to Content types tab and (under the Content category) create two Content Types with the following settings:
Dog Breed
- Name: Dog Breed
- Identifier:
dog_breed - Fields:
| Field Type | Name | Identifier | Required | Searchable | Translatable |
|---|---|---|---|---|---|
| Text line | Name | name |
yes | yes | yes |
| Text line | Short Description | short_description |
yes | yes | yes |
| Image | Photo | photo |
yes | no | no |
| RichText | Full Description | description |
yes | yes | yes |
Tip
- Name: Tip
- Identifier:
tip - Fields:
| Field Type | Name | Identifier | Required | Searchable | Translatable |
|---|---|---|---|---|---|
| Text line | Title | title |
yes | yes | yes |
| Text block | Body | body |
no | no | yes |
Modify existing Article Content Type
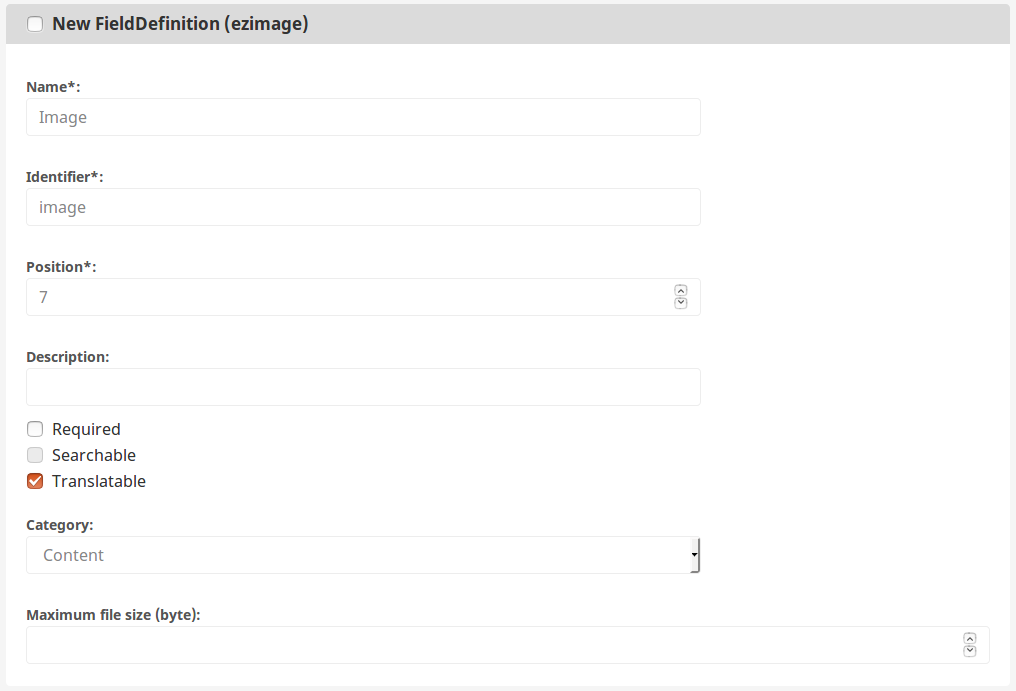
You also need to modify the built-in Article Content Type. It will make inserting photos into articles easier. Edit it to remove the Image Field that has a Content Relation (ezobjectrelation) type, and create a new Field in its place:
| Field Type | Name | Identifier | Required | Searchable | Translatable |
|---|---|---|---|---|---|
| Image | Image | image |
yes | no | yes |

Alternative text requirement
It is recommended that you require an alternative text for the image. To do this, select the "Alternative text is required" checkbox.
Add template, configuration and style files
Tip
For an introduction on how to use templates in eZ Platform, take a look at the Building a Bicycle Route Tracker in eZ Platform tutorial
Place the pagelayout.html.twig and pagelayout_menu.html.twig files in app/Resources/views folder. Create a new folder, called full, under views. Place further template files in it:
Place two configuration files in app/config folder:
Modify the config.yml file located in app/config folder and add the following lines at the end of the imports block:
1 2 | |
In web/assets folder create:
- a
csssubfolder and add this stylesheet file to it:style.css - an
imagessubfolder and add theheader.jpgfile to it
In src/AppBundle folder create a QueryType subfolder and add LocationChildrenQueryType.php to it. This file allows your folders to display all content that they contain (read up on it in the documentation).
Finally, add the following files to src/AppBundle, to create dynamic links in the top menu:
Controller/MenuController.phpDependencyInjection/AppExtension.phpQueryType/MenuQueryType.phpResources/config/services.yml
All the files you've placed in src/AppBundle are not the scope of this tutorial and we won't go here into detail on how they work.
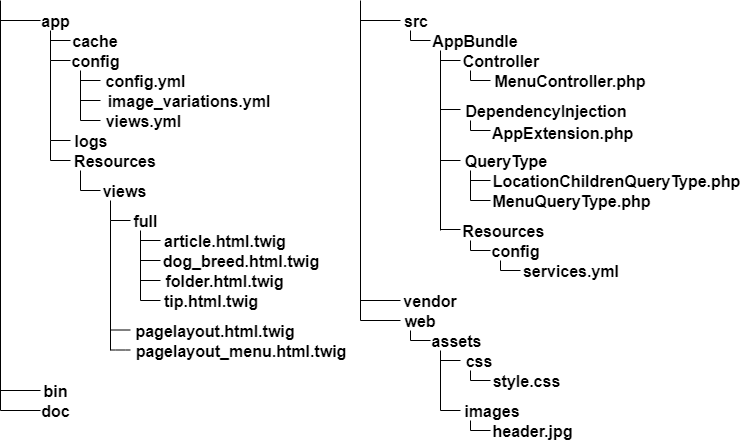
This is what the structure of the new and modified files should look like (excluding pre-existing files):

Create content
Now return to the Back Office and create some content for your website.
First, make three Folders under the Content/Content structure tab. Call them 'All Articles', 'Dog Breed Catalog' and 'All Tips'. Remember that you save and close them by using the 'Publish' button.
Next, create a few Content items of proper Content Types in each of these folders:
- 4 Articles (at least, to best see the effects of the Content Scheduler block that you will create in step 3.)
- 3 Dog Breeds
- 3 Tips
Finally, remove the "eZ Platform" folder. You will not need it for this tutorial.
Add images
When you need an image, you can use one from this image pack. This will let you compare effects of your work to screenshots in the tutorial.
At this point you are ready to proceed with the next step.