Step 1 — Get a starter website
To set up the starter website, you need to follow these steps:
Get a clean Ibexa DXP installation
To begin the tutorial, you need a clean installation of Ibexa Experience.
Get it by following the Install Ibexa DXP guide.
Add content types
Log in to the Back Office – add /admin to your installation's address (<yourdomain>/admin) and log in using admin as the login and publish as the password. Disable the Focus mode, go to content types screen and (under the Content category) add two content types with the following settings:
Dog Breed
- Name: Dog Breed
- Identifier:
dog_breed - Fields:
| Field Type | Name | Identifier | Required | Searchable | Translatable |
|---|---|---|---|---|---|
| Text line | Name | name |
yes | yes | yes |
| Text line | Short Description | short_description |
yes | yes | yes |
| Image Asset | Photo | photo |
yes | no | no |
| RichText | Full Description | description |
yes | yes | yes |
Tip
- Name: Tip
- Identifier:
tip - Fields:
| Field Type | Name | Identifier | Required | Searchable | Translatable |
|---|---|---|---|---|---|
| Text line | Title | title |
yes | yes | yes |
| Text block | Body | body |
no | no | yes |
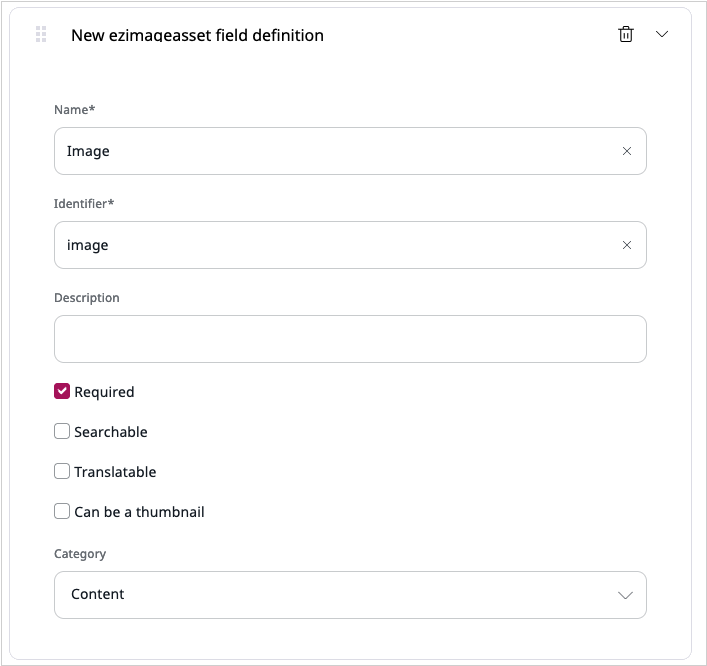
Modify existing Article content type
You also need to modify the built-in Article content type. It will make inserting photos into articles easier. Edit it to remove the Image Field that has a Content Relation (ezobjectrelation) type, and create a new Field in its place:
| Field Type | Name | Identifier | Required | Searchable | Translatable |
|---|---|---|---|---|---|
| Image Asset | Image | image |
yes | no | no |
Add template, configuration and style files
Tip
For an introduction on how to use templates in Ibexa DXP, take a look at the Beginner tutorial.
First, to remove the welcome page, go to config/packages/ and delete the ibexa_welcome_page.yaml file.
Place the pagelayout.html.twig and pagelayout_menu.html.twig files in the templates folder. Create a new folder, called full, in templates. Place further template files in it:
Place two configuration files in the config/packages folder:
In the assets folder in the project root:
- create a
cssfolder and add the following stylesheet:style.cssto it - add the
header.jpgfile to theassets/imagesfolder
In the webpack.config.js file in the project root folder, add the following line after Encore.addEntry('app', './assets/app.js');:
1 | |
Next, in the terminal run the commands:
1 2 | |
Tip
Compiling assets with Webpack Encore is explained in the beginner tutorial.
In the src folder create a QueryType subfolder and add QueryType/MenuQueryType.php to it.
This file takes care of displaying the top menu (read up on it in the documentation). It is not the scope of this tutorial and we won't go here into detail on how it works.
This is what the structure of the new and modified files should look like:

Create content
Now return to the Back Office and create some content for your website.
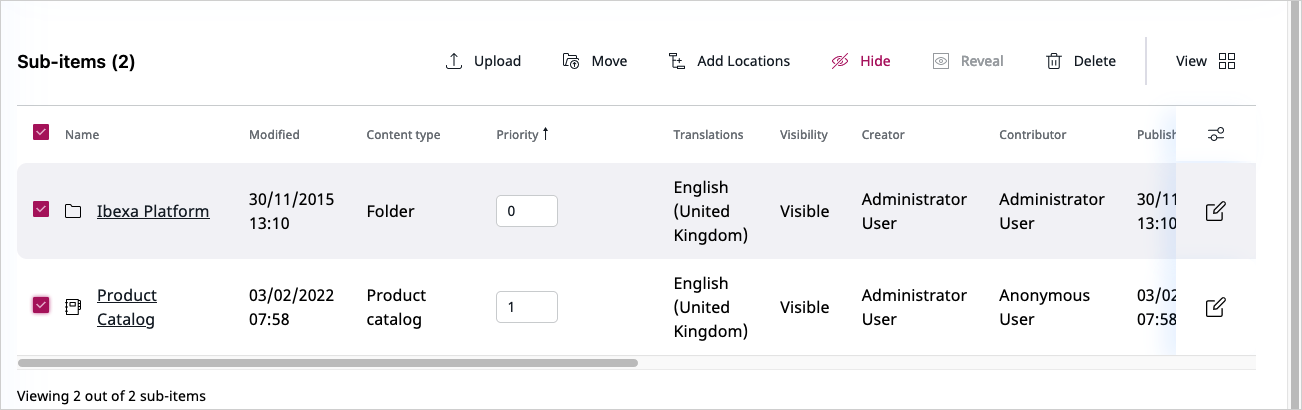
First, you can hide unneeded content items from the project root.
Go to Content structure and select "Ibexa Digital Experience Platform". In the Sub-items tab, select all the current sub-items and click the Hide icon:
Next, under "Ibexa Digital Experience Platform", create three Folders. Call them 'All Articles', 'Dog Breed Catalog' and 'All Tips'. Remember that you can Save and close them, but you should use the Publish button.
Next, create a few content items of proper content types in each of these folders:
- 4 Articles (at least, to best see the effects of the Content Scheduler block that you will create in step 3.)
- 3 Dog Breeds
- 3 Tips
Add images
When you need an image, you can use one from this image pack. This will let you compare effects of your work to screenshots in the tutorial.
At this point you are ready to proceed with the next step.